


Phone 425-775-8461 • www.audiocontrol.com
®
19
Setup Menus
This section of the manual discusses how to navigate the set-up menus of
your Concert AVR-4 home theater receiver. As you have probably deter-
mined by now, if you have the read the rest of this manual, the Concert
AVR-4 is an incredibly flexible and sophisticated processor that you can
literally “personalize” for use with your performance theater system. While
the set-up menus incorporate a number of default settings that we deter-
mined will work well with many theater systems, you will want to take the
time to go through each of these set-up screens and make the appropriate
adjustments to the settings. Once you have made the changes, you will not
have to change these again unless you make equipment or usage settings to
your system.
To get started and view these set-up menus it is very important that you
have one of the video outputs (Component, HDMI, composite, or S-Video)
of your Concert AVR-4 connected to your video display device (i.e. projec-
tor, flat panel, TV). This is absolutely necessary to see the set-up menus.
In the event you need to reset the output resolution and frame rate to the
factory settings, it is simply a matter of pressing and holding the
“SELECT” button for three seconds.
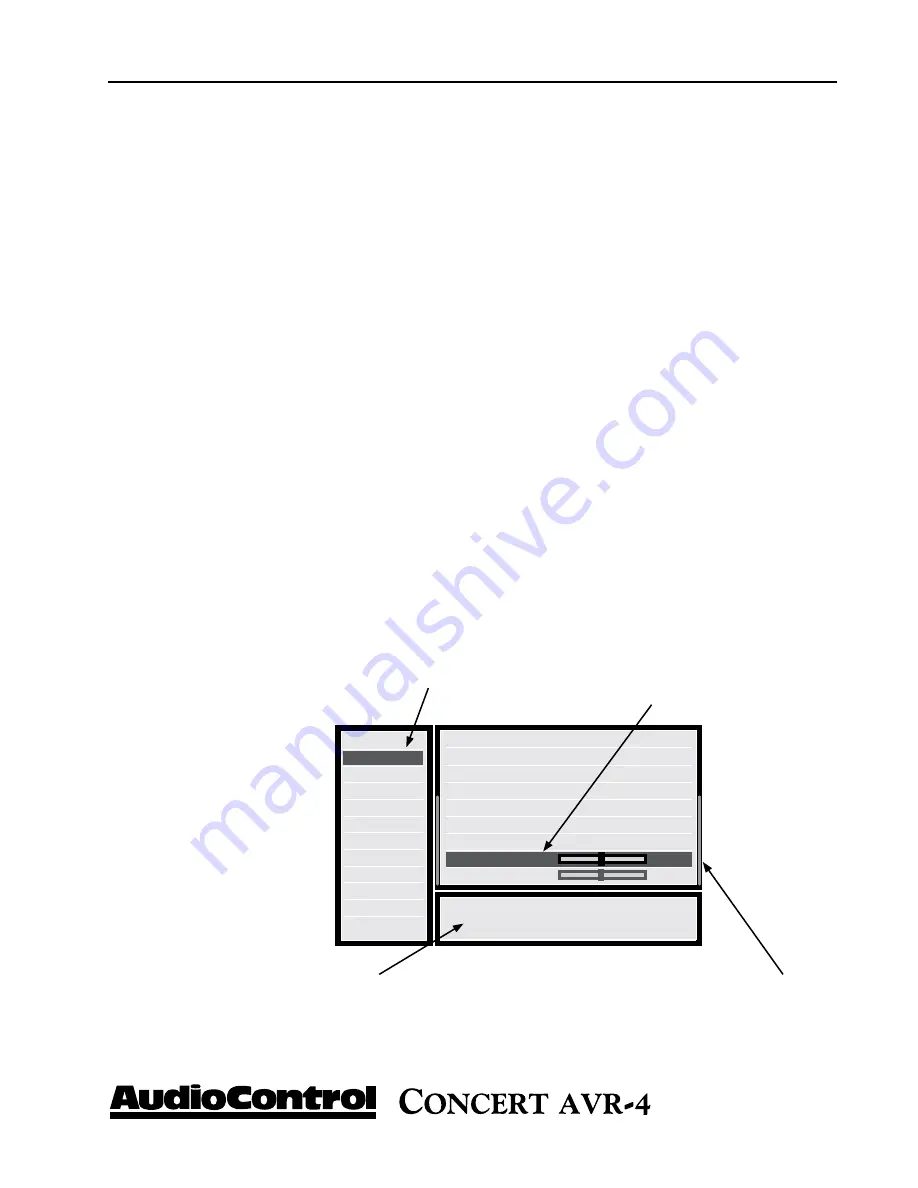
Input Confi g
General Setup
Auto Setup
Spkr Types
Spkr Distance
Spkr Levels
Video Inputs
Video Outputs
Mode
Zone Settings
Network
Adjust to compensate for an off-centre listening
position.
Source Input
:DVD
Incoming Format
:Dolby digital
Incoming Sample Rate :45KHz Out : 48KHz
Incoming bitrate
:192kbps
Dialnorm
: -31dB
Video input
:DVD
AudioCompression
:Off
Balance
0dB
Bass
0dB
Menu Panel -
The left-hand panel
lists the setup screens available for
adjustment. The selected menu is
highlighted with a dark green band.
Adjustment Panel -
The upper right-hand
panel lists the parameters you can change as
a user. The selected line is highlighted with
a dark green band. Lines that cannot be
selected are greyed-out.
Help Screen -
The lower
right-hand panel gives a
short help text for the fea-
ture being adjusted.
Scroll Bars -
These indicate
the position of the displayed
screen within longer menus.
INSTALL TIP
*
n
avIgatIng
tHe
s
et
-u
p
M
enus