

8 Double-click the downloaded file to extract
and launch the driver setup program.
9 Follow the on-screen instructions to complete
the driver installation.
Mac OS X
1 Power on your system and log in as the
administrator or a user with proper
administrative privileges
2 Go to
https://www.attotech.com/downloads/
3 Register or log in if previously registered.
4 Click on
Ethernet Adapters
in the left dialog.
5 Navigate to your HBA model/family in the
right dialog and click on it.
6 Scroll down to and click the desired driver
depending on the operating system.
7 A download window appears. Choose
Save
File
.
8 Launch the installer package.
9 Follow the on-screen instructions.
Linux
Note
These steps assume a basic knowledge of Linux
terminal commands. You must also have the correct
kernel source files for the appropriate kernel already
installed.
1 Power on your system and log in as the
administrator or a user with proper
administrative privileges
2 Go to
https://www.attotech.com/downloads/
3 Register or log in if previously registered.
4 Click on
Ethernet Adapters
in the left dialog.
5 Navigate to your HBA model/family in the
right dialog and click on it.
6 Scroll down to and click the desired driver
depending on the operating system.
7 A download window appears. Choose
Save
File
.
8 After the download has completed, open the
FastFrame volume on the desktop.
9 Open the
Linux
folder.
10 Open the
Drivers
folder.
11 Copy the .tgz file to a temporary folder.
12 Open a terminal window and change to the
location of the copied tgz.
13 Extract the file using the command
tar -xfz
<filename.tgz>.
14 Change to the directory created above then
run the installer script
./install.sh
.
FreeBSD
Note
These steps assume a basic knowledge of FreeBSD
terminal commands. You must also have the correct
kernal source files for the appropriate kernel already
installed.These steps also assume the user has a
GUI and internet browser installed, or an external
machine which can download the driver and transfer
it to the appropriate machine running a supported
version of FreeBSD.
1 Power on your system and log in as the
administrator or a user with proper
administrative privileges
2 Go to
https://www.attotech.com/downloads/
3 Register or log in if previously registered.
4 Click on
Ethernet Adapters
in the left dialog.
5 Navigate to your HBA model/family in the
right dialog and click on it.
6 Scroll down to and click the desired driver
depending on the operating system.
7 A download window appears. Choose
Save
File
.
8 After the download has completed, open the
FastFrame volume on the desktop.
9 Open the
FreeBSD
folder.
10 Open the
Drivers
folder.
11 Copy the .tgz file to a temporary folder.
12 Open a terminal window and change to the
location of the copied tgz.
13 Extract the file using the command
tar -xfz
<filename.tgz>.
14 Change to the directory created above then
run the installer script
./install.sh
.
4 Hardware Installation
Note
If you are replacing an existing adapter with a new
adapter, you must re-install the driver.
Insert a PCI Express Adapter in the Server
1 Turn off the server and unplug the power
cord, then remove the server's cover.
CAUTION
CAUTION
Turn off and unplug the server before removing the
server's cover. Failure to do so could endanger you and
may damage the adapter or server.
2 Remove the cover bracket from a PCIe 3.0
slot. PCI-Express slots and adapters vary in
the number of connectors present,
depending on the data lanes being
supported.
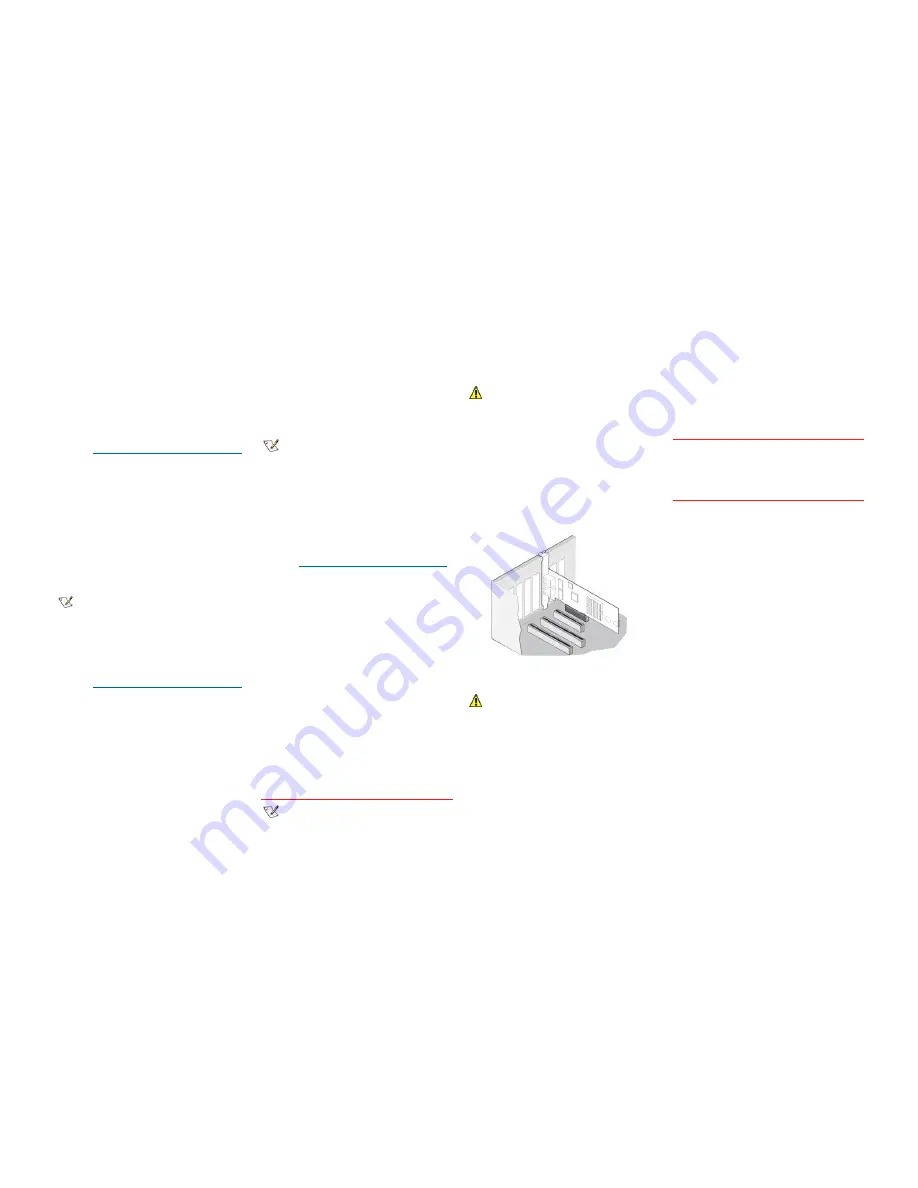
3 Insert the adapter in an available, compatible
PCI Express slot. Push the adapter into the
slot until the adapter is firmly seated. The
adapter can be installed in a x8 or x16
mechanical PCIe slot.
CAUTION
CAUTION
Some PCI-Express adapters may have a short connector,
making them more fragile than PCI adapters. Excessive
force could break the connector. Use caution when
pressing the board in the slot.
4 Repeat steps 2 through 3 for each adapter
you want to install.
5 Replace the server cover and plug in the
power cord.
6 Turn the power on.
Insert QSFP modules
1 If utilizing QSFP modules, please insert into
specificed ports. If using QSFP integrated
cables, wait until Step 5 is complete.
Connect a 40Gb Ethernet Adapter cable
5 Configure Network Settings
To configure your network settings, consult your
System Administrator or System
Documentation.
6 Configure your Adapter
Default settings are appropriate for most
systems, but you may change the default
settings using the Device Manager in Windows
or the ethtool in Linux.


