


19
HOW TO PERFORM A NUC
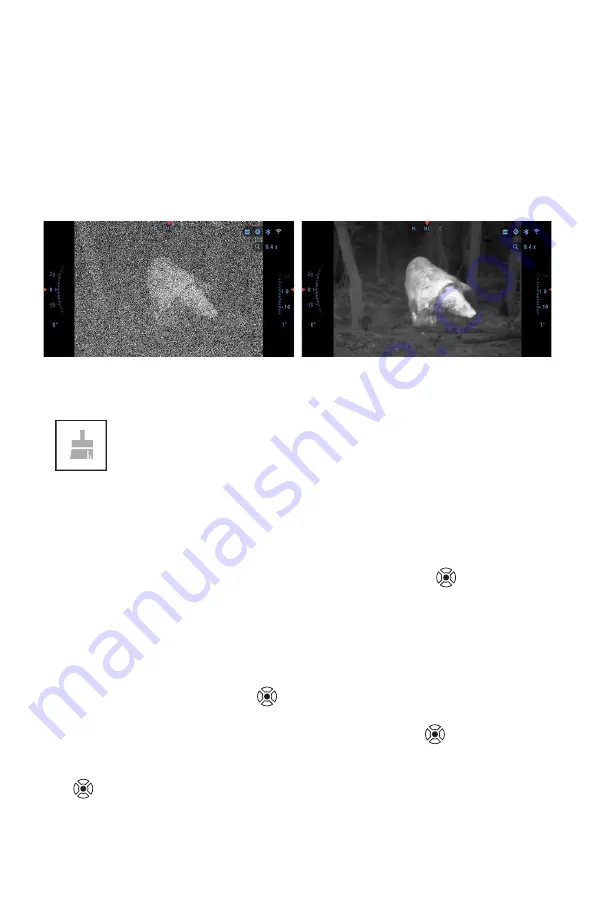
NUC’ing helps to improve the image quality when the image is degraded
by various environmental factors. There are multiple NUC tables that span
the full operating temperature range, and the camera automatically selects
the optimum table based on its temperature.
You can set the system to perform a NUC automatically at a predefined
time interval. Or, you can turn the automatic NUC off and NUC the system
manually, when required. Also, you can use the NUC shortcut from the Home
Screen by pressing the Power button, provided that you activated this short-
cut in the system settings.
Example:
Change of temperature, continuous viewing of a particular warm
object, and movement from one environment to another all may cause image
degradation.
To clean up the image you will need to select NUC from the
Shortcut Carousel after you select to NUC the system. The mon-
ocular will perform the required calibration improving the visual
quality of the image.
PIXEL CORRECTION PROCEDURE
Pixel Correction Procedure is intended to correct “neutral” pixels that are
visible in the FOV, but are not responding to the changing environment or
scenery. They may be white or black and remain static and or nonresponsive.
1. Enter the Shortcut Carousel by pressing the OK button
.
2. Select System Settings.
3. Select Thermal Category.
4. Select Pixel Correction Subcategory.
5. Select Manual Correction.
6. You should see a targeting reticle, use the key pad and Scroll Wheel to
move the reticle over the neutral pixel. If it is hard to target the neutral
pixel, press the OK button
and select Zoom. Use the Scroll Wheel
to zoom in and out, on to the neutral pixel in order to isolate it. Once you
have isolated the neutral pixel, press the OK button
to escape from
the zoom function.
7. Once the reticle is positioned over the neutral pixel, press the OK button
and select Save. This should correct the pixel.
NOTE
If after you have done the procedure outlined above and the neutral
pixel has not been corrected. Try the process on a pixel directly adjacent
to the neutral pixel in order to make a uniformed correction in the FOV.


