background image

www.atlona.com | toll free: 

1-877-536-3976

For International: 1-

408-962-0515

5

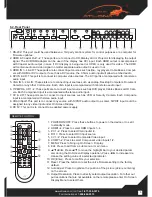
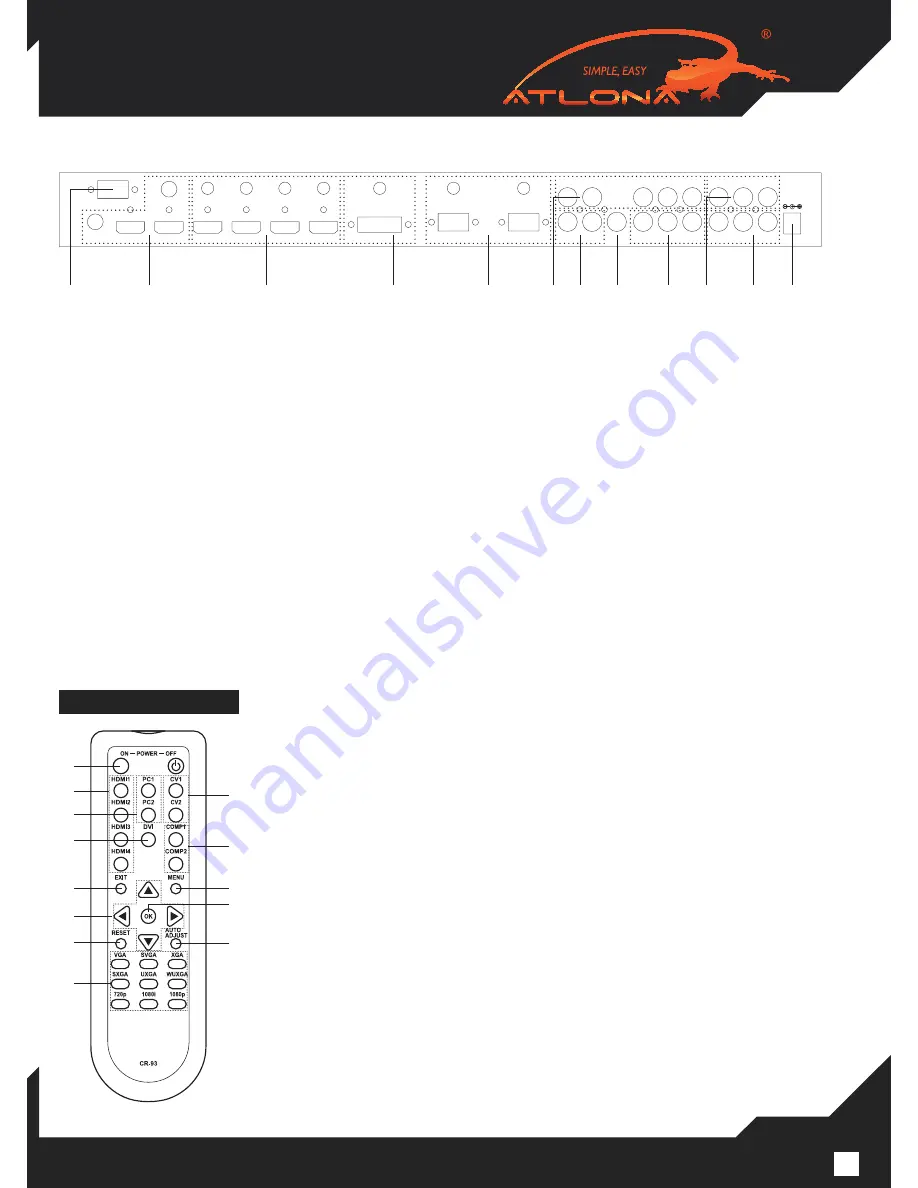
6.2. Rear Panel

1. RS-232: This port could be used between a 3rd party control system for control purposes or a computer for  

  firmware updates.

2. HDMI & Coaxial Out 1~2: These ports are to connect to HD Display and or Projector for displaying the output  

  signal. The DVI/HDMI adapter can be used if the display has DVI input. Each HDMI output is accompanied  

  with Coaxial audio output in case if DVI display is being used or HDMI is only used for video. The HDMI  

  will contain audio and video signal no matter separate audio output is used or not. 

3. HDMI IN 1~4 & L/R: These ports are to connect input sources such as Blu-  ray players, Cable Boxes, Comput- 

  ers with HDMI or DVI outputs. If user has a DVI source, the 3.5mm audio input will allow to embed audio

4. DVI IN & L/R: This port is to connect to computer video sources. The DVI port is accompanied with mini stereo  

  audio input.

5. VGA IN 1~2 & L/R: These slots are to connect input sources such as Laptop, Desktop Computers, Document  

  Camera or any other VGA source. Each VGA input is accompanied with mini stereo audio input.

6. Y/PB/PR & L/R 1~2: These ports are to connect input sources such as DVD player, Cables Boxes or HD Cam- 

  era. Each Component input is accompanied with stereo audio input.

7. CV & L/R: These ports are to connect to input sources such as VCR or Security Camera. Each Composite  

  input is accompanied with stereo audio input.

8. COAX/Spdif: This port is to connect any source with S/PDIF audio output to a scaler. S/PDIF input could be  

  assigned to any video input under On Screen Didplay.

9. DC 5V: This port is to connect to a supplied power supply.

 REMOTE CONTROL

  1. POWER ON/OFF: Press these buttons to power on the device or to set it  


to standby mode.

  2. HDMI1~4: Press to select HDMI inputs 1~4.

  3. PC 1~2: Press to select VGA inputs1/2.

  4. DVI 1: Press to select DVI input source.

  5. CV 1~2: Press to select Composite Video input.

  6. COMP1~2: Press to select Component video inputs 1/2.

  7. MENU: Press to bring up On Screen   Display.

  8. Exit: Press to exit from a sub menu or main menu.

  9. ▲/▼/◄/►: Press ▲/▼ to move the highlight bar to your desired param 


eter during the On Screen Display operation. Press ◄/► to increase/ de 


crease the setting value of a selected parameter.

10. OK (Enter): Press to confirm your selection.

11. Reset: Press the button to reset the unit’s firmware setting to the factory  


default.

12. Auto Adjust: Press to optimize the position of the picture (picture centering)  


on the screen.

13. Output Resolution: Press to directly select output resolution. For other out 


put resolutions that are not available on the remote please enter On Screen


Display Menu to select them.

DC 5V

CV1

CV2

R

R

L

L

R

L

COAX

Cr/Pr Cb/Pb Y/HD2

Cr/Pr Cb/Pb Y/HD1

R

L

VGA 1

VGA 2

L/R

L/R

L/R

L/R

L/R

L/R

L/R

DVI1

HDMI 4

HDMI 3

HDMI 2

HDMI 1

HDMI OUT

HDMI OUT

COAX OUT

COAX

OUT

RS-232


Summary of Contents for AT-LINE-PRO5

Page 1: ...www atlona com toll free 1 877 536 3976 For International 1 408 962 0515 User Manual AtlonA 11 Inputs Professional Video Presentation Switcher Scaler with Dual HDMI Output AT LINE PRO5 ...

Page 2: ...Contents 3 4 Features 3 5 Specification 4 6 Operation Controls and Functions 4 6 1 Front Panel 4 6 2 Rear Panel 5 7 Remote Control 5 8 On Screen Display 6 9 RS232 Protocols 7 9 1 Set Command 8 9 2 Status Command 9 9 3 Key Command 9 10 Connection and Installation 11 11 Safety Information 12 12 Warranty 13 13 Atlona Product Registration 14 ...

Page 3: ...VGA WUXGA or 480p 1080p Audio embedding from any input to HDMI outputs De embedding audio from HDMI outputs to coaxial output to allow video be routed to a projector and audio to an amplifier PAL to NTSC and NTSC to PAL conversion 50 60Hz RS232 commands available for control systems IR Commands are available for using a universal remote or an IR control system Standard 1U size for easy rack mounti...

Page 4: ... and LED Press this button to Turn ON or set the device to standby mode The LED will illumi nate in red when the power is ON 2 IR Receiver This IR window receives IR signal from the supplied IR remote control 3 CV1 2 Press CV1 CV2 s button to select composite video inputs 1 or 2 the LED will illuminate in red 4 COMP1 2 Press COMP1 COMP2 s button to select component inputs 1 or 2 the LED will illum...

Page 5: ...o connect to input sources such as VCR or Security Camera Each Composite input is accompanied with stereo audio input 8 COAX Spdif This port is to connect any source with S PDIF audio output to a scaler S PDIF input could be assigned to any video input under On Screen Didplay 9 DC 5V This port is to connect to a supplied power supply REMOTE CONTROL 1 POWER ON OFF Press these buttons to power on th...

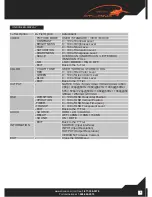
Page 6: ...f Red Color Level GREEN 0 100 of Green Color Level BLUE 0 100 of Blue Color Level EXIT Back to the 1st Tier OUTPUT NATIVE VGA SVGA XGA SXGA UXGA 480i 480p 720p 60Hz 1080i 60Hz 1080p 60Hz 576i 576p 720p 50Hz 1080i 50Hz 1080p 50 WXGA WSXGA WUXGA OSD HPOSITION 0 100 of OSD Horizontal Position VPOSITION 0 100 of OSD Vertical Position TIMER 0 100 of OSD Show Time sec TRANSP 0 100 of OSD Transparent Lev...

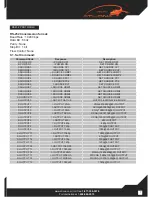
Page 7: ...CE HDMI4 SET SOURCE HDMI4 S OUTPUT 0 OUTPUT NATIVE OUTPUT EDID NATIVE MODE S OUTPUT 1 OUTPUT VGA VGA 640X480 60 OUTPUT S OUTPUT 2 OUTPUT SVGA SVGA 800X600 60 OUTPUT S OUTPUT 3 OUTPUT XGA XGA 1024X768 60 OUTPUT S OUTPUT 4 OUTPUT SXGA SXGA 1280X1024 60 OUTPUT S OUTPUT 5 OUTPUT UXGA UXGA 1600X1200 60 OUTPUT S OUTPUT 6 OUTPUT 480i 480i OUTPUT S OUTPUT 7 OUTPUT 480p 480p OUTPUT S OUTPUT 8 OUTPUT 720p 7...

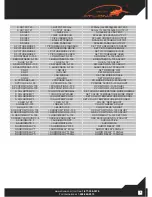
Page 8: ...DDLE S NR 3 NR HIGH SET NR MODE HIGH S PCPHASE 0 63 PCPHASE 0 63 PC MODE PHASE 0 63 ADJUST S PCCLOCK 0 100 PCCLOCK 0 100 PC MODE CLOCK 0 100 ADJUST S PCHPOSITION 0 100 PCHPOSITION 0 100 H POSITION 0 100 ADJUST S PCVPOSITION 0 100 PCVPOSITION 0 100 V POSITION 0 100 ADJUST S COLORTEMP 0 COLORTEMP NORMAL SET COLOR TEMPERATURE MODE NORMAL S COLORTEMP 1 COLORTEMP WARM SET COLOR TEMPERATURE MODE WARM S ...

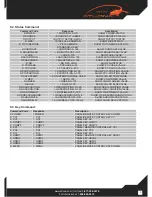
Page 9: ...POSITION VALUE R COLORTEMP COLORTEMP NORMAL USER SHOW COLOR TEMP MODE R RED RED 0 100 SHOW COLOR RED VALUE R GREEN GREEN 0 100 SHOW COLOR GREEN VALUE R BLUE BLUE 0 100 SHOW COLOR BLUE VALUE R OSDHPOSITION OSDHPOSITION 0 100 SHOW OSD H POSITION VALUE R OSDVPOSITION OSDVPOSITION 0 100 SHOW OSD V POSITION VALUE R OSDTIMEOUT OSDTIMEOUT 0 100 SHOW OSD TIMEOUT VALUE R OSDBACKGROUND OSDBACKGROUND 0 8 SHO...

Page 10: ...REMOTE CONTROL KEY XGA K SXGA SXGA REMOTE CONTROL KEY SXGA K UXGA UXGA REMOTE CONTROL KEY UXGA K 1080i60 1080i60 REMOTE CONTROL KEY 1080i K 480p 480p REMOTE CONTROL KEY 480p K 720P60 720p60 REMOTE CONTROL KEY 720p K 1080P60 1080p60 REMOTE CONTROL KEY 1080p K UP UP REMOTE CONTROL KEY K DOWN DOWN REMOTE CONTROL KEY K LEFT LEFT REMOTE CONTROL KEY K RIGHT RIGHT REMOTE CONTROL KEY K EXIT EXIT REMOTE CO...

Page 11: ...www atlona com toll free 1 877 536 3976 For International 1 408 962 0515 11 CONNECTION AND INSTALLATION Laptops Blu ray DVD Live Camera VCR Laptop and or HDTV Projector PC ...

Page 12: ...tomatically turn off If this occurs unplug the device and plug it back in Protect and route power cords so they will not be stepped on or pinched by anything placed on or against them Be especially careful of plug ins or cord exit points from this product Avoid excessive humidity sudden temperature changes or temperature extremes Keep this product away from wet locations such as bathtubs sinks lau...

Page 13: ...ted for the remainder of the original warranty period or 3 year whichever is longer 3 NO OTHER WARRANTIES TO THE MAXIMUM EXTENT PERMITTED BY APPLICABLE LAW ATLONA TECHNOLOGIES AND ITS SUPPLIERS DISCLAIM ALL OTHER WARRANTIES EITHER EXPRESS OR IMPLIED INCLUDING BUT NOT LIMITED TO IM PLIED WARRANTIES OF MERCHANTABILITY AND FITNESS FOR A PARTICULAR PURPOSE WITH REGARD TO THE PRODUCT AND ANY RELATED WR...

Page 14: ...stration creates an ownership record if your product is lost or stolen and helps ensure you ll receive notification of performance issues and firmware updates At Atlona we respect and protect your privacy and assure you that your registration information is completely secure Of course Atlona product registration is totally voluntary and failure to register will not diminish your limited war ranty ...

Page 15: ...www atlona com toll free 1 877 536 3976 For International 1 408 962 0515 ...

Page 16: ...www atlona com toll free 1 877 536 3976 For International 1 408 962 0515 ...

Reviews: