


Delfi and Sharky User Guide
4. Operation
No part of this User Guide may be reproduced, stored in a retrieval system, or published, in any form or by any means, electronic,
mechanical, photocopying, recording or otherwise, without the prior written permission of Atlas Revalidatie Techniek BV.
© 2008 Atlas Revalidatie Techniek B.V.
7
4
4
.
.
O
O
p
p
e
e
r
r
a
a
t
t
i
i
o
o
n
n
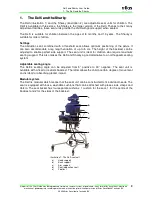
A distinction is made between standard settings and daily adjustments to the seat unit. Changes to
the standard settings always require special tools. The daily settings are recognisable from the
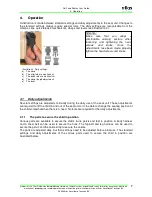
clamps, clips, quick release mechanisms, clasps and levers (see illustration 3).
4.1
Daily adjustments
Several settings are adjusted continually during the daily use of the seat unit. These adjustments
are required to lift the child in and out of the seat unit or to be able to change the seating position of
the child somewhat when there is a need. No tools are required for the daily adjustments.
4.1.1
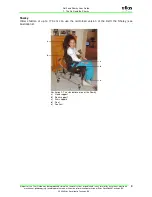
The parts to secure the child in position
Various parts are available to secure the child’s trunk, pelvis and feet in position. A body harness
and a chest belt can be used to secure the trunk. The hip belt and leg harness can be used to
secure the pelvic and the ankle strap to secure the ankles.
The parts are adjusted daily, but their settings need to be adjusted before initial use. The standard
settings and daily adjustments of the various parts used to secure the child in position are
illustrated below.
Illustration 3: Daily settings:
a) The clasp
b) The clip (release mechanism)
c) The quick release mechanism
d) The clasp (length adjustment)
e) The lever
Attention:
Make
sure
that
you
adopt
a
comfortable working posture when
loosening and tightening the head
screws
and
knobs.
Once
the
adjustments have been made, properly
tighten the head screws and knobs


