


GTG25 F120-13
EN
Service
© Atlas Copco Industrial Technique AB - 9839 0065 01
19
Instructions
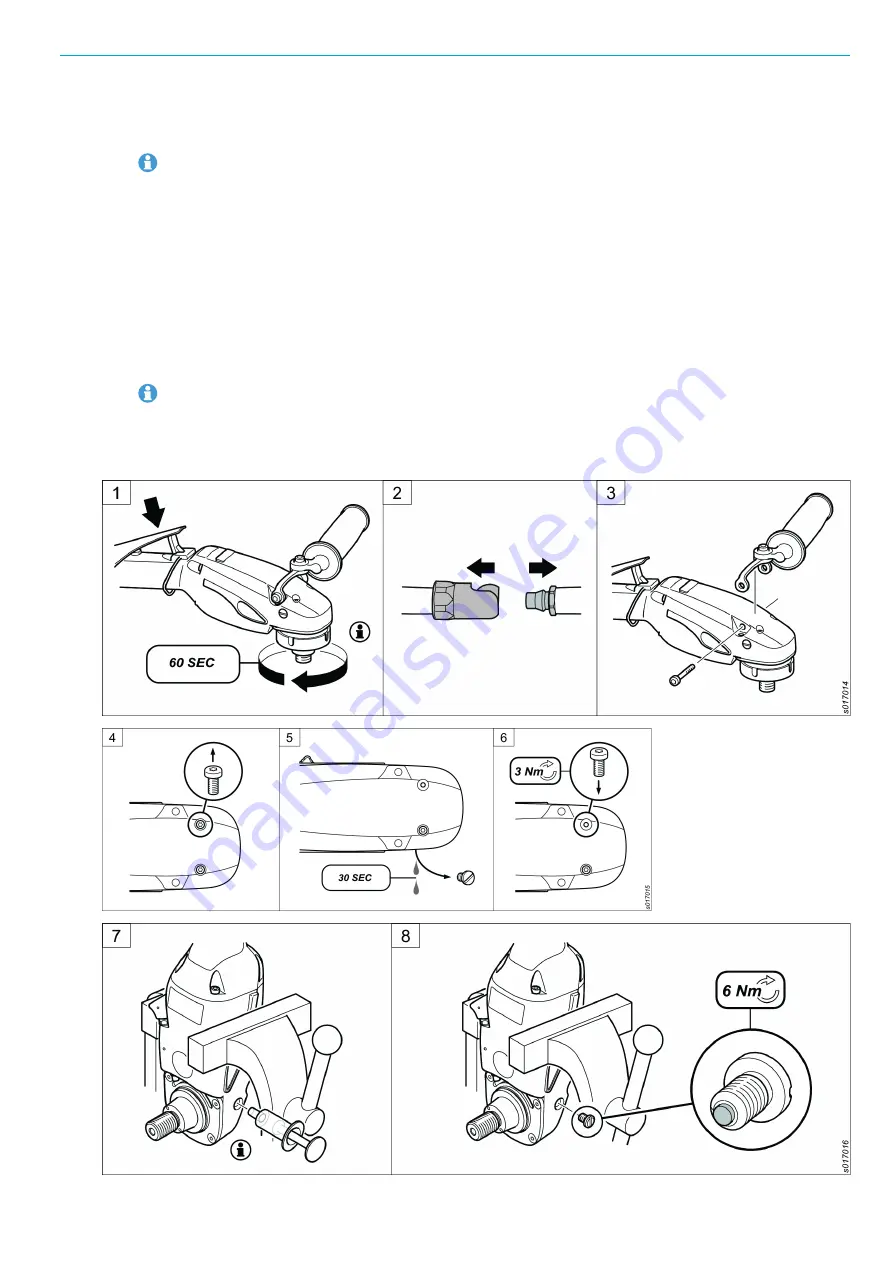
1.
Connect the tool to the air supply (if not already connected).
Always lock auto-balancer with applicable part before running the tool.
Run the tool at idle speed for 60 seconds.
2.
Disconnect the compressed air supply hose from the tool.
3.
Remove the support handle from the tool.
4.
Place the tool in a horizontal and stable position. Remove the spindle screw.
5.
Remove the oil plug. Keep the tool in a horizontal position.
Drain the oil from the tool for at least 30 seconds.
6.
Fit the spindle screw in position and tighten with recommended torque.
7.
Place the tool in a vice in a vertical position with the oil filling hole downwards. Fill the tool with 7 ml
Turbine Gearbox Oil 32 using an oil syringe (included in the service kit)
Make sure that the tool is filled with oil within the recommended range. High oil level will cause
overheating, while low oil level can cause gear damage over time.
8.
Clean the magnet on the oil plug from oil and particles using a clean lint-free cloth.
Fit the oil plug in position and tighten with recommended torque.
Summary of Contents for 8423252501
Page 17: ...GTG25 F120 13 EN Operation Atlas Copco Industrial Technique AB 9839 0065 01 17 ...
Page 25: ......
Page 26: ......
Page 27: ......


