background image

LEGENDS ULTIMATE FEATURES 

13

-: 

14

-:

15

-:  :

16 

:

17 

:-

:-

7

:-

,-

I

j

主 ·吕

'

'

'

'

'

'

0  g 

6

��� 

10

-; 

18-

:  ;-

11 

:-

12 

, , 

• 

:

' , 

d

I - -

- - _, 

��� 
��� 

o0 

�I(§))

0

'

'

'

'

'

'

, 

, , 

1

-! 

3

-! 

1. JOYSTICK P1
2. JOYSTICK P2

3.  SPINNER P1
4. SPINNER P2

5

._:

7. START P1
8. HOME/MENU

9.  START P2

10. POWER

'

'

'

'

'

'

'

'

'

'

2

-! 

4

-! 

5. TRACKBALL

11. P1 BLUETOOTH INDICATOR 

6. RETURN 

12.  P2  BLUETOOTH INDICATOR 

•FRONT 

•REAR

13.  HDMI PORT 
14. USB 2.0 PORT 
15.  RESET BUTTON
16.  USB 3.0 PORT 
17. SWITCH BUTTON
18. VOLUME ADJUSTER

ANCHOR TO PREVENT 

MARQUEE LIGHT BOX 

STEREO 

,.  PINBALL BUTIONS 

Summary of Contents for HA8801B

Page 1: ...1 1 q 军 总门泣 首 ae口旨同 座 吨 令 芦 I主 沙i 芦 畦 杰呤 叩LliPEdE Gil I一 ace MIDFII 丘员R WA心 Em Sign Up For ArcadeNet i More Games with Instant Play i Online Multiplayer and Leaderboards M Special Deals for Members M And So Much More AT A眉ES www atgames net Sign Up at www arcadenel net ...

Page 2: ...E P2 p 11 P12 P12 HOW TO SIGN UP AND SIGN IN FOR AM ARCADEMET ACCOUNT P 13 HOW TO PAIR BLUETOOTH DEVICES P 14 HOW TO CONNECT ATGAMES BLAST DONGLES AND CONSOLES P 15 TO LEGENDS ULTIMATE HOW TO SAFELY POWER OFF ARCADE WARRANTY INFO FEATURED GAMES SAFETY NOTICE FCC STATEMENT Pl6 Pl6 Pl7 Pl8 ...

Page 3: ...ASSEMBLY GUIDE TOOLS NEEDED NOT INCLUDED Phillips head screwdriver Straight head sc ewdriver PARTS 归 Ox2 Pinball kit eSide panel art 0 ...

Page 4: ... X22 X4 CORD C Power adapter ANTI TIPPING KIT 0X2 X2 X2 X2 11111111111111111111111111111111111111111111111111111111111111111111111111111111111111111111111111111111111111111111111111111111111111111111111111111111111111111111111111111 声 0 Cabletie ...

Page 5: ... both panels Please make sure the cam bolts align with the holes Step C Insert the cam locks to the matching holes Step D Tighten clockwise with straight head screwdriver Phillips head screwdriver Step 1 Insert the 16 S1 to the matching holes on A and BJ on both panels with Phillips head screwd iver Please insert and make sure to tighten perpendicular to the board redo the step as needed Do not us...

Page 6: ...nd DJ Please note the side with the slotted faces outwards 111 r 811 1 rr Step 3 Lay A aside and take out a piece of CJ Insert CJ into A Please note the sides with holes face outwards Use straight head screwdriver to rotate S2 with mark to tighten Repeat process for the rest of CJ and DJ ...

Page 7: ...ASSEMBLY STEPS Step 4 Slide El into the tracks of the pair of DJ Step 5 Insert BJ to the matching holes on CJ and DJ Use flat head screwdriver to rotate the 8 S2J with mark to tighten ...

Page 8: ...tep 6 Slide G and F into the tracks of A and BJ 0 f Step 7 Insert S3 to the matching holes on G and F with Phillips head screwdriver 0 t t e n _ b a c e h t f rt a p m ti b e h t t H i _ p t ar b h c a t t A 8 p st o e ...

Page 9: ... the cables to the matching slots on the control panel I Please make sure the slots are aligned Insert I to the cabinet 0 0 0 Step 10 Insert a pair of S4 to the matching holes on I and then insert S5 to 6 matching holes on the sides of the cabinet and tighten ...

Page 10: ...SEMBLY STEPS 少 h r r 0 Step 11 Insert S6 to 22 matching holes on J and K and tighten 0 昙 L 0 0 昙 Step 12 Attach L to the matching slot on the sides of the cabinet Insert S7 to 4 matching holes and tighten ...

Page 11: ...n the bracket OJ against the wall Step 16 Fasten the cable tie Pl to connect both brackets OJ to keep the cabinet from tipping over WARNING Serious or fatal crushing 1n1u es can occur from tip over To help prevent tip over Do not set any heavy objects on top of the cabinet Neve allow children to climb o hang on the cabinet Use of tip ove estraints may only reduce but not eliminate the risk ot tip ...

Page 12: ...TICK P2 3 SPINNER P1 4 SPINNER P2 5 _ 7 START P1 8 HOME MENU 9 START P2 10 POWER 2 4 5 TRACKBALL 11 P1 BLUETOOTH INDICATOR 6 RETURN 12 P2 BLUETOOTH INDICATOR FRONT REAR 13 HDMI PORT 14 USB 2 0 PORT 15 RESET BUTTON 16 USB 3 0 PORT 17 SWITCH BUTTON 18 VOLUME ADJUSTER ANCHOR TO PREVENT MARQUEE LIGHT BOX STEREO PINBALL BUTIONS ...

Page 13: ...Fi SSID you would like to connect to and select Connect If prompted enter the Wi Fi password using the on screen keyboard and select Submit when done 雪 甲 卢 g 一 口 气 勹 芒 i 回 一 HOW TO UPDATE FIRMWARE 1 Power on the arcade 2 Connect via Ethernet or Wi Fi for internet connection 3 Go to SETTINGS menu and select Version 4 If there is a newer Ii mware version please follow the instructions to start downl...

Page 14: ...n the QR code on the screen to launch the ArcadeNet website You will be directed to a login page where you can choose either to sign in with your existing Google Facebook account or e mail 4 You can also sign up for a new account here if you don t have an account already Atgames net Account 1 https authatgamesnet 口 X 压eJA眉ES G Continue with Google or user example com 0 Remember me 巨三 Forgot your p...

Page 15: ... will show on the arcade once signed in Atgames net Account hltps auth atgamo net 白 x AT A眉ES Authorized You can close this X window and continue on your device HOW TO PAIR BLUETOOTH DEVICES ARCADE MACHINE PAIRING AS HOST 1 Power on the arcade 2 Go to SETTINGS and select Bluetooth Select Refresh to search for the device to pair 3 Select the device you wish to pair and select Connect ...

Page 16: ...onnect USB power cord Step 2 Press HDMI SWITCH button to selected HDMI source Step 3 The Games Menu will display on the screen Select the game you like and play Legends Ultimate supports the following AtGames products 2019 Legends Flashback FB8660 Atari Flashback X AR3060 Bandai Namco Arcade Blast WD3305 and WD3305S Adventure Flashback Blast WD3308 Star Flashback Blast WD3309 2018 Activision Flash...

Page 17: ...er normal residential use and conditions for a period of thirty 30 days from the original invoice date Shipping and handling fees are to be paid for by the customer Please also be aware that standard warranty services are valid with receipt from an authorized retailer Purchases through thi d party sellers and resellers do not fall under the standard warranty program For warranty support please con...

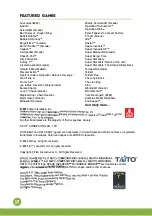
Page 18: ...r Star Wars Return of the Jedi Super Star Wars The Empire Strikes Back Tempest Arcade Tetris Tetris Plus The Jungle Book The Lion King Tron Warlords Arcade Wild WesternT Vars Reveng碑 2600 Zombies Ate My Neighbors Zoo Keeper And many more 2020 Atari Interactive Inc 巴三气气芒三 霉立芦二它 e e i iered trademarks of Atari 囚 All other trademarks are the property of their respective owners CITY CONNECTION CO LTD ...

Page 19: ...ned by turning the equipment off and on the user is encouraged to try to correct the interference by one or more of the following measures Reorient or relocate the receiving antenna Inc ease the separation between the equipment and eceiver Connect the equipment into an outlet on a circuit different from that to which the receiver is connected Consult the dealer or an experienced radio厅V technician...

Page 20: ...onal support please email support atgames net ATE A扇匠S 2020 AtGames Interactive www atgames net PO Box 1691 El Segundo CA 90245 All rights reserved Content and images are for reference only and subject to change ...

Page 21: ... or operating in conjunction with any other antenna or transmitter This device complies with FCC RF radiation exposure limits set forth for an uncontrolled environment This device should be installed and operated with a minimum distance of 20 centimetres between the device and your body ...

Reviews: