background image

- 6 -

Hardware Overview

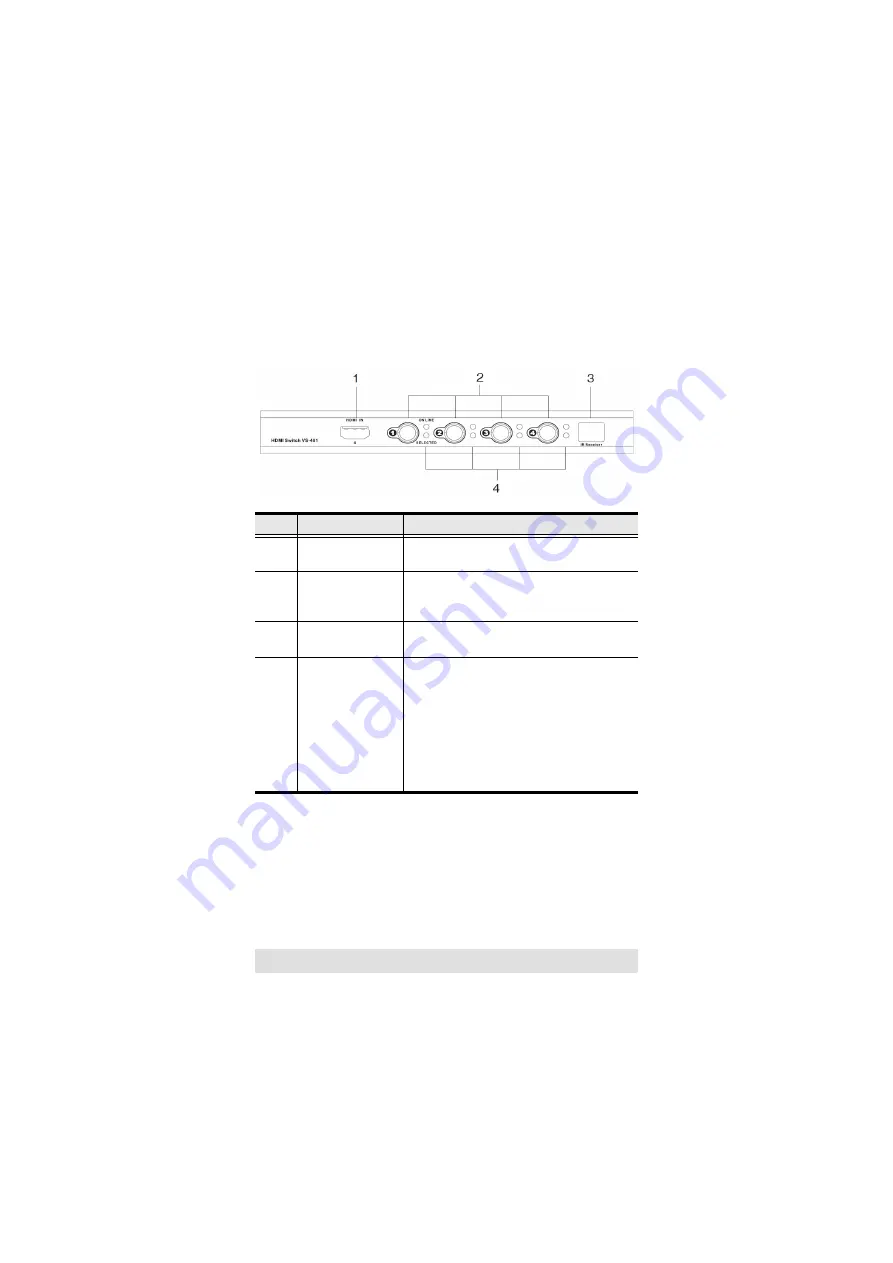
VS481 Front View

No.

Component

Function

1

HDMI In (Type A)

Plug the cable from an HDMI source 
device into this port (number 4).

2

Port Selection 
Pushbuttons

Pressing a port selection pushbutton 
routes the source from the corresponding 
input port to the output port for display.

3

IR Receiver

The IR receiver receives signals from the 
IR remote control.

4

Port LEDs

There are two port LEDs next to each port 
selection pushbutton. The ON LINE LED 
(top) and the SELECTED LED (bottom).

The ON LINE LED (orange) lights to 
indicate that the device attached to the 
corresponding port is powered on.

The SELECTED LED (green) lights to 
indicated that the port is selected.

Summary of Contents for VS481

Page 1: ...VS481 HDMI Switch USER MANUAL...

Page 2: ...ns However there is no guarantee that interference will not occur in a particular installation If this equipment does cause harmful interference to radio or television reception which can be determine...

Page 3: ...to prevent any damage to the units and or any devices that connect to them Package Contents The VS481 HDMI Switch package contains the following items 1 User Manual 1 Quick Start Guide 1 VS481 HDMI S...

Page 4: ...hbuttons located on the switch Features Low cost solution for home theater integration Easy switching between four digital video signals e g DVD and satellite receiver by remote control or front panel...

Page 5: ...package We strongly recommend that you purchase high quality cables of appropriate length since this will affect the quality of the audio and video display Contact your dealer to purchase the correct...

Page 6: ...the corresponding input port to the output port for display 3 IR Receiver The IR receiver receives signals from the IR remote control 4 Port LEDs There are two port LEDs next to each port selection pu...

Page 7: ...unction 1 Power Jack The power adapter cable plugs in here 2 HDMI Out Type A The cable from the HDMI display device plugs in here 3 HDMI In Type A The cables from the HDMI source devices can plug into...

Page 8: ...Press the Port Up button to cycle forward through ports 1 to 2 2 to 3 3 to 4 4 to 1 Press the Port Down button to cycle backward through the ports 4 to 3 3 to 2 2 to 1 1 to 4 2 Port Selection Buttons...

Page 9: ...HDMI output ports on the source device s to the HDMI input ports on the switch The fourth HDMI port is located on the front of the switch 3 Plug the provided power adapter into an appropriate AC power...

Page 10: ...10 Installation Diagram...

Page 11: ...on To select a source device with the remote control press the number button that corresponds to the port it is connected to Alternatively you may also cycle through the available source devices by pu...

Page 12: ...in 1 Power off the attached devices 2 Unplug the power adapter cable from the HDMI switch 3 Wait 10 seconds and then plug the power adapter cable back in 4 After the HDMI switch is powered on power on...

Page 13: ...Power 1 LEDs On Line 4 Orange Selected 4 Green Buttons Port Selection 4 x Pushbuttons Remote Control IR Sensor 1 Power Consumption DC 5 3V 2W Video 1600 x 1200 60Hz 480p 720p 1080i 1080p Environment O...

Page 14: ...d by the Limited Hardware Warranty ATEN will provide a repair service without charge during the Warranty Period If a product is detective ATEN will at its discretion have the option to 1 repair said p...

Reviews: