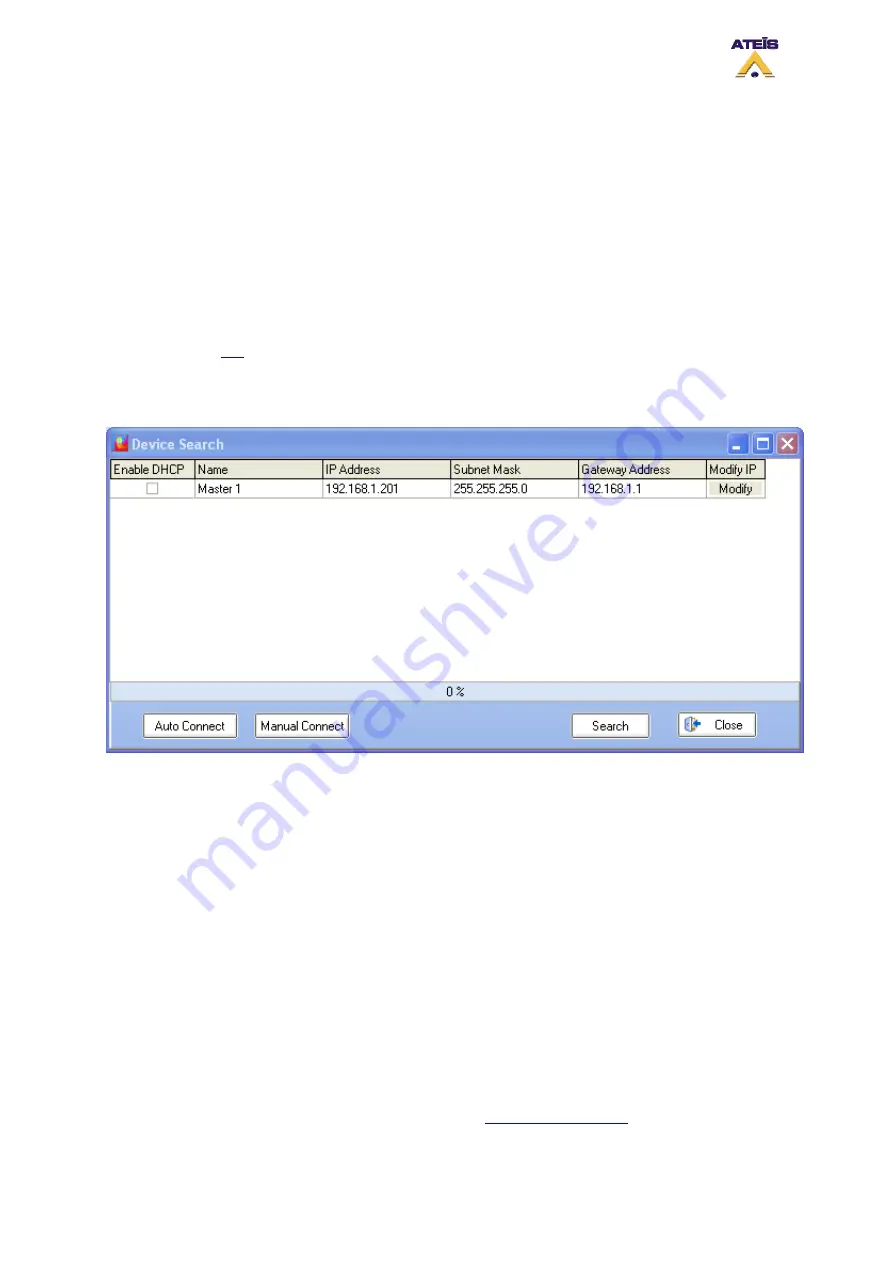
Buttons explanation:
•
Search:
starts the search process. A progression bar indicates when the search is finished
•
Auto Connect:
allows to connect to a master DIVA that have been found. Select a master in the
list by just clicking on the corresponding line. Note: attention do not select Enable DHCP when
clicking on the line, it could cause connection problem.
•
Manual Connect:
allows to quickly connect to a known master DIVA IP without doing the search
process
•
Close:
closes the Device Search window
8.14 Set IP Address
From the front panel of DIVA, you can change the address from the LCD menu display. In order to do
this, please read
IP, submask and gateway address can also been changed from the software by going in the device
search menu: Tools -> Device Search.
Once a DIVA unit has been found, click in the IP Address, Subnet Mask or Gateway Address field to
be able to change the current value. To save the new settings, click on Modify.
Note:
you have to keep in mind that setting TCP/IP parameters not related to the one set for your
network card, could lead to communication problems.
8.15 Perform a DIVA Master Network
As briefly explained before, you can put several DIVA master on a same network. The DIVA master
network is based on Ethernet protocol. Keep in mind that DIVA slave unit are not on Ethernet network.
In order to complete a DIVA network you will need the following devices:
•
Ethernet Switch/Hub
•
Multiple DIVA8M units
•
A computer
Before connecting those devices on the network, you need to check the IP address of each DIVA
master units and set each DIVA IP address corresponding to your project's network. By default, a new
DIVA8M unit has the following IP: 192.168.100.100. See
Ateïs International
Ch. du Dévent, 1024 Ecublens, Switzerland.
Phone : +41 21 881 25 10
55


