


Serial-to-Ethernet Device Servers
Copyright © 2014 Reserved by ATC Technology, All Rights Reserved
4.0 Configuration and Operation
Use this section to set up your computer to assign it a static IP address in the
192.168.2.2 to 192.168.2.254 range with a subnet mask of 255.255.255.0.
This is necessary to ensure that your computer can communicate with your
ATC-1000. Your computer must have an Ethernet card and TCP/IP installed.
TCP/IP should already be installed on computer using Windows 98/2000/XP
and later operating systems.
Step 1
:
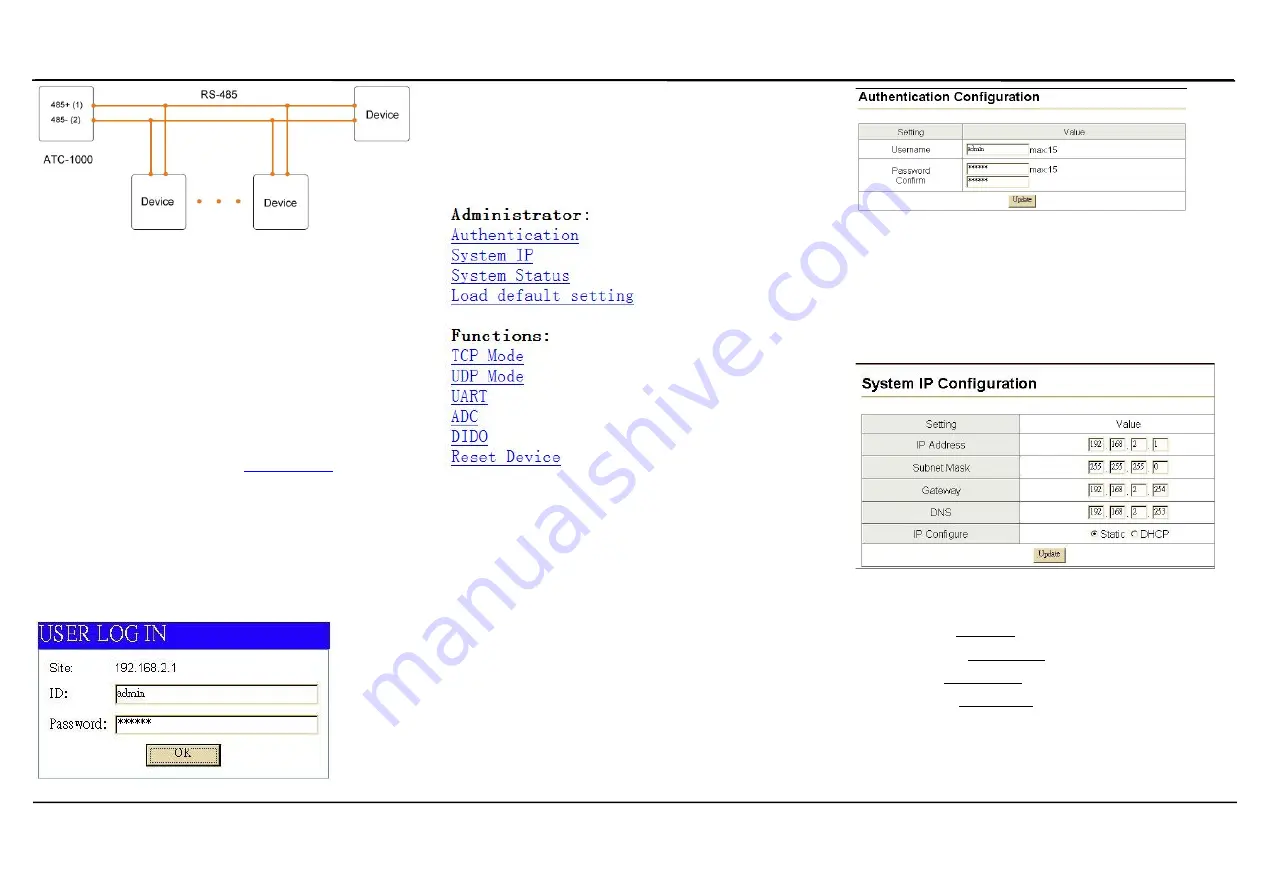
Open your web browser and type
http://192.168.2.1
in the browser’s
address box. This address is the factory set IP Address of your ATC-1000.
Press
“Enter”
.
Step 2
:
The
“ID and Password required”
prompt box will appear. Typing
“admin”
(default username) in the ID field and typing
“system”
(default
password) in the Password field. Click
“OK”
. The setup screen will then
appear.
User login to enter a password.
Default ID
:
admin
Default Password: system
4.1 The menu features as below:
All above the functions explain as below:
4.2 Administrator Setup
Manager of the relevant setting page.
4.3 Authentication Configuration
The Users can change the username and password to prevent unauthorized
access.
Login ID and password authentication, the maximum is 15 characters and
numbers.
User Name: default admin
Password: default system
4.4 System IP Configuration
The ATC-1000 support three IP connection types: Static IP, DHCP. These
types are listed in the Web page for the IP Configuration setting. Each setup
screen and available features will differ depending on what kind of IP
connection types you select. Default is Static IP
Static (or Fixed) IP
IP Address: default 192.168.2.1
Subnet mask: default 255.255.255.0
Gateway: default 192.168.2.254
Primary DNS: default 192.168.2.253
If you are connecting through a static or fixed IP from your network
environment, perform these steps
:
Step 1: Enter IP address
Step 2: Enter Subnet mask


