background image

SERVICE LOG

70

Hours

Service Performed

Notes

Summary of Contents for PT-70

Page 1: ...anual PT70 SN All English All Language Geographic Region Serial Number Range This manual is complements of TrackLoaderParts com The world s best source for ASV parts Track Loader Parts 6543 Chupp Road Atlanta Georgia 30058 USA 800 616 8156 ...

Page 2: ...intended to make you aware of poten tial risks and encourage a safe approach to operation inspection and maintenance of the machine Do not operate the machine until you are sure you have a thorough understanding of its operation inspection and maintenance It is your responsibility as the operator to exercise caution while performing these tasks to ensure your safety and the safety of others DANGER...

Page 3: ...accessories Warranty claims will not be processed unless the machine PIN is provided Engine Serial Number The Engine Serial Number is located on a metal identification plate fastened to the engine valve cover at the rear of the machine Manual Storage The manual storage compart ment is located in the lower left portion of the cab near the oper ator s left leg M MA AC CH HI IN NE E I ID DE EN NT TI ...

Page 4: ...1 Safety Overview 2 Machine Identification 3 Safety 6 Controls 14 Operation 22 Maintenance 32 Troubleshooting 58 Machine Specifications 63 California Proposition 65 64 Recommended Fluids 65 Standard Torque Guidelines 66 Service Log 67 ...

Page 5: ...5 ...

Page 6: ...S SA AF FE ET TY Y CONTENTS 6 Features 7 Tipping Load Operating Cap GVW 9 Fire Prevention 10 Warning Decals 11 ...

Page 7: ...equipped In equipped machines the lap bar houses the gauges to keep the operator aware of machine system status while operating C Operator Presence Seat Switch This switch ensures that the operator is seated inside the machine before any motion is allowed to take place This safe ty switch is activated when an operator is seated in the cab D Auxiliary Hydraulic Safety Switches These switches have b...

Page 8: ...em downward The switches may then be moved into the desired positions G Lift Arm Brace Each machine is equipped with a brace to ensure your safety during service work or mainte nance Prior to performing any service or maintenance that requires the lift arms to be in the raised position follow the lift arm brace installation procedure located on page 34 H Escape Hatch The rear window on the PT 70 8...

Page 9: ...ften move the center of gravity further away from the machine reducing the ROC Do not exceed the rated operat ing capacity for your machine Doing so could result in serious injury to the operator and or damage to the machine The operating capacity ratings for the PT 70 80 are located on page 63 Note SAE J818 standards define operating capacity ratings for rubber tired skid steer load ers 50 tippin...

Page 10: ...ry or even death Listed are a set of precautionary tasks that should be performed daily or more often if necessary Repair or replace worn or dam aged components as needed to ensure safe machine operation Precautionary Tasks With the engine off and cool remove any debris present in the engine compartment and chassis area under cab Remove the belly pans and pressure wash these areas to clean them pr...

Page 11: ...ior to opera tion Carrying Loads Carry loads low Load unload and turn on level ground Inclines Travel with heaviest end of machine facing uphill Riders Riders not permitted Work Platform Never use a work tool as a work platform Disclaimer Failure to observe and comply with the warn ings listed above may result in machine dam age personal injury or even death Pre Start Checklist 1 Operator seated i...

Page 12: ...to avoid combustion Failure to do so could result in fire that may cause machine damage personal injury or even death 2 Speed if equipped To engage Press the button located on the front of the right joystick control To disengage Press the button a sec ond time 2045 468 Keep out from under raised lift arms Do not go beneath raised lift arms unless the lift arm brace has been properly installed See ...

Page 13: ...13 ...

Page 14: ...C CO ON NT TR RO OL LS S CONTENTS 14 Instrument Display 15 Switch Panels 16 Drive Lift Arm 17 Throttle Electric Attachment 18 Auxiliary Hydraulic 19 Two Speed Power Quick Attach 21 ...

Page 15: ... F Tachometer G High Range Indicator H Glow Plug Operation Indicator I Low Range Indicator J Parking Brake Indicator K Hour Meter Note The locations of items A U within the operator enclosure may differ from the illustrations However they are present and easily identified by label form or by icons present on the com ponents The glow plug operation light should illuminate only when the ignition swi...

Page 16: ...ghout the machine The switch panels include L Parking Brake Switch M Headlight Switch N Bucket Positioning Switch O High Flow Aux Switch P Low Flow Aux Switch Q Hyd Quick Attach Switch R Heater Fan Switch S Windshield Wiper Switch T Beacon Switch U Ignition Switch Optional on PT 70 Optional on PT 70 80 L M N O P Q R S T U Left Right ...

Page 17: ...stop a moving machine release the left joystick altogeth er This will stop the machine Lift Arm Control The lift arm control right joy stick is used to control the lift arms and attachment bucket movement The illustration above shows the relationship between joystick and lift arm attachment movement The PT 70 80 are equipped with a float function that allows the lift arms and attachment bucket to ...

Page 18: ...pm has been reached To decrease RPM press the rear heel of the pedal towards the floor Electric Attachment Control Most attachments for ASV Rubber Track Loaders are con trolled hydraulically but some require electrical input as well When electrical input is required the four buttons on the drive control left joystick can be uti lized to send electrical current to the receptacle located on the uppe...

Page 19: ...plers Note Low and high flow circuits may not be used simultaneously Low Flow Intermittent The low flow auxiliary circuit can be utilized intermittently or con tinuously It also has the capabil ity of varying attachment speed through the use of a spring cen tered roller switch F located on the back of the right joystick Attachment direction is deter mined by rolling the switch to the right or left...

Page 20: ...sition Note When connected to an attachment the auxiliary switch es have the effect of reversing flow through their respective cir cuits when switched or rolled from one position to the other Note The high and low flow auxiliary hydraulic switches are equipped with locking devices Their purpose is to lock the switches into neutral position when not in operation These locking devices must be disen ...

Page 21: ...he machine down to ensure a smooth transition Power Quick Attach The PT machines are available with a power quick attach fea ture that allows the operator to fasten and unfasten attachments without exiting the machine PT 80 standard PT 70 optional To lock the power quick attach depress the rocker type switch located on the switch panel into the lock position To unlock the quick attach move the swi...

Page 22: ...O OP PE ER RA AT TI IO ON N CONTENTS 22 Pre Operation 23 Starting Procedure 24 Operation Techniques 25 Attachments 29 ...

Page 23: ...en sioned 8 Hydraulic hoses and fittings are in good condition No visible wear or leaks 9 Joysticks and high low flow auxiliary switches are in their neutral positions 10 Power quick attach is in locked position if equipped visually verify 11 Hood is closed and bystanders are clear of any moving parts 12 All grease points have been lubricated Note The parking brake is auto matically activated when...

Page 24: ...h and turn it to the left for approximately 6 sec onds to pre heat the engine During this time the glow plug operation light will illuminate 5 Once the engine has been pre heated turn the key to the right and hold to start the engine Release the key as soon as the engine fires 6 Once running reduce throt tle to a low idle by pushing back slowly on the foot pedal with your heel Allow the engine to ...

Page 25: ...ice with out worry of injuring people or damaging property including him herself and the machine Dirt Work ASV Rubber Track Loaders pro vide far superior traction and floatation than traditional wheeled loaders This added capability enables an operator to fill the bucket by slowly driving into a pile of dirt without having to depend on vehicle momentum to plunge into the pile Machine weight is mor...

Page 26: ... the ground for transporting Grading Steps see illustration 1 Lower the lift arms until they rest on the frame 2 Tilt the bucket slowly forward until the cutting edge engages the ground 3 Drive the machine forward making slight bucket angle adjust ments to vary cut depth as necessary 4 When full curl the bucket and raise the lift arms simultaneously Once clear lower them to approximately 10 12 abo...

Page 27: ...r the materi al varying bucket angle slightly as necessary to maintain grade Loading Steps see illustration 1 Engage the self level bucket positioning function then raise the lift arms upward until the bottom of the bucket clears the side of the truck bed or trailer 2 Once clear drive the machine forward until the pivot point of the bucket clears the bed side 3 Tilt the bucket forward until all of...

Page 28: ... back down the hill while slowly turning until the machine is pointed in the desired direction Then pro ceed forward Operation On Turf One of the many features of a Rubber Track Loader is the abili ty to work on turf and similar fin ished surfaces with minimal sur face disturbance The suspended undercarriage and track assemblies distribute machine weight extremely well However care should still be...

Page 29: ...and downward to lock the attachment in place Note When fastening an attach ment always visually verify that the attachment is locked in place prior to operation To unfasten an attachment 1 Lower the lift arms so that the attachment is just barely off of the ground 2 Pull the locking levers upwards and toward the outside of the machine to unlock the attachment 3 Lay the attachment gently onto the g...

Page 30: ...er switch located on the switch panel to the lock position This will acti vate the locking cylinders and lock the attachment securely to the quick attach mechanism Note When fastening an attach ment always visually verify that the attachment is locked in place prior to operation To unfasten an attachment 1 Lower the lift arms so that the attachment is just barely off of the ground 2 Move the power...

Page 31: ...31 ...

Page 32: ...stallation 34 Tilt Up R O P S F O P S Cab 35 Jacking Procedure 36 Maintenance Schedule 37 Grease Points 38 Radiator Oil Cooler Engine Cleaning 39 Air Cleaner 40 Fuel Filter Water Separator 42 Accessory Belts 43 Engine 45 Hydraulic System 48 Electrical Undercarriages 50 Drive Sprocket Rollers 56 ...

Page 33: ...work on a machine sup ported only by a jack Always use ASV approved jack stands to support vehicle weight while performing service work Never work under raised lift arms unless supported by an ASV approved lift arm brace Always remove attachments prior to working underneath a machine Never run the engine in a poorly ventilated area Exhaust fumes are fatal when inhaled in sufficient quantities Neve...

Page 34: ...move the retaining pins B securing the lift arm brace and removeit from the machine 4 Make sure bystanders are clear of the lift arms then raise them to the upper limit 5 Have an assistant Install the brace around the cylinder shaft as shown and reinstall the pins to secure it to the cylinder 6 Lower the lift arms slowly until they come to rest on the brace 7 It is now safe to shut the engine off ...

Page 35: ... the cab one in each of the lower front corners 4 Once the bolts have been removed tilt the cab slowly upwards The cab brace C should fall onto the shoulder bolt D locking the cab in its upright position The cab is now secure To lower the cab 1 Raise the cab brace so that the locking channel is clear of the shoulder bolt 2 Hold the brace upwards and lower the cab until the locking channel is clear...

Page 36: ...t of the machine and center the lifting pad directly under the middle of the front torsion axle 5 Once in place jack the machine upward making sure it remains stable until it has reached sufficient height to install an ASV jack stand beneath the machine fig 1 6 Slide the jack stand into place making sure it is cen tered under the machine left to right when viewed from the front and far enough back...

Page 37: ...oler Inspect Daily Clean often as necessary Undercarriages Inspect Daily Clean often as necessary Engine compartment Inspect Daily Clean often as necessary Drive sprocket rollers Inspect 50 hr Replace if damaged or worn 35 min Engine oil and filter Replace 12 Mo or 500 hr Harsh conditions 6 Mo 250 hr interval 9 qt Hydraulic filters 2 Replace 250 hr Replace filters as a pair Hydraulic oil Replace 5...

Page 38: ...sts on the right side of the machine for each one identified in the illus tration Lubricate all fittings DAILY or after every 10 hours of opera tion to maximize component life and ensure proper machine func tion A Lower Bucket Cylinder Pivot B Upper Bucket Cylinder Pivot C Front Lift Cylinder Pivot D Lift Arm Pivot E Rear Lift Cylinder Pivot F Rear Axle Pivot 2 G Front Axle Pivot 2 H Lower Bucket ...

Page 39: ...iator oil cooler 1 Make sure the engine is off and cool 2 Using compressed air or a pressure washer thoroughly clean radiator oil cooler as shown Note Make sure water nozzle is at least 12 8 for air from the cooler and that the spray is directed straight through the cooler or the cooling fins may be damaged bent over which will decrease cooling performance Engine Periodic cleaning of the chas sis ...

Page 40: ...er clockwise until the band is loose enough to remove the cover then remove the cover The pri mary element B should be exposed 5 Remove the primary ele ment and inspect it If it appears damaged in any way replace it If the ele ment is heavily soiled replace it If it appears to be in good condition clean if necessary and re install 6 Once the primary element has been removed the sec ondary element ...

Page 41: ... 2 away from filter Water 40 P S I max with out nozzle 2 Soak the filter in a non suds ing detergent solution for at least 15 minutes moving it gently through the solution to further clean the element Never soak for more than 24 hours 3 Rinse the filter thoroughly with a gentle stream of water to remove all dirt and remaining detergent 4 Allow the filter to dry com pletely before re installing it ...

Page 42: ...lock wise when viewed from the bottom and remove it from the assembly Take care not to lose the o ring that seals it to the filter base 3 Twist the upper lock ring B counter clockwise when viewed from the bottom and remove it from the assembly 4 Slide the filter C downward to remove it Note the posi tion of the raised tabs on the upper portion of the filter to simplify reassembly 5 Install the new...

Page 43: ... 1 2 4 Measure the distance from the bottom of the straight edge to the top surface of each belt deflection Fan belt deflection should meas ure 3 8 7 16 A C if prop erly tensioned 5 If the belts are loose or tight adjust tension until correct To adjust fan or A C belt tension 1 Make sure the engine is cold off and the key has been removed from the igni tion to avoid accidental start 2 Lift the hoo...

Page 44: ...ll the fan belt 1 Reverse the steps of the removal procedure 2 Perform the belt tension check and adjustment pro cedures on page 43 to com plete the installation A C Belt Removal Installation To remove the A C belt 1 Follow steps 1 and 2 of the belt adjustment procedure 2 Once loose pivot the A C pump towards the engine to increase slack 3 Slip the belt off of the pulleys and remove it from the ma...

Page 45: ...l Then turn the engine off before proceeding 2 Remove the rear belly pan beneath the engine 3 Remove the drain plug from the oil pan and drain the used oil into a suitable catch container fig 1 Note Make sure to use the cor rect size combination or socket wrench to keep the drain plug in reusable condition 4 Thread the engine oil filter off of the filter head fig 2 5 Rotate the closed end of the f...

Page 46: ... in the lap bar instrument display The needle should rise up into the green range as soon as oil pressure has been established If the nee dle doesn t rise above the red zone shortly after start up turn the engine off imme diately and look for potential problems If the needle does move into the green zone as expected oil pressure has been achieved 14 Once the engine is running perform a visual insp...

Page 47: ...k A from its tube 4 Wipe the dipstick with a clean shop cloth and re insert it into the tube until it comes to rest in its seated position 5 Remove the dipstick once again and inspect the end for oil on the level indi cator 6 Oil should be present on the dipstick up to but not over the upper full level indicator notch If the level is correct re install the dipstick and then close and latch the hoo...

Page 48: ...allen socket to avoid damaging the drain plug fig 1 2 3 Drain the hydraulic fluid into a suitable catch container 4 Locate the two hydraulic fil ters underneath the cab on the left side of the machine fig 3 5 Thoroughly clean around the filters to prevent dirt or debris from entering the sys tem and remove the filters by hand or with a strap as required 6 Check to make sure the filter gaskets are ...

Page 49: ...l and secure the hydraulic reservoir filler cap 11 Start the machine and oper ate all hydraulic circuits to work any trapped air out of the system Drive the machine forward and backward Raise and lower the lift arms unloaded Dump and curl bucket quick attach 12 Once you have purged the air from the system check the level on the hydraulic fluid level sight gauge If the level is low repeat step 9 an...

Page 50: ...roblems Undercarriages The undercarriage assemblies in the PT machines typically oper ate in harsh working conditions They work in mud gravel debris and various other abrasive materials during operation ASV recommends a daily inspection of the undercarriage assemblies and cleaning if necessary Materials that are particularly sticky or abrasive like clay mud or gravel should be cleaned from the und...

Page 51: ...Drive the machine forward 5 feet to remove belt slack from the lower and rearward portions of the track 2 Lay a straight edge along the top of the track bridging the drive sprocket and front idler wheel 3 Apply 90 lbs of down force to the the track by either placing weight on top or hanging it using rope or wire midway between the drive sprocket and front idler 4 Measure from the bottom of the str...

Page 52: ...r it has only one row of stationary inner and outer idler wheels Track removal is identi cal with this exception fig 6 Track Removal 1 Break up and remove any foreign material from the cavity between the suspen sion rail and the drive table support fig 4 Note A shop vac or pressure washer will work well to remove material from this cavity 2 Clean the threads on the turnbuckle thoroughly using a st...

Page 53: ... wheel to the hub then remove the wheel PT 80 only fig 11 12 8 Use a pry bar to peel the track over the inner wheel s toward the outside of the machine fig 13 9 Once the track is off of the front wheel s pull the rear of the track clear of the suspension fig 14 15 MAINTENANCE Undercarriages 53 11 12 13 14 8 9 10 15 ...

Page 54: ...strap until the track is pulled upward slight ly and in position to slide over the inner idler wheel s at the front fig 3 6 Pull all of the slack forward and make sure the track drive lugs are properly meshed with the sprocket to provide as much slack as possible for installation 7 If you have an assistant have them pull the track for ward while you push inward on the track Work the track over the...

Page 55: ...wheel from spin ning as you torque the mounting bolts to spec fig 8 10 Install the scraper onto the suspension rail and tighten the bolts to secure it in place PT 80 only fig 9 11 Install the outer idler wheel and secure it in place with the mounting bolts Torque them to 90 10 Lb Ft fig 10 11 12 Perform the track tension adjustment and check pro cedures on page 51 to com plete installation MAINTEN...

Page 56: ... page 52 to allow the sprocket to be removed 2 Remove the seven bearing plate mounting bolts A I then remove the plate B from the drive table 3 Remove the bearing cap G by tapping around the bulged area of the cap with a hammer This will relieve the outward pressure on the cap and allow for removal 4 Remove the external snap ring H from the bearing shaft 5 Using a puller remove the bearing assembl...

Page 57: ...ient the cap so that the domed area is facing outward Then tap the center of the cap with a ball peen hammer or similar device to reset the cap Do this gently Too much inward force can damage mushroom the bearing shaft 10 Repeat steps 1 9 on the other side of the machine if necessary 11 Perform the track tension adjustment and check pro cedures on page 51 Note Replace rollers as a set to simplify ...

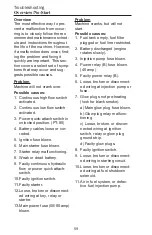
Page 58: ...T TR RO OU UB BL LE ES SH HO OO OT TI IN NG G CONTENTS 58 Overview No Start 59 Hydraulics 60 Electrical 61 Overheat 62 ...

Page 59: ...quick attach switch 10 Faulty ignition switch 11 Faulty starter 12 Loose broken or disconnect ed wiring at key relay or starter 13 Main power fuse 60 80 amp blown Problem Machine cranks but will not start Possible causes 1 Fuel tank empty fuel filter plugged or fuel line restricted 2 Battery discharged engine rotates slowly 3 Injection pump fuse blown 4 Power relay B fuse blown 40 amp 5 Faulty pow...

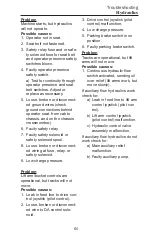
Page 60: ...solenoid 9 Low charge pressure Problem Lift arm bucket controls are operational but tracks will not move Possible causes 1 Leak in feed line to drive con trol joystick pilot control 2 Loose broken or disconnect ed wire to DA control sole noid 3 Drive control joystick pilot control malfunction 4 Low charge pressure 5 Parking brake switch in on position 6 Faulty parking brake switch Problem Tracks a...

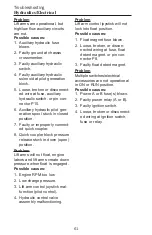
Page 61: ...not float engine labors and lift arms create down pressure when float is engaged Possible causes 1 Engine RPM too low 2 Low charge pressure 3 Lift arm control joystick mal function pilot control 4 Hydraulic control valve assembly malfunctioning Problem Lift arm control joystick will not lock into float position Possible causes 1 Float magnet fuse blown 2 Loose broken or discon nected wiring at fus...

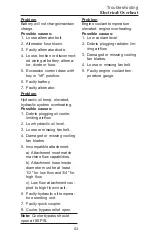
Page 62: ... level 3 Loose or missing fan belt 4 Damaged or missing cooling fan blades 5 Incompatible attachment a Attachment must match machine flow capabilities b Attachment hose inside diameter must be at least 1 2 for low flow and 3 4 for high flow c Low flow attachment cou pled to high flow circuit 6 Faulty hydraulic oil tempera ture sending unit 7 Faulty quick coupler 8 Cooler bypass relief open Note Co...

Page 63: ...n ng g S Sp pe ec ci if fi ic ca at ti io on ns s Operating capacities Tipping load 6 200 lb 2 812 kg 5 500 lb 2 495 kg 35 tip load 2 170 lb 984 kg 1 925 lb 873 kg 50 tip load 3 100 lb 1 406 kg 2 750 lb 1 247 kg Maximum speed low high range 7 12 5 mph 12 5 20 kmh8 mph 12 9 kmh A Au ux xi il li ia ar ry y H Hy yd dr ra au ul li ic c P Pu um mp p Low flow max 20 gpm 75 7 lpm 20 gpm 75 7 lpm High flo...

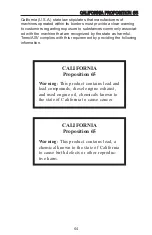
Page 64: ...ecognized by the state as harmful Terex ASV complies with this requirement by providing the following information CALIFORNIA Proposition 65 Warning This product contains lead and lead compounds diesel engine exhaust and used engine oil chemicals known to the state of California to cause cancer CALIFORNIA Proposition 65 Warning This product contains lead a chemical known to the state of California ...

Page 65: ...mended The ASV product line includes Heavy Duty Engine Oil 10W 30 Premium All Season MV Hydraulic Oil Multi Purpose EP Lithium Grease Long Life 50 50 Antifreeze Coolant Undercarriage Wheel Bearing Lubricant ASV fluids and lubricants are available through your ASV Dealer If ASV products are not available use high quality sub stitutions that meet or exceed the specifications listed above and through...

Page 66: ...bs Thread size Standard Torque 1 4 9 2 lb ft 5 16 18 4 lb ft 3 8 35 7lb ft 7 16 50 11 lb ft 1 2 75 15 lb ft 9 16 120 22 lb ft 5 8 160 30 lb ft 3 4 275 37 lb ft 7 8 460 60 lb ft 1 660 75 lb ft 1 1 8 960 110 lb ft 1 1 4 1320 150 lb ft 1 3 8 1780 220 lb ft 1 1 2 2280 260 lb ft Thread size Standard Torque M6 12 3 Nm M8 28 7 Nm M10 55 10 Nm M12 100 20 Nm M14 160 30 Nm M16 240 40 Nm M20 460 60 Nm M24 80...

Page 67: ...SERVICE LOG 67 Hours Service Performed Notes ...

Page 68: ...SERVICE LOG 68 Hours Service Performed Notes ...

Page 69: ...SERVICE LOG 69 Hours Service Performed Notes ...

Page 70: ...SERVICE LOG 70 Hours Service Performed Notes ...

Page 71: ...Terex Construction Americas 8800 Rostin Road Southaven MS 38671 888 201 6008 662 393 1800 www terex com ASVPT70 80 OM 1 09 Copyright 2009 Terex ...

Reviews: