background image

5-43

ASUS V2/V3-M3N8200

Exit & Discard Changes

Select this option only if you do not want to save the changes that you  made to 

the Setup program. If you made changes to fields other than System Date, System 

Time, and Password, the BIOS asks for a confirmation before exiting.

Discard Changes

This option allows you to discard the selections you made and restore the 

previously saved values. After selecting this option, a confirmation appears. Select 

OK

 to discard any changes and load the previously saved values.

Load Setup Defaults 

This option allows you to load the default values for each of the parameters on the 

Setup menus. When you select this option or if you press <F5>, a confirmation 

window appears. Select 

OK

 to load default values. Select 

Exit & Save Changes


or make other changes before saving the values to the non-volatile RAM.

Exit & Save Changes

Once you are finished making your selections, choose this option from the Exit 

menu to ensure the values you selected are saved to the CMOS RAM. An onboard 

backup battery sustains the CMOS RAM so it stays on even when the PC is turned 

off. When you select this option, a confirmation window appears. Select 

OK

 to save 

changes and exit.

5.8 

Exit menu

Pressing <Esc> does not immediately exit this menu. Select one of the options 

from this menu or <F10> from the legend bar to exit.

The Exit menu items allow you to load the optimal or failsafe default values for the 

BIOS items, and save or discard your changes to the BIOS items.

Exit Options

Exit & Save Changes

Exit & Discard Changes

Discard Changes

Load Setup Defaults

 If you attempt to exit the Setup program without saving your changes, the 

program prompts you with a message asking if you want to save your changes 

before exiting. Press <Enter>  to save the  changes while exiting.

Exit system setup 

after saving the 

changes.

F10 key can be used 

for this operation.

Summary of Contents for V2-M3N8200 - V Series - 0 MB RAM

Page 1: ...V2 V3 M3N8200 ASUS PC Desktop Barebone Installation Manual R R ...

Page 2: ...RTICULAR PURPOSE IN NO EVENT SHALL ASUS ITS DIRECTORS OFFICERS EMPLOYEES OR AGENTS BE LIABLE FOR ANY INDIRECT SPECIAL INCIDENTAL OR CONSEQUENTIAL DAMAGES INCLUDING DAMAGES FOR LOSS OF PROFITS LOSS OF BUSINESS LOSS OF USE OR DATA INTERRUPTION OF BUSINESS AND THE LIKE EVEN IF ASUS HAS BEEN ADVISED OF THE POSSIBILITY OF SUCH DAMAGES ARISING FROM ANY DEFECT OR ERROR IN THIS MANUAL OR PRODUCT SPECIFICA...

Page 3: ...Unit CPU 2 4 2 4 1 Installing the CPU 2 4 2 4 2 Installing the heatsink and fan 2 6 2 5 Installing a DIMM 2 8 2 5 1 Memory configurations 2 8 2 5 2 Installing a DDR2 DIMM 2 12 2 5 3 Removing a DDR2 DIMM 2 12 2 6 Expansion slots 2 13 2 6 1 Installing an expansion card 2 13 2 6 2 Configuring an expansion card 2 13 2 6 3 PCI slots 2 15 2 6 4 PCI Express x1 slot 2 15 2 6 5 PCI Express x16 slot 2 15 2 ...

Page 4: ...uction 4 2 4 2 Motherboard layout 4 2 4 3 Jumpers 4 3 4 4 Connectors 4 4 Chapter 5 BIOS setup 5 1 Managing and updating your BIOS 5 2 2 1 1 Creating a bootable floppy disk 5 2 5 1 2 ASUS EZ Flash 2 utility 5 4 5 1 3 AFUDOS utility 5 5 5 1 4 ASUS CrashFree BIOS 3 utility 5 7 5 1 5 ASUS Update utility 5 9 5 2 BIOS setup program 5 12 5 2 1 BIOS menu screen 5 13 5 2 2 Menu bar 5 13 5 2 3 Navigation ke...

Page 5: ...22 5 4 3 Chipset 5 23 5 4 4 Onboard Devices Configuration 5 30 5 4 5 PCI PnP 5 31 5 4 6 USB Configuration 5 32 5 4 7 Trusted Computing 5 33 5 5 Power menu 5 34 5 5 1 Suspend Mode 5 34 5 5 2 ACPI 2 0 Support 5 34 5 5 3 ACPI APIC Support 5 34 5 5 4 APM Configuration 5 35 5 5 5 Hardware Monitor 5 36 5 6 Boot menu 5 37 5 6 1 Boot Device Priority 5 37 5 6 2 Boot Settings Configuration 5 38 5 6 3 Securi...

Page 6: ... harmful interference to radio or television reception which can be determined by turning the equipment off and on the user is encouraged to try to correct the interference by one or more of the following measures Reorient or relocate the receiving antenna Increase the separation between the equipment and receiver Connect the equipment to an outlet on a circuit different from that to which the rec...

Page 7: ...sockets and circuitry Avoid dust humidity and temperature extremes Do not place the product in any area where it may become wet Place the product on a stable surface If you encounter technical problems with the product contact a qualified service technician or your retailer Lithium Ion Battery Warning CAUTION Danger of explosion if battery is incorrectly replaced Replace only with the same or equi...

Page 8: ...atures including introduction on the front and rear panel and internal components 2 Chapter 2 Basic installation This chapter provides step by step instructions on how to install components in the system 3 Chapter 3 Starting up This chapter helps you power up the system and install drivers and utilities from the support CD 4 Chapter 4 Motherboard information This chapter gives information about th...

Page 9: ...n to aid in completing a task Where to find more information Refer to the following sources for additional information and for product and software updates 1 ASUS Websites The ASUS websites worldwide provide updated information on ASUS hardware and software products Refer to the ASUS contact information 2 Optional Documentation Your product package may include optional documentation such as warran...

Page 10: ... items is damaged or missing contact your retailer immediately Item description 1 ASUS V2 V3 M3N8200 barebone system with ASUS motherboard Power supply unit ASUS chassis 2 Cable AC power cable 3 Support CD 4 User guide An optional card reader is available along with the system for the users to purchase ...

Page 11: ...apter 1 System introduction This chapter gives a general description of the ASUS V2 V3 M3N8200 The chapter lists the system features including introduction on the front and rear panel and internal components ...

Page 12: ...upports the AMD Phenom FX Phenom Athlon SempronTM processors The system supports up to 8 GB of system memory using DDR2 1066 800 667 533 DIMMs High resolution graphics via Nvidia on board Gfx or PCI Express x16 slot Serial ATA USB 2 0 and 8 channel audio feature the system and take you ahead in the world of power computing 1 2 Front panel The front panel includes the optical drive bays floppy disk...

Page 13: ...SB 2 0 devices such as a mouse printer scanner camera PDA and others 7 Microphone port This Mic pink port connects a microphone 8 Headphone port This Line In green port connects a headphone with a stereo mini plug This V series provide V2 V3 two types of front panel for users to choose please refer to your product package for the front panel type you purchased PCI Express Graphics Slot supports mo...

Page 14: ...the section Voltage selector on page 1 6 before adjusting this switch 2 Power connector This connector is for the power cable and plug 3 Power supply unit fan vent This vent is for the PSU fan that provides ventilation inside the power supply unit 4 Power Switch This switch is for switching on off the power supply unit Do NOT cover the rear vent and the ambience temperature is limited up to 35o C ...

Page 15: ...ual display output support This table indicates that whether the following dual display outputs are supported for your motherboard Dual display outputs Supported Not supported DVI D Sub DVI HDMI HDMI D Sub During POST only the monitor connected to the D Sub port has display The dual display function works only under Windows Playback of HD DVD and Blu Ray Discs For better playback quality we recomm...

Page 16: ...port connects a headphone or a speaker In 4 channel and 6 channel configuration the function of this port becomes Front Speaker Out 17 Line In port light blue This port connects the tape CD DVD player or other audio sources 18 Rear Speaker Out port black This port connects the rear speakers in a 4 channel 6 channel or 8 channel audio configuration 19 Center Subwoofer port orange This port connects...

Page 17: ...ropriate system input voltage according to the voltage supply in your area If the voltage supply in your area is 100 127 V set this switch to 115 V If the voltage supply in your area is 200 240 V set this switch to 230 V Setting the switch to 115V in a 230V environment or 230V in a 115V environment will seriously damage the system 115V 230V Voltage selector ...

Page 18: ...nents are labeled for your reference Proceed to Chapter 2 for instructions on installing additional system components 1 Front panel cover 2 5 25 inch optical drive bays 3 Floppy disk drive bay 4 Hard disk drive bay 5 Power supply unit 6 CPU socket 7 DIMM sockets 8 ASUS motherboard 9 PCI Express x1 slot 10 PCI Express x16 slot 11 PCI slots 12 Metal bracket lock R R 2 1 3 5 4 7 6 8 9 10 11 12 ...

Page 19: ...R R Chapter 2 Basic installation This chapter provides step by step instructions on how to install components in the system ...

Page 20: ... mode and not powered OFF Unplug the power cable from the power outlet and make sure that the standby power LED is OFF before installing any system component Use a grounded wrist strap or touch a safely grounded object or a metal object such as the power supply case before handling components to avoid damaging them due to static electricity Hold components by the edges to avoid touching the ICs on...

Page 21: ...hooks disengage from the chassis tab holes Set the side cover aside 3 Locate the front panel assembly hooks then lift them until they disengage from the chassis 4 Swing the front panel assembly to the right until the hinge like tabs on the right side of the assembly are exposed 5 Remove the front panel assembly then set aside 1 1 2 2 4 3 4 4 3 3 Chassis tab holes Air duct 4 ...

Page 22: ... Processing Unit CPU The motherboard comes with a 940 pin AM2 socket designed for the AMD Athlon 64 X2 Athlon 64 Sempron processor Socket lever R CPU Socket AM2 The AM2 socket has a different pinout from the 940 pin socket designed for the AMD Opteron processor Make sure you use a CPU is designed for the AM2 socket The CPU fits in only one correct orientation DO NOT force the CPU into the socket t...

Page 23: ...fully insert the CPU into the socket until it fits in place 5 When the CPU is in place push down the socket lever to secure the CPU The lever clicks on the side tab to indicate that it is locked 6 Install a CPU heatsink and fan following the instructions that came with the heatsink package Please make sure your CPU is fully plugged in to reduce abnormal symptom ...

Page 24: ...ave to remove the retention module base when installing the CPU or installing other motherboard components If you purchased a separate CPU heatsink and fan assembly make sure that a Thermal Interface Material is properly applied to the CPU heatsink or CPU before you install the heatsink and fan assembly Your boxed CPU heatsink and fan assembly should come with installation instructions for the CPU...

Page 25: ... fan and heatsink assembly perfectly fits the retention mechanism module base otherwise you cannot snap the retention bracket in place 4 Push down the retention bracket lock on the retention mechanism to secure the heatsink and fan to the module base 5 When the fan and heatsink assembly is in place connect the CPU fan cable to the connector on the motherboard labeled CPU_FAN Do not forget to conne...

Page 26: ...nd DIMM A2 Channel B DIMM_B1 and DIMM B2 R 240 pin DDR2 DIMM Sockets DIMM_B1 DIMM_A2 DIMM_B2 DIMM_A1 128 Pins 112 Pins 2 5 1 Memory configurations You may install 256 MB 512 MB 1 GB and 2 GB unbuffered ECC and non ECC DDR2 DIMMs into the DIMM sockets Recommended Memory Configurations Mode Sockets DIMM_A1 DIMM_B1 DIMM_A2 DIMM_B2 Single Channel Populated Populated Dual channel 1 Populated Populated ...

Page 27: ...stalled in any of the slots In other cases the 1066 MHz memory modules can only run at 800 MHz Always use identical DDR2 DIMM pairs for dual channel mode For optimum compatibility we recommend that you obtain memory modules from the same vendor If you are using a Windows 32 bit version operating system e g 32 bit Windows 32 bit Vista the system will allocate a certain amount of memory space for sy...

Page 28: ...S A3R1GE3CFF734MAA0J 512MB Nanya NT512T64U88A1BY 3C N A Nanya SS NT5TU64M8AE 3C 1G Kingtiger E0736001024667 N A Kingtiger DS KTG667PS6408NST C6 GDBTX 1G Kingston KHX6400D2LL 1G N A Kingston DS Heat Sink Package 1G Samsung KR M378T2953CZ3 CE7 N A Samsung DS K4T51083QC ZCE7 1G Samsung KR M391T2953CZ3 CE7 N A Samsung DS K4T51083QC ZCE7 ECC 512MB Qimonda HYS64T64000EU 2 5 B2 6 Qimonda SS HYB18T512800B...

Page 29: ...500C5 N A Corsair DS Heat Sink Package 1G Corsair CM2X1024 8500C5D 5 Corsair DS Heat Sink Package 512MB ADATA M2OMIDG3H3160INC5Z 5 ADATA SS Heat Sink Package 1G ADATA M2OMIDG314720INC5Z 5 ADATA DS Heat Sink Package 1G OCZ OCZ2N10662GK N A OCZ DS Heat Sink Package 1G GEIL M016E2864T2AGXAKT7G330520 5 Micron DS 7KD22D9GMH Size Vendor Model CL Brand SS DS Component DIMM support A B C 1G HY HYMP512U64A...

Page 30: ...ning clips snap back in place and the DIMM is properly seated 1 Unlock a DDR2 DIMM socket by pressing the retaining clips outward 2 Align a DIMM on the socket such that the notch on the DIMM matches the break on the socket Locked Retaining Clip Make sure to unplug the power supply before adding or removing DIMMs or other system components Failure to do so may cause severe damage to both the mother...

Page 31: ...y until the card is completely seated on the slot 5 Secure the card to the chassis with the screw you removed earlier 6 Replace the system cover Make sure to unplug the power cord before adding or removing expansion cards Failure to do so may cause you physical injury and damage motherboard components 2 6 2 Configuring an expansion card After installing the expansion card configure it by adjusting...

Page 32: ...15 Slave IDE When using PCI cards on shared slots ensure that the drivers support Share IRQ or that the cards do not need IRQ assignments Otherwise conflicts will arise between the two PCI groups making the system unstable and the card inoperable LNKA LNKB LN0A LN2A LATA UB12 UB11 LUB2 LUB0 LPMU LSMB LMAC LSA0 LAZA SGRU PCI slot1 shared PCI slot2 shared PCI EX1 Slot shared PCI EX16 slot shared Onb...

Page 33: ...CI Express x1 slot This motherboard supports PCI Express x1 network cards SCSI cards and other cards that comply with the PCI Express specifications The figure shows a network card installed on the PCI Express x1 slot 2 6 5 PCI Express x16 slot This motherboard supports PCI Express x16 graphic cards that comply with the PCI Express specifications The figure shows a graphics card installed on the P...

Page 34: ...oles align with the holes on the bay as shown 4 Secure the optical drive with two screws on both sides of the bay IDE ribbon cable Power cable 5 Connect a power cable from the power supply to the power connector at the back of the optical drive 6 Connect one end of the IDE ribbon cable to the IDE interface at the back of the optical drive matching the red stripe on the cable with Pin 1 on the IDE ...

Page 35: ...rive slot the lowest 3 5 inch drive slot without the metal plate cover 3 Connect one end of the Serial ATA cable to the SATA connector at the back of the drive then connect the other end to a Serial ATA connector on the motherboard See page 4 7 for the location of the Serial ATA connectors If you do not need to install the optional card reader into your system you can install the HDD in the one of...

Page 36: ...ur Serial ATA HDD has both 4 pin and 15 pin connectors at the back use either the 15 pin SATA power adapter plug OR the legacy 4 pin power connector DO NOT use both to prevent damage to components and to keep the system from becoming unstable To install an IDE hard disk drive 1 Follow steps 1 2 of the previous section 2 Connect the blue interface of the IDE ribbon cable to the primary IDE connecto...

Page 37: ...f you will install only one hard disk drive make sure to configure your hard disk drive as Master device before connecting the IDE cable and power plug Refer to the HDD documentation on how to set the drive as a Master device If you will install two IDE hard disk drives configure the other device as Slave 2 9 Installing the card reader An optional card reader module see the figure below is availab...

Page 38: ...y insert the card reader module into the 3 5 inch bay until the screw holes align with the holes on the bay 3 Secure the card reader module with two screws on both sides 4 Connect the USB cable of the card reader to the USB connector on the motherboard remove the metal plate cover and install the card reader module here ...

Page 39: ...cure the floppy disk drive with two screws on both sides 4 Connect the floppy disk drive signal cable to the signal connector at the back of the drive 5 Connect the other end of the signal cable to the floppy disk drive connector on the motherboard See page 4 5 for the location of the floppy disk drive connector 6 Connect a 4 pin power cable from the power supply unit to the power connector at the...

Page 40: ...fore you replace the chassis cover LED cables Connect the reset button power switch power LED and HD LED cables to their respective leads in the system panel connector on the motherboard HDD LED Power LED Power Switch Reset button I R System Panel Connector PANEL PLED 5V Speaker SPEAKER PLED Ground Reset Reset Ground Ground PLED IDE_LED IDE_LED IDE_LED PWR Ground PWRSW ...

Page 41: ...To reinstall the front panel assembly and side cover 1 Insert the front panel assembly hinge like tabs to the holes on the right side of the chassis 2 Swing the front panel assembly to the left then insert the hooks to the chassis until the front panel assembly fits in place 3 Insert the six side cover hooks into the chassis tab holes 4 Push the side cover to the direction of the front panel until...

Page 42: ...2 24 Chapter 2 Basic installation ...

Page 43: ...R R Chapter 3 Starting up This chapter helps you power up the system and install drivers and utilities from the support DVD ...

Page 44: ...r the OS Press to turn ON the system Because motherboard settings and hardware options vary use the setup procedures presented in this chapter for general reference only Refer to your OS documentation for more information Windows XP OS setup cannot recognize Serial ATA hard drives without the necessary drivers Use the bundled floppy disk when installing Windows XP OS to a Serial ATA hard drive Fro...

Page 45: ...menu if Autorun is enabled in your computer Screen display and options may not be the same for different operating system versions The contents of the support DVD are subject to change at any time without notice Visit the ASUS website for updates If Autorun is NOT enabled in your computer browse the contents of the support DVD DVD to locate the file ASSETUP EXE from the BIN folder Double click the...

Page 46: ...s Launches the ASUS InstallAll driver installation wizard Norton Internet Security 2008 Installs the Norton Internet Security 2008 softwawre to protect your PC from the latest online threads AMD Cool n Quiet Driver Installs the AMD Cool n Quiet driver NVIDIA nForce Chipset Driver Installs the NVIDIA nForce Chipset driver VIA Audio Driver Installs the VIA Audio driver Nvidia HDMI Driver Program Ins...

Page 47: ... Launches the ASUS InstallAll utilities installation wizard ASUS Update The ASUS Update utility allows you to update the motherboard BIOS in a Windows environment This utility requires an Internet connection either through a network or an Internet Service Provider ISP ASUS AI Manager Installs the ASUS AI Manager Click to display the next screen Click to display the previous screen ...

Page 48: ... games in your computer Visit the Microsoft website www microsoft com for updates Corel MediaOne Starter Installs the Corel MediaOne Starter to easily manage edit share and protect your multimedia data CyberLink PowerBackup Installs the CyberLink PowerBackup that allows you to backup or restore your data easily WinZip 11 Installs the WinZip 11 software for file compression and protection Ulead Bur...

Page 49: ...llows you to create an NVIDIA 32 bit 64 bit XP Serial ATA SATA RAID driver disk for Windows XP Operating System OS NVIDIA Vista 32bit 64bit SATA RAID Driver Allows you to create an NVIDIA 32 bit 64 bit Serial ATA SATA RAID driver disk for Windows Vista Operating System OS Click to display the next screen Click to display the previous screen ...

Page 50: ...ader from the Utilities menu before opening a user manual file NVIDIA 32bit 64bit XP AHCI Driver Allows you to create an NVIDIA 32 bit 64 bit AHCI driver disk for Windows XP Operating System OS NVIDIA 32bit 64bit Vista AHCI Driver Allows you to create an NVIDIA 32 bit 64 bit AHCI driver disk for Windows Vista Operating System OS JMicron JMB36X 32bit 64bit RAID AHCI Driver Allows you to create a JM...

Page 51: ...3 9 ASUS V2 V3 M3N8200 3 3 6 ASUS Contact information Click the Contact tab to display the ASUS contact information You can also find this information on the inside front cover of this user guide ...

Page 52: ...3 10 Chapter 3 Starting up ...

Page 53: ...Chapter 4 Motherboard introduction This chapter gives information about he motherboard that comes with the system This chapter includes the motherboard layout jumper settings and connector locations R R ...

Page 54: ...I O SATA5 SATA4 SATA3 SATA2 SATA1 Socket AM2 CPU_FAN EATXPWR PRI_IDE COM1 PANEL USB1112 USB78 USB910 AAFP SB_PWR 8Mb BIOS Nvidia MCP78S DDR2 DIMM_A1 64 bit 240 pin module DDR2 DIMM_B1 64 bit 240 pin module DDR2 DIMM_A2 64 bit 240 pin module DDR2 DIMM_B2 64 bit 240 pin module CR2032 3V Lithium Cell CMOS Power PCI2 PCI1 PCIEX16 PCIEX1_1 VT1708B Realtek 8211CL GR CLRTC R SPDIF_OUT LPT KB_USB56 VGA_DV...

Page 55: ...pins 2 3 Keep the cap on pins 2 3 for about 5 10 seconds then move the cap back to pins 1 2 4 Re install the battery 5 Plug the power cord and turn ON the computer 6 Hold down the Del key during the boot process and enter BIOS setup to re enter data Except when clearing the RTC RAM never remove the cap on CLRTC jumper default position Removing the cap will cause system boot failure You do not need...

Page 56: ... Disk Drive signal cable is purchased separately 2 TPM connector 20 1 pin TPM This connector supports a Trusted Platform Module TPM system which can securely store keys digital certificates passwords and data A TPM system also helps enhance network security protects digital identities and ensures platform integrity R Floppy Disk Drive Connector NOTE Orient the red markings on the floppy ribbon cab...

Page 57: ...each Ultra DMA 133 100 66 signal cable blue black and gray Connect the blue connector to the motherboard s IDE connector then select one of the following modes to configure your device s Pin 20 on the IDE connector is removed to match the covered hole on the Ultra DMA cable connector This prevents incorrect insertion when you connect the IDE cable Use the 80 conductor IDE cable for Ultra DMA 133 1...

Page 58: ... the Windows XP Service Pack 1 before using Serial ATA For detailed instructions on how to configure RAID 0 RAID 1 RAID 5 and RAID 0 1 and JBOD refer to the RAID manual in the support DVD If you intend to create a Serial ATA RAID set using these connectors set the SATA Mode select item in the BIOS to RAID Mode See the page 2 18 for details Due to the chipset limitation SATA 4 and SATA 5 do not sup...

Page 59: ...nal Sony Philips Digital Interface S PDIF port s Connect the S PDIF module cable to this connector then install the module to a slot opening at the back of the system chassis Only CPU Fan and Chassis Fan support Q Fan The S PDIF module is purchased separately Do not forget to connect the fan cables to the fan connectors Insufficient air flow inside the system may damage the motherboard components ...

Page 60: ...4 cable to the USB connectors Doing so will damage the motherboard 8 Optical drive audio in connector 4 pin CD These connectors allow you to receive stereo audio input from sound sources such as a CD ROM TV tuner or MPEG card The USB 2 0 module is purchased separately R USB 2 0 Connectors USB78 USB 5V USB_P8 USB_P8 GND NC USB 5V USB_P7 USB_P7 GND 1 USB910 USB 5V USB_P10 USB_P10 GND NC USB 5V USB_P...

Page 61: ...nect a high definition front panel audio module to this connector to avail of the motherboard high definition audio capability If you want to connect a high definition front panel audio module to this connector ensure that the Front Panel Type item in the BIOS is set to HD Audio if you want to connect an AC 97 front panel audio module to this connector set the item to AC97 See page 2 29 for detail...

Page 62: ...ed as a chassis intrusion event By default the pin labeled Chassis Signal and Ground are shorted with a jumper cap Remove the jumper caps only when you intend to use the chassis intrusion detection feature 12 LPT connector The LPT Line Printing Terminal connector supports devices such as a printer LPT standardizes as IEEE 1284 which is the parallel port interface on IBM PC compatible computers R P...

Page 63: ...ot boot up if the power is inadequate Do not forget to connect the 4 pin ATX 12 V power plug Otherwise the system will not boot up We recommend that you use a PSU with higher power output when configuring a system with more power consuming devices The system may become unstable or may not boot up if the power is inadequate If you are uncertain about the minimum power supply requirement for your sy...

Page 64: ... or written to the HDD System warning speaker 4 pin SPEAKER This 4 pin connector is for the chassis mounted system warning speaker The speaker allows you to hear system beeps and warnings Power Soft off button 2 pin PWRSW This 2 pin connector is for the system power button Pressing the power button turns the system ON or puts the system in SLEEP or SOFT OFF mode depending on the BIOS settings Pres...

Page 65: ...R R Chapter 5 BIOS setup This chapter tells how to change system settings through the BIOS Setup menus and describes the BIOS parameters ...

Page 66: ... on these utilities Save a copy of the original motherboard BIOS file to a bootable floppy disk in case you need to restore the BIOS in the future Copy the original motherboard BIOS using the ASUS Update or AFUDOS utilities 2 1 1 Creating a bootable floppy disk 1 Do either one of the following to create a bootable floppy disk DOS environment a Insert a 1 44MB floppy disk into the drive b At the DO...

Page 67: ...ppy disk drive b Click from the Windows desktop then select Computer c Right click Floppy Disk Drive then click Format to display the Format 3 1 2 Floppy dialog box d Select the Create an MS DOS startup disk check box e Click Start 2 Copy the original or the latest motherboard BIOS file to the bootable floppy disk ...

Page 68: ...nter to enable it You can switch between drives by pressing Tab before the correct file is found Then press Enter 4 When the correct BIOS file is found EZ Flash 2 performs the BIOS update process and automatically reboots the system when done 1 Insert the floppy disk USB flash disk that contains the BIOS file to the floppy disk drive or the USB port Press Alt F2 during POST to display the followin...

Page 69: ...e then at the prompt type afudos o filename where the filename is any user assigned filename not more than eight alphanumeric characters for the main filename and three alphanumeric characters for the extension name A afudos oOLDBIOS1 rom Ensure that the floppy disk is not write protected and has at least 1024KB free space to save the file The succeeding BIOS screens are for reference only The act...

Page 70: ...ase restart your computer A 2 Copy the AFUDOS utility afudos exe from the motherboard support DVD to the bootable floppy disk you created earlier 3 Boot the system in DOS mode then at the prompt type afudos i filename where filename is the latest or the original BIOS file on the bootable floppy disk A afudos iM3N8200 ROM Write the BIOS filename on a piece of paper You need to type the exact BIOS f...

Page 71: ...SB flash disk to M3N8200 ROM Recovering the BIOS from a floppy disk To recover the BIOS from a floppy disk 1 Turn on the system 2 Insert the floppy disk with the original or updated BIOS file to the floppy disk drive 3 The utility displays the following message and automatically checks the floppy disk for the original or updated BIOS file Bad BIOS checksum Starting BIOS recovery Checking for flopp...

Page 72: ...tarting BIOS recovery Checking for floppy 4 Restart the system after the utility completes the updating process The recovered BIOS may not be the latest BIOS version for this motherboard Visit the ASUS website www asus com to download the latest BIOS file Only the USB flash disk with FAT 32 16 format and single partition can support ASUS CrashFree BIOS 3 The device size should be smaller than 8GB ...

Page 73: ...anage save and update the motherboard BIOS in Windows environment The ASUS Update utility allows you to Save the current BIOS file Download the latest BIOS file from the Internet Update the BIOS from an updated BIOS file Update the BIOS directly from the Internet and View the BIOS version information This utility is available in the support DVD that comes with the motherboard package ASUS Update r...

Page 74: ... Next Updating the BIOS through the Internet To update the BIOS through the Internet 1 Launch the ASUS Update utility from the Windows desktop by clicking Start Programs ASUS ASUSUpdate ASUSUpdate The ASUS Update main window appears 2 Select Update BIOS from the Internet option from the drop down menu then click Next ...

Page 75: ...rom a file option from the drop down menu then click Next 3 Locate the BIOS file from the Open window then click Open 4 Follow the screen instructions to complete the update process 4 From the FTP site select the BIOS version that you wish to download Click Next 5 Follow the screen instructions to complete the update process The ASUS Update utility is capable of updating itself through the Interne...

Page 76: ...If you wish to enter Setup after POST reboot the system by doing any of the following procedures Restart using the OS standard shut down procedure Press Ctrl Alt Del simultaneously Press the reset button on the system chassis Press the power button to turn the system off then back on The default BIOS settings for this motherboard apply for most conditions to ensure optimum performance If the syste...

Page 77: ... Power For changing the advanced power management APM configuration Boot For changing the system boot configuration Tools For setting EZ Flash 2 Exit For selecting the exit options and loading default settings To select an item on the menu bar press the right or left arrow key on the keyboard until the desired item is highlighted Use ENTER TAB or SHIFT TAB to select a field Use or to configure sys...

Page 78: ...n is a brief description of the selected item Some of the navigation keys differ from one screen to another 5 2 7 Pop up window Select a menu item then press Enter to display a pop up window with the configuration options for that item 5 2 8 Scroll bar A scroll bar appears on the right side of a menu screen when there are items that do not fit on the screen Press the Up Down arrow keys or Page Up ...

Page 79: ...to set the system date 5 3 3 Legacy Diskette A 1 44M 3 5 in Sets the type of floppy drive installed Configuration options Disabled 360K 5 25 in 1 2M 5 25 in 720K 3 5 in 1 44M 3 5 in 2 88M 3 5 in System Time 03 30 50 System Date Mon 09 09 2008 Legacy Diskette A 1 44M 3 5 in Primary IDE Master Not Detected Primary IDE Slave Not Detected SATA1 ST380011AS SATA2 Not Detected SATA3 Not Detected ESATA No...

Page 80: ...Async DMA Ultra DMA and SMART monitoring These values are not user configurable These items show N A if no IDE device is installed in the system Type Auto Selects the type of IDE drive Setting to Auto allows automatic selection of the appropriate IDE device type Select CDROM if you are specifically configuring a CD ROM drive Select ARMD ATAPI Removable Media Device if your device is either a ZIP L...

Page 81: ...Auto PIO Mode Auto Selects the PIO mode Configuration options Auto 0 1 2 3 4 DMA Mode Auto Selects the DMA mode Configuration options Auto SMART Monitoring Auto Enables or disables the S M A R T Self Monitoring and Reporting Technology capability of your hard drive This features allows your system to report read write errors of the hard drive and to issue warnings when a third party hardware monit...

Page 82: ...ler Enabled SATA Mode select SATA Mode Onboard PCI IDE Controller Enabled Allows you to enable or disable the onboard PCI IDE controller Configuration options Enabled Disabled OnChip S ATA Controller Enabled Allows you to disable or set the OnChip S ATA devices Configuration options Enabled Disabled SATA Mode select SATA Mode Allows you to select the SATA Mode Configuration options SATA Mode RAID ...

Page 83: ...s the items in this menu AMIBIOS Version 0303 Build Date 07 18 08 Processor Type AMD Sempron tm Processor 3200 Speed 1800MHz Count 1 System Memory Installed Size 1024MB Usable Size 896MB AMI BIOS Displays the auto detected BIOS information Processor Displays the auto detected CPU specification System Memory Displays the auto detected system memory ...

Page 84: ...SB Configuration Trusted Computing Adjust System Frequency Voltage etc 5 4 1 JumperFree Configuration Configure System Frequency Voltage AI Overclocking Auto CPU Over Voltage Auto VDDNB Over Voltage Auto Memory Over Voltage Auto Select the target CPU frequency and the relevant parameters will be auto adjusted Frequencies higher than CPU manufacturer recommmends are not guaranteed to be stable If t...

Page 85: ...E Configuration options Min 100 Max 150 The following item appear only when the CPU Overclocking item is set to Manual The following item appears only when the CPU Overclocking item is set to Overclock Profile Overclock Options Auto Allows you to select the overclock options Configuration options Auto Overclock 3 Overclock 5 Overclock 7 Test mode CPU Over Voltage Auto Allows you to adjust the CPU ...

Page 86: ...ual Machine mode Configuration options Disabled Enabled Cool n Quiet Enabled Allows you to enable or disable the generation of ACPI_PPC _PSS and _PCT objects Configuration options Disabled Enabled This option should remain disabled for the normal operation The driver developer may enable it for testing purpose CPU Configuration Module Version 13 20 AGESA Version 3 1 8 0 Physical Count 1 Logical Co...

Page 87: ...ipset menu allows you to change the advanced chipset settings Select an item then press Enter to display the sub menu Advanced Chipset Setting WARNING Setting wrong values in below sections may cause system to malfunction NorthBridge Configuration Southbridge Configuration Hyper Transport Configuration Options for NB v02 61 C Copyright 1985 2008 American Megatrends Inc ...

Page 88: ...abled Address bits 6 Address bits 12 XOR of Address bits 20 16 6 XOR of Address bits 20 16 9 Enable Clock to All DIMMs Disabled Enables or disables clock to all DIMMs Configuration options Disabled Enabled MemClk Tristate C3 ALTVID Disabled Enables or disables the MemClk Tristate C3 ALTVID Configuration options Disabled Enabled Memory Hole Remapping Enabled Enables or disables the memory remapping...

Page 89: ...S Latency Auto Allows you to set CAS latency Configuration options Auto 3 CLK 4 CLK 5 CLK 6 CLK 7 CLK DH_Only TRCD Auto Allows you to set TRCD Configuration options 3 CLK 4 CLK 5 CLK 6 CLK Auto TRP Auto Allows you to set TRP Configuration options 3 CLK 4 CLK 5 CLK 6 CLK Auto tRTP Auto Allows you to specify the read CAS to percharge time Configuration options Auto 2 4 CLK 3 5 CLK DRAM Timing Config...

Page 90: ...tions 2 CLK 3 CLK 4 CLK 5 CLK Auto tRWTTO Auto Allows you to set tRWTTO Configuration options Auto 2 CLK 3 CLK 4 CLK 5 CLK 6 CLK 7 CLK 8 CLK 9 CLK tWRRD Auto Allows you to specify the write to read delay when accessing different DRAMs Configuration options Auto 0 CLK 1 CLK 2 CLK 3 CLK tWTR Auto Allows you to specify the write to read delay when accessing the same DRAM Configuration options 1 CLK 2...

Page 91: ... BG Scrub Disabled Disables or sets the DRAM BG Scrub Configuration options Disabled 40ns 80ns 160ns 320ns 640ns 1 28us 2 56us 5 12us 10 2us 20 5us 41 0us 81 9us 163 8us 327 7us 655 4us 1 31ms 2 62ms 5 24ms 10 49ms 20 97ms 42 00ms 84 00ms Data L2 L3 Cache BG Scrub Disabled Disables or sets the Data L2 L3 Cache BG Scrub This item allows the cache RAM to be corrected when idle Configuration options ...

Page 92: ...Configuration options Disabled Internal codec External codec Internal codec External codec Front Panel Select HD Audio Allows you to set HD Audio mode Configuration options HD Audio SPDIF Mode Setting SPDIF Output Allows you to select SPDIF mode Configuration options HDMI Output SPDIF Output Onboard LAN Enabled Allows you to set or disable the Onboard LAN Configuration options Enabled Disabled Sou...

Page 93: ...B to K8 CPU Freq Auto Enabled SouthBridge to K8 CPU frequency selection by CPU capability SB to K8 CPU Freq Auto Enabled Allows you to enable or disable auto selection of SouthBridge frequency to K8 CPU Configuration options Disabled Enabled The following items appear only when the SB to K8 CPU Freq Auto item to Disabled SB to K8 CPU Frequency 1000MHz Allows you to select the frequency of the Sout...

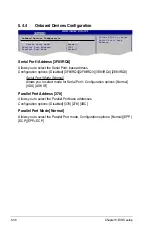
Page 94: ...e address Configuration options Disabled 3F8 IRQ4 2F8 IRQ3 3E8 IRQ4 2E8 IRQ3 Serial Port1 Mode Normal Allows you to select mode for Serial Port1 Configuration options Normal IrDA ASK IR Parallel Port Address 378 Allows you to select the Parallel Port base addresses Configuration options Disabled 378 278 3BC Parallel Port Mode Normal Allows you to select the Parallel Port mode Configuration options...

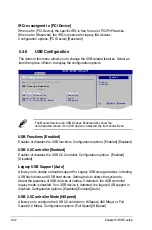
Page 95: ... No BIOS configures all the devices in the system When set to Yes and if you install a Plug and Play operating system the operating system configures the Plug and Play devices not required for boot Configuration options No Yes PCI Latency Timer 64 Allows you to select the value in units of PCI clocks for the PCI device latency timer register Configuration options 32 64 96 128 160 192 224 248 Alloc...

Page 96: ...nce of USB devices at startup If detected the USB controller legacy mode is enabled If no USB device is detected the legacy USB support is disabled Configuration options Disabled Enabled Auto USB 2 0 Controller Mode HiSpeed Allows you to configure the USB 2 0 controller in HiSpeed 480 Mbps or Full Speed 12 Mbps Configuration options Full Speed HiSpeed The Module Version and USB Devices Enabled ite...

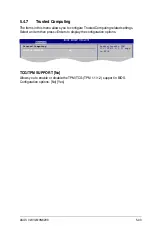
Page 97: ...d Computing related settings Select an item then press Enter to display the configuration options Trusted Computing TCG TPM SUPPORT No Enable Disable TPM TCG TPM 1 1 1 2 supp in BIOS TCG TPM SUPPORT No Allows you to enable or disable the TPM TCG TPM 1 1 1 2 support in BIOS Configuration options No Yes ...

Page 98: ...end to RAM sleep state default In S3 sleep state the system appears to be off and consumes less power than in the S1 state When signaled by a wake up device or event the system resumes to its working state exactly where it was left off Auto Detected by OS 5 5 2 ACPI 2 0 Support Disabled Allows you to add additional tables as per Advanced Configuration and Power Interface ACPI 2 0 specifications Co...

Page 99: ...u to enable or disable PCI PCIE Onboard LAN devices to generate a wake event Configuration options Disabled Enabled Power On By Ring Disabled Allows you to enable or disable RI to generate a wake event Configuration options Disabled Enabled Power On By PS 2 KB MS Disabled Allows you to enable or disable PS 2 Keyboard Mouse to generate a wake event Configuration options Disabled Enabled Power On By...

Page 100: ...M If the fan is not connected to the motherboard the field shows N A Select Ignored if you do not wish to display the detected speed Chassis Power Fan Speed xxxxRPM or N A or Ignored The onboard hardware monitor automatically detects and displays the chassis power fan speed in rotations per minute RPM If the fan is not connected to the chassis the specific field shows N A Select Ignored if you do ...

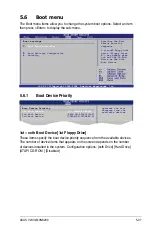
Page 101: ...Change Option F1 General Help F10 Save and Exit ESC Exit 5 6 1 Boot Device Priority Boot Device Priority 1st Boot Device 1st FLOPPY DRIVE 2nd Boot Device SATA 3M ST380011AS 3rd Boot Device CDROM PS PIONEER D 1st xxth Boot Device 1st Floppy Drive These items specify the boot device priority sequence from the available devices The number of device items that appears on the screen depends on the numb...

Page 102: ...ystem When set to Disabled BIOS performs all the POST items Configuration options Disabled Enabled Full Screen Logo Enabled This allows you to enable or disable the full screen logo display feature Configuration options Disabled Enabled Add On ROM Display Mode Force BIOS Sets the display mode for option ROM Configuration options Force BIOS Keep Current Bootup Num Lock On Allows you to select the p...

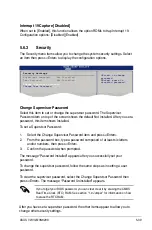
Page 103: ...er to change password Enter again to disabled password Change Supervisor Password Select this item to set or change the supervisor password The Supervisor Password item on top of the screen shows the default Not Installed After you set a password this item shows Installed To set a Supervisor Password 1 Select the Change Supervisor Password item and press Enter 2 From the password box type a passwo...

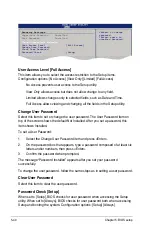
Page 104: ...he password box that appears type a password composed of at least six letters and or numbers then press Enter 3 Confirm the password when prompted The message Password Installed appears after you set your password successfully To change the user password follow the same steps as in setting a user password Clear User Password Select this item to clear the user password Password Check Setup When set...

Page 105: ... your choice ASUSTek EZ Flash 2 BIOS ROM Utility V3 21 Current ROM Update ROM A Note Enter Select or Load Tab Switch V Drive Info Up Down Home End Move B Backup Esc Exit FLASH TYPE MXIC 25L8005 PATH A BOARD M3N78 VM V M3N8200 VER 0303 H 00 B 00 DATE 07 18 2008 BOARD Unknown VER Unknown DATE Unknown Press ENTER to run the utility to select and update BIOS This utility doesn t support 1 NTFS format ...

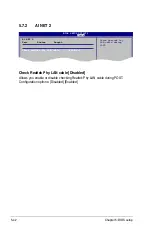
Page 106: ...tus Length Check Realtek Phy LAN cable Disabled Check Realtek Phy LAN cable during POST BIOS SETUP UTILITY Tools Check Realtek Phy LAN cable Disabled Allows you enable or disable checking Realtek Phy LAN cable during POST Configuration options Disabled Enabled ...

Page 107: ...ile RAM Exit Save Changes Once you are finished making your selections choose this option from the Exit menu to ensure the values you selected are saved to the CMOS RAM An onboard backup battery sustains the CMOS RAM so it stays on even when the PC is turned off When you select this option a confirmation window appears Select OK to save changes and exit 5 8 Exit menu Pressing Esc does not immediat...

Page 108: ...5 44 Chapter 5 BIOS setup ...

Reviews: