background image

82

Chapter 5: BIOS Information

General Help

In addition to the Item Specific Help window, the BIOS setup program
also provides a General Help screen. This screen can be called up
from any menu by simply pressing <F1> or the <Alt> + <H>
combination. The General Help screen lists the legend keys with their
corresponding alternates and functions.

Saving Changes and Exiting the Setup Program

See 5.8 Exit Menu for detailed information on saving changes and
exiting the setup program.

Scroll Bar

When a scroll bar appears to the right of a help window, it indicates
that there is more information to be displayed that will not fit in the
window. Use <PgUp> and <PgDn> or the up and down arrow keys to
scroll through the entire help document. Press <Home> to display
the first page, press <End> to go to the last page. To exit the help
window, press <Enter> or <Esc>.

Sub-Menu

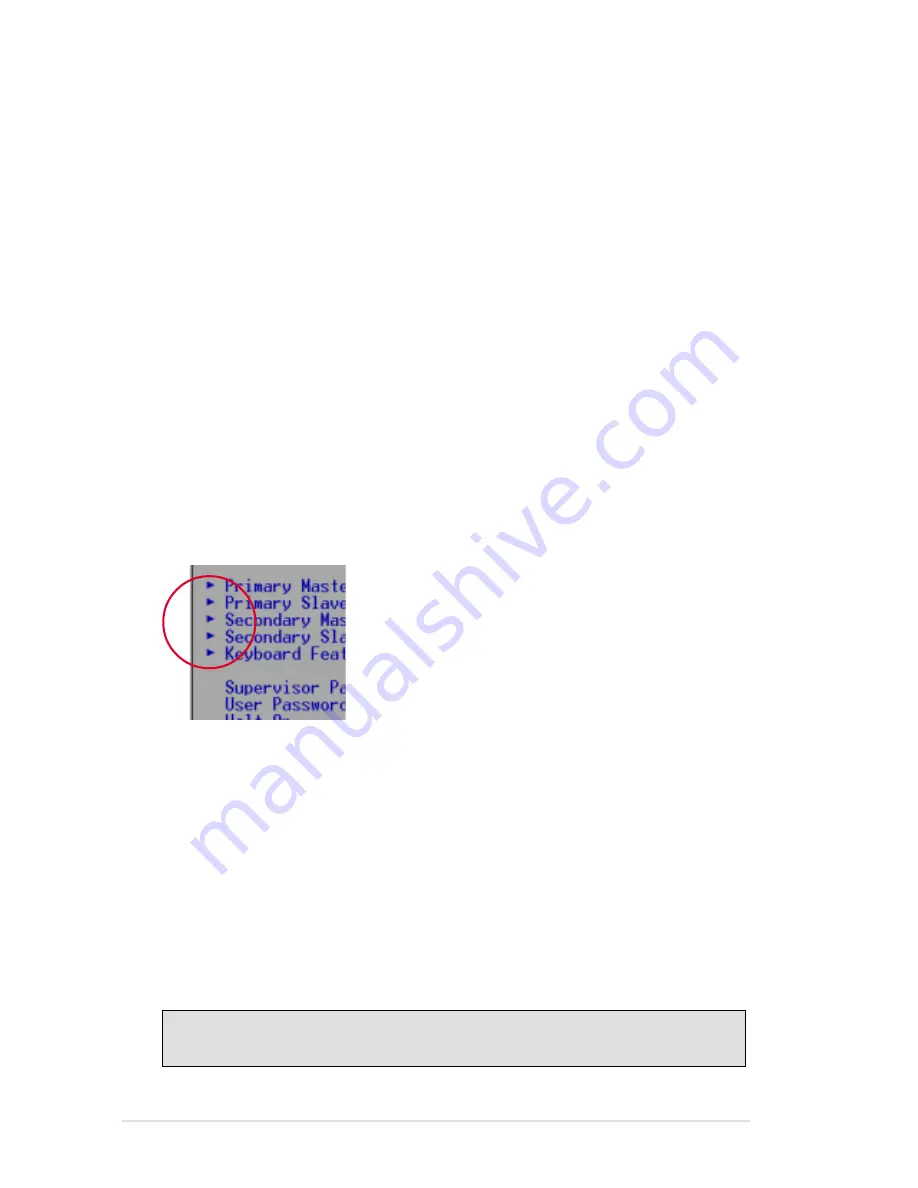
Note that a right pointer symbol (as shown on
the left ) appears to the left of certain fields.
This pointer indicates that you can launch a
sub-menu from this field. A sub-menu contains
additional options for a field parameter. To
display a sub-menu, simply move the highlight
to the field and press <Enter>. Use the legend

keys to enter values or move from field to field within a sub-menu just
as you would within a menu. Use the <Esc> key to return to the main
menu.

Take some time to familiarize yourself with each of the legend keys
and their corresponding functions. Practice navigating through the
various menus and sub-menus. If you accidentally make unwanted
changes to any of the fields, use the set default hot key <F5>. While
moving around through the Setup program, note that explanations
appear in the Item Specific Help window located to the right of each
menu. This window displays the help text for the currently highlighted
field.

NOTE: The item heading in square brackets represents the default
setting for that field.

Summary of Contents for Terminator K7

Page 1: ...Barebone System Terminator K7 User s Guide ...

Page 2: ...horized in writing by ASUS or 2 the serial number of the product is defaced or missing Products and corporate names appearing in this manual may or may not be registered trademarks or copyrights of their respective companies and are used only for identification or explanation and to the owners benefit without intent to infringe The product name and revision number are both printed on the product i...

Page 3: ...merica Marketing Address 6737 Mowry Avenue Mowry Business Center Building 2 Newark CA 94560 USA Fax 1 510 608 4555 Email info usa asus com tw Technical Support Fax 1 510 608 4555 BBS 1 510 739 3774 Email tsd asus com WWW www asus com FTP ftp asus com tw pub ASUS ASUS COMPUTER GmbH Europe Marketing Address Harkortstr 25 40880 Ratingen BRD Germany Fax 49 2102 442066 Email sales asuscom de for market...

Page 4: ...s cause harmful interference to radio or television reception which can be determined by turning the equipment off and on the user is encouraged to try to correct the interference by one or more of the following measures Reorient or relocate the receiving antenna Increase the separation between the equipment and receiver Connect the equipment to an outlet on a circuit different from that to which ...

Page 5: ...2 2 Detach the Drive Frame 17 2 3 Install a CPU 19 2 4 Install System Memory 21 2 5 Install a Hard Disk Drive 22 2 6 Install a CD ROM Drive 24 2 7 Install a Modem Riser Card 26 2 8 Install a PCI Expansion Card 27 2 9 Re connect Cables 28 2 10 Replace the Cover 30 2 11 Connect External Devices 32 2 12 Power Supply Specifications 33 Chapter 3 M B Information 35 3 1 Specifications 36 3 2 Components 3...

Page 6: ...ing Up the First Time 64 4 2 Install the Operating System 66 4 3 ASUS PC Probe 69 Chapter 5 BIOS Information 75 5 1 Managing and Updating Your BIOS 76 5 2 BIOS Setup Program 80 5 3 Main Menu 83 5 4 Advanced Menu 89 5 5 Power Menu 101 5 6 Boot Menu 106 5 7 Exit Menu 108 NOTES 110 ...

Page 7: ...Switching Power Supply 4 1 44MB Floppy Disk Drive 5 CD ROM Drive optional 6 56K PCI Modem Card optional 7 Support CD with Drivers and Utilities 8 Installation Guide NOTE If you are assembling the system by yourself make sure to prepare all the components before starting It saves you a lot of time not having to hunt down components when you need them ...

Page 8: ...8 NOTES ...

Page 9: ...stem Installation Guide This guide provides general information and installation instructions for the Terminator Barebone System About This Guide contains an introduction on the contents of this document which includes target audience and chapter description Introduction About This Guide ...

Page 10: ...d the internal features 3 Chapter 2 Basic Installation This chapter tells how to install components into the barebone system through illustrated step by step instructions 4 Chapter 3 Motherboard Information This chapter gives information about the A7VC motherboard that comes with the ASUS Terminator Barebone System This chapter includes the motherboard layout jumper settings and connector location...

Page 11: ...minator K7 Barebone System This chapter gives a general description of the ASUS Terminator K7 barebone system It includes an overview of the front rear panel and the internal features Chapter 1 System Introduction ...

Page 12: ...he CD ROM drive and modem card are optional items and may not come installed in some models The lower part of the front panel is a door that covers accessible I O features that include two USB connectors Ports 2 3 a headphone connector and a microphone connector Push the dotted area of the door to open it and show the connectors as in the above figure CD ROM Drive optional Floppy Drive Power Butto...

Page 13: ...ing power supply is equipped with a voltage selector switch located below the power socket Use this switch to select the appropriate voltage according to the AC voltage supply in your area If the AC voltage supply in your area is 100 127V set the switch to 115V If the AC voltage supply in your area is 200 240V set the switch to 230V Game MIDI Connector Serial Port COM1 PS 2 Mouse Connector PS 2 Ke...

Page 14: ... remove the cover and flip out the drive frame You will see here the standard components that come already installed in the system and the places where you can install the other required components to get the system running Motherboard Power Supply USB audio Board Two 5 25 Drive Bays 3 5 HDD Drive Bay 3 5 Floppy Drive ...

Page 15: ...ASUS Terminator K7 Barebone System 15 This chapter tells how to install components into the barebone system through illustrated step by step instructions Chapter 2 Basic Installation ...

Page 16: ...er You don t have to remove the thumbscrew from the chassis 2 Place your hands on both corners of the front panel just beside the CD ROM frame With the rest of your fingers pulling forward from both sides push on the CD ROM area with your thumbs until the cover tilts forward 3 While supporting the front panel with one panel place your other hand on the top rear edge of the cover and carefully lift...

Page 17: ...t secures the power socket module Follow these steps to detach the drive frame 1 Place the chassis on a flat surface and turn it on its side Notice that the power socket and voltage selector switch are attached to a metal module which is secured to the rear panel Module screw Power Socket Module WARNING Do not plug the main power connector into the power socket until you have completed a system in...

Page 18: ...rame 3 Place your thumb on the right edge of the power socket module and slide it to the right until it is completely detached the module from the rear panel Swivel Edge Drive Frame NOTE The drive frame has a swivel hinge like edge that is attached to the main chassis It is not necessary to completely detach the drive frame from the chassis when installing components ...

Page 19: ... chassis has a Socket 462 that supports AMD Athlon and Duron processor of up to 1 4GHz 2 Unlock the socket by pressing the lever sideways then lifting it up to a 90 100 angle Follow these steps to install a CPU 1 Locate the CPU socket on the motherboard CPU Socket 370 CPU Fan Connector CPU_FAN Notched corners ...

Page 20: ... damaging the CPU If the CPU does not fit completely check its orientation or check for bent pins 6 Push down the lever to secure the CPU The lever clicks in place indicating that the socket is locked 7 Connect the CPU fan cable to the 3 pin CPU_FAN connector on the motherboard Refer to the picture in step 1 Notched Corners Heatsink Fan Notched Corner Socket Lever 4 Position the CPU above the sock...

Page 21: ...e the DIMM sockets on the motherboard 2 Unlock a DIMM socket by pressing the retaining clips outward Align a DIMM on the socket such that the notches on the DIMM match the breaks on the socket 3 Firmly insert the DIMM in the socket until the retaining clips snap back in place and the DIMM is properly seated CAUTION DIMMs are keyed with notches so that they fit in only one direction DO NOT force a ...

Page 22: ...ews of the HDD bay location Follow these steps to install an IDE HDD 1 Place the chassis upright 3 Carefully push the HDD into the bay until its screw holes align with the holes on the bay 4 Secure the HDD with three screws on each side of the bay 2 Carefully insert the HDD into the 3 5 inch bay HDD right side up 5 25 inch Drive Bay 3 5 inch HDD Drive Bay Internal View External View HDD Screw hole...

Page 23: ...n the cable with Pin 1 on the IDE interface 7 Connect the other end of the IDE ribbon cable to the primary IDE connector blue connector labeled IDE1 on the motherboard 5 Connect a power cable from the power supply to the power connector at the back of the HDD Use the cable with the white connector labeled HDD Red Stripe to Pin 1 IDE Ribbon Cable Power Cable HDD Primary IDE Connector IDE1 ...

Page 24: ...if you acquired a model without a CD ROM Follow these steps to install a CD ROM drive 1 Place the chassis upright 3 Carefully push the CD ROM drive into the bay until its screw holes align with the holes on the bay as shown 4 Secure the CD ROM with two screws on each side of the bay 2 Insert the CD ROM drive into the upper 5 25 inch bay CD ROM Screws 5 25 inch Drive Bay ...

Page 25: ...of the CD ROM Use the cable with the white connector labeled P6 8 Connect the other end of the IDE ribbon cable to the secondary IDE connector black connector labeled IDE2 on the motherboard 7 Connect one end of the CD ROM audio cable to the 4 pin connector at the back of the CD ROM 9 Connect the other end of the audio cable to the black 4 pin connector labeled CD on the motherboard Red Stripe to ...

Page 26: ... riser card 1 Place the chassis on its side 2 Remove the metal bracket cover opposite the AMR expansion slot 3 Align the modem card golden fingers to the AMR slot and its metal bracket to the slot opening on the chassis 4 Press the card firmly until the it is properly seated on the slot 5 Secure the card to the chassis with a bracket screw Connect to a Telephone Line Connect to a Telephone Set The...

Page 27: ...e the metal bracket cover opposite the PCI slot marked PCI1 The figure on the right shows a sample PCI network card that you can install on the PCI slot 3 Align the PCI card golden fingers to the PCI slot and its metal bracket to the slot opening on the chassis 4 Press the card firmly until the it is properly seated on the slot 5 Secure the card to the chassis with a bracket screw NOTE If you have...

Page 28: ...otherboard 2 Connect the HDD LED cable to the 2 pin lead marked IDELED 3 Connect the Line Out Mic cable to the FLOUT MIC2 connector on the motherboard matching the red pin stripe with Pin 1 4 Connect the USB2P cable to the USB1 connector on the motherboard matching the red pin stripe with Pin 1 Power Switch Power LED HDD LED Line Out Mic USB Connector USB2P The figures below show the front panel c...

Page 29: ...UT Lead for Line Out Cable MIC2 Lead for Microphone Cable Pin 1 2 9 2 Motherboard Connectors The figures below show the specific connectors on the motherboard and the UAEX Extension Module where the front panel cables must be connected You must re connect these cables before replacing the chassis cover Front Panel Connectors Connect to USB1 Connector on the Motherboard Connect to FLOUT Lead on the...

Page 30: ...llow these steps to re assemble the system 1 With the chassis lying on its side hook the swivel edge of the drive frame to the main chassis 2 Sway the drive frame inward until it fits completely The protruding tabs on both ends of the drive frame should snap perfectly to the chassis edge 3 Turn the chassis upright 4 Place the cover over the chassis leaving about two inches from the rear panel Prot...

Page 31: ...ace the Cover 6 Push the cover towards the rear until it fits The locking tab snaps into the hole on the chassis indicating that the cover is in place 7 Lock the cover with the captive thumbscrew on the rear panel IMPORTANT Firmly push the cover to ensure that it is fully engaged to the chassis Locking Tab Hole Rail Tabs Locking Tab ...

Page 32: ...allation 2 11 Connect External Devices The figure below shows the specific connectors and devices that you can connect to the rear panel ports Serial PS 2 KB VGA Line Out Line In Mic Game MIDI PS 2 Mouse AC Parallel USB RJ 45 ...

Page 33: ... 90A max at 115Vac full load cold start at 25 C Efficiency 70 min at nominal input maximum load Output Load Range Regulation Ripple Voltage Min Max Min Max Max 5V 0 5A 4 0A 5 5 50mVp p 12V 0 45A 8 2A 5 5 120mVp p 12V 0A 0 2A 10 10 120mVp p 5Vsb 0 05A 1 5A 5 5 50mVp p 3V3 1A 8 0A 5 5 50mVp p Output Voltage Maximum Voltage 5V 6 5V 12V 15 6V 3 3V 4 3V NOTE The power supply will shut down and latch of...

Page 34: ...34 Chapter 2 Basic Installation NOTES ...

Page 35: ...S Terminator K7 Barebone System This chapter gives detailed technical information about the different features of the A7VC motherboard the heart of the Terminator K7 Barebone System Chapter 3 M B Information ...

Page 36: ...6 Support Comes with an onboard PCI Bus Master IDE controller with two connectors that carries four IDE devices on two channels Supports UltraDMA 66 UltraDMA 33 PIO Modes 3 4 and Enhanced IDE devices such as DVD ROM CD ROM CD R RW LS 120 and Tape Backup drives LAN Support Features the Realtek R8100 10 100Mbps Fast Ethernet LAN controller and built in RJ 45 connector to allow fast and easy connecti...

Page 37: ...rammable BIOS Flash EEPROM offering enhancedACPI for Windows 98 2000 compatibility built in firmware based virus protection and autodetection of most devices for a virtual automatic setup Suspend to RAM Comes with Suspend to RAM STR feature that provides maximum power savings while leaving your computer ON STR enables QuickStart when you get back so you don t have to go through the long boot proce...

Page 38: ... 0 Port 1 Bottom 21 1 USB Header Port 2 Port 3 12 1 PS 2 Mouse Connector Top 27 1 PS 2 Keyboard Connector Bottom 27 Audio Features AC 97 Audio Codec 16 Game MIDI Port refer to CGAEX layout on p 40 Line Out Connector Bottom 24 Line In Connector Bottom 24 Microphone Connector Bottom 24 Modem Connector internal 19 CD Connector internal 18 Network Features LAN Connector RJ 45 Top 23 Wake On LAN Connec...

Page 39: ...ASUS Terminator K7 Barebone System 39 3 2 1 Component Locations 1 2 3 4 5 6 7 8 9 10 11 12 13 14 15 17 20 21 22 23 24 26 27 25 16 18 19 ...

Page 40: ...IDE FLOPPY PANEL USB1 IDELED A7VC DIMM Socket 1 64 72 bit 168 pin module 3 2 Socket 462 PCI Slot 1 Realtek RTL8100 ATX Power Connector CR2032 3V Lithium Cell CMOS Power LANLED CH_FAN CPU_FAN WOLCON CD Audio Codec MODEM IR ADN JP1B WOR FLOUT MIC2 ASUS Mozart Audio Modem Riser AMR PS 2 T Mouse B Keyboard RJ 45 USB T Port0 B Port1 Mic In Line Oit Line In VGA1 PARALLEL PORT IOC_MB PCI Slot 2 LCDTV COM...

Page 41: ...ded wrist strap before handling computer components If you do not have one touch both of your hands to a safely grounded object or to a metal object such as the power supply case 3 Hold components by the edges and try not to touch the IC chips leads or connectors or other components 4 Place components on a grounded antistatic pad or on the bag that came with the component whenever the components a...

Page 42: ...RAM in CMOS You can clear the CMOS memory of date time and system setup parameters by erasing the CMOS RTC RAM data The RAM data in CMOS that include system setup information such as system passwords is powered by the onboard button cell battery To erase the RTC RAM 1 Turn OFF the computer and unplug the power cord 2 Remove the battery 3 Short the jumper 4 Re install the battery 5 Plug the power c...

Page 43: ...r supply in reduced power mode A7VC A7VC CPU FSB Frequency Setting CPU 133MHz 1 2 2 3 FS1 FS2 CPU 100MHz 2 CPU FSB Frequency Selection The FS jumper is set to a factory default 2 3 that operates with AMD 100 MHz FSB capacity processors If AMD 133 MHz capacity processors are used then reset the jumper to 1 2 The FS jumper settings should match the capacity of the processor Otherwise the motherboard...

Page 44: ...e primary and secondary Audio Modem Riser AMR device Set to 1 2 to use a secondary AMR device or set to 2 3 to use a primary AMR device Disable the onboardAC97 audio parameter in BIOS when you use a primary AMR A7VC A7VC AMR Riser Card Detection Setting ADN DISABLE 2 3 Default ENABLE 1 2 ...

Page 45: ...t to mix registered SDRAMs with VCM SDRAMs Install memory in any combination as follows DIMM Location 168 pin DIMM Total Memory Socket 1 Rows 0 1 SDRAM 16 32 64 128 256 512MB x1 Socket 2 Rows 2 3 SDRAM 16 32 64 128 256 512MB x1 Total System Memory Max 1GB 3 6 1 General DIMM Notes DIMMs that have more than 18 chips are not supported on this motherboard For the system CPU bus to operate 100MHz 133MH...

Page 46: ...the power supply when adding or removing memory modules or other system components Failure to do so may cause severe damage to both the motherboard and expansion cards see 3 4 Hardware Setup Procedure for more information Insert the module s into the DIMM sockets as shown Because the number of pins are different on either side of the breaks the module only fits in one direction SDRAM DIMMs have di...

Page 47: ...ng corner on the socket so as not to damage the CPU pins The CPU picture above is for reference only Usually when you buy a CPU the heatsink and fan are already attached to the CPU If a heatsink and fan did not come with the package make sure you obtain one before installing the CPU A7VC A7VC Socket A LOCK LEVER BLANK AMD Athlon NOTCH 3 7 Central Processing Unit CPU WARNING You must install the pr...

Page 48: ...able The following table lists the default IRQ assignments for standard PC devices Use this table when configuring your system and for resolving IRQ conflicts Standard Interrupt Assignments IRQ Priority Standard Function 0 1 System Timer 1 2 Keyboard Controller 2 N A Programmable Interrupt 3 11 Communications Port COM2 4 12 Communications Port COM1 5 13 Sound Card sometimes LPT2 6 14 Floppy Disk C...

Page 49: ...d another defined as secondary You can only use primary AMRs with this motherboard NOTE The motherboard package does not include the AMR card A7VC A7VC Audio Modem Riser AMR Slot IMPORTANT The AMR slot shares the same expansion slot with PCI Slot 6 Because of space limitation the AMR slot can support only specially designed AMR cards The components of a standard AMR card and its bracket face towar...

Page 50: ...s See PS 2 Mouse Function Control in 4 7 Advanced Menu 3 9 1 External Connectors WARNING Some pins are used for connectors or power sources These are clearly distinguished from jumpers in the Motherboard Layout Placing jumper caps over these connector pins will cause damage to your motherboard IMPORTANT Ribbon cables should always be connected with the red stripe to Pin 1 on the connectors Pin 1 i...

Page 51: ... the IRQ through Onboard Parallel Port see 5 4 2 I O Device Configuration NOTE Serial printers must be connected to the serial port Parallel Printer Port 25 pin female VGA Monitor 15 pin female 5 Audio Connectors Three 1 8 AUDIO The Line Out lime connects a headphone or speakers The Line In light blue connects a tape players or other audio sources The Mic pink connects a microphone Mic Line In Lin...

Page 52: ... pad for playing games and MIDI devices for playing or editing audio files 6 Fast Ethernet LAN Connector R J45 The RJ 45 connector allows connection to a Local Area Network LAN through a network hub 7 Universal Serial BUS Ports 1 2 Black two 4 pin USB Two USB ports are available for connecting USB devices RJ 45 Universal Serial Bus USB Joystick Midi 15 pin female ...

Page 53: ... or speakers and a MIC which connects to a microphone Universal Serial Bus LOUT MIC COM1 Serial Port 9 Pin male 9 Serial Port Connector Teal Turquoise 9 pin COM1 on CGAEX One serial port located on the CGAEX extension module is available for a mouse or other serial devices A second serial port is available using a serial port bracket connected from the motherboard to an expansion slot opening Refe...

Page 54: ...sk documentation for the jumper settings BIOS supports specific device bootup see 5 6 Boot Menu If you have more than two UltraDMA 66 33 devices purchase another UltraDMA 66 33 cable NOTES 1 Pin 20 on each IDE connector is removed to match the covered hole on the UltraDMAcable connector This prevents incorrect orientation when you connect the cables 2 The hole near the blue connector on the UltraD...

Page 55: ...nal wireless transmitting and receiving infrared module This module mounts to a small opening on a system chassis that supports this feature You must also configure the setting through UART2 Use Infrared see 5 4 2 I O Device Configuration to select whether UART2 is directed for use with COM2 or IrDA Use the five pins as shown in Back View and connect a ribbon cable from the module to the motherboa...

Page 56: ...otation signal The Rotations Per Minute RPM can be monitored using ASUS PC Probe see 4 3 Install the Operating System 5 IDE Activity LED 2 pin IDELED This connector supplies power to the cabinet s IDE activity LED Read and write activity by devices connected to the Primary or Secondary IDE connectors cause the IDE LED to light up A7VC A7VC 12 Volt Cooling Fan Power CH_FAN CPU_FAN GND Rotation 12V ...

Page 57: ...ferent hole sizes Find the proper orientation and push down firmly making sure that the pins are aligned A7VC 3 3Volts 12 0Volts Ground Power Supply On Ground Ground Ground 5 0 Volts 5 0 Volts 5 0 Volts Power Good 12 0Volts 3 3 Volts 3 3 Volts Ground 5 0 Volts Ground 5 0 Volts Ground 5V Standby A7VC ATX Auxiliary Power Connectors ATX12V ATXPWR 12V DC COM 12V DC COM A7VC A7VC Internal Audio Connect...

Page 58: ...A7VC Floppy Disk Drive Connector FLOPPY PIN 1 9 Wake On LAN Connector 3 pin WOL_CON This connector connects to a LAN card with a Wake On LAN output such as the ASUS PCI L101 Ethernet card see 7 Appendix The connector powers up the system when a wakeup packet or signal is received through the LAN card IMPORTANT To use this feature enable the Wake On LAN feature in BIOS see 5 5 1 Power Up Control an...

Page 59: ...d through the COM port 11 LCD TV Headers 18 pin 18 1 pin LCDTV These headers require an optional LCD module for LCD output or a TV out module for TV output A7VC A7VC LCD TV Headers LCDTV 1 LTVCL 3V TVVSYNC GND DD4 DD3 DD1 GND TV LCD PAL NTSC GND BLANK TVHSYNC GND DD2 DD0 5V GND DD11 DD9 DD7 GND DD5 5V PCIRST DD10 GND DD8 DD6 CLKOUT0 GND VSPCLK1 VSPD1 LCDTV_ON IMPORTANT This feature requires that t...

Page 60: ...12 IOC_MB Connector 22 pin This connects the motherboard to the CGAEX extension module which contains the COM1 and GAME ports 13 Internal Microphone 2 pin and FLOUT 3 pin Connectors This connector allows you to connect chassis mounted microphone to the motherboard instead of having to attach an external microphone onto the ATX connectors Connect the Line Out Mic cable to the FLOUT MIC2 connector ...

Page 61: ...pin connector allows you to manually place the system into a suspend mode or Green mode where system activity is instantly decreased to save power and to expand the life of certain system components Attach the case mounted suspend switch this 2 pin connector 18 ATX Power Switch Soft Off Switch Connector 2 pin PWR SW The system power is controlled by a momentary switch attached to this connector Pr...

Page 62: ...62 Chapter 3 Motherboard Information NOTES ...

Page 63: ...ASUS Terminator K7 Barebone System 63 This chapter enumerates the contents of the support CD that comes with the Terminator Barebone System package Chapter 4 Support CD ...

Page 64: ... Add New Hardware Wizard to install all the necessary device drivers When prompted to restart select No then follow the normal setup procedures on the screen To begin using the support CD insert it into the CD ROM drive The support installation menu should appear If the menu does not appear double click or run D ASSETUP EXE assuming that your CD ROM drive is drive D 4 1 Install the Operating Syste...

Page 65: ...ate the AC 97 compliant audio features Realtek RTL8139C PCI Fast Ethernet NIC Driver Installs the Realtek RTL8139C PCI Fast Ethernet NIC Driver ASUS PC Probe V2 14 06 Installs a smart utility that can monitor the computer fan temperature and voltages ASUS Update V3 28 04 Installs theASUS Update program This program allows you download the latest version of Flash BIOS from the ASUS website Before u...

Page 66: ...ing items click on the arrow pointing to the right on the lower right corner of the screen To return to the first menu screen click on the arrow pointing to the left on the lower right corner of the second screen ASUS Screen Saver Installs the ASUS monitor screen saver Show Mainboard Information Allows you to view information about the motherboard such as product name BIOS version and CPU Browse S...

Page 67: ...Probe Vx xx The PC Probe icon appears on the taskbar system tray indicating that ASUS PC Probe is running Clicking the icon allows you to see the status of your PC ASUS PC Probe is a convenient utility to continuously monitor your computer system s vital components such as fan rotations voltages and temperatures It also has a utility that lets you review useful information about your computer such...

Page 68: ...ure for supported processors only Temperature Warning threshold adjustment Move the slider up to increase the threshold level or down to decrease the threshold level Fan Monitor Shows the PC fan rotation Voltage Monitor Shows the PC voltages Fan Warning threshold adjustment Move the slider up to increase the threshold level or down to decrease the threshold level ...

Page 69: ...hows the used and free space of the PC s hard disk drives and the file allocation table or file system used Fan Control Lets you enable disable Smart Fan Control Smart Fan Control adjusts the fan speed automati cally based on the current CPU temperature and predefined threshold CPU Cooling System Setup Lets you select when to enable software CPU cooling When When CPU Overheated is selected the CPU...

Page 70: ...ion pertinent to the PC such as CPU type CPU speed and internal external fre quencies and memory size Utility Lets you run programs outside of theASUS Probe modules To run a program click Execute Pro gram NOTE This feature is cur rently unavailable Memory Shows the PC memory load memory usage and paging file usage ...

Page 71: ...t clicking the PC Probe icon brings up a menu to open or exitASUS PC Probe and pause or resume all system monitoring When the ASUS PC Probe senses a problem with your PC portions of the ASUS PC Probe icon changes to red the PC speaker beeps and the ASUS PC Probe monitor appears ...

Page 72: ...72 Chapter 4 Starting Up NOTES ...

Page 73: ...ASUS Terminator K7 Barebone System 73 This chapter describes the power up sequence and gives details on how to change the system settings using the BIOS setup menus Chapter 5 BIOS Information ...

Page 74: ...when you press the ATX power switch If the monitor complies with green standards or if it has a power standby feature the monitor LED may light up or switch between orange and green after the system LED does The system then runs the power on tests While the tests are running the BIOS beeps or additional messages appear on the screen If you do not see anything within 30 seconds from the time you tu...

Page 75: ... before switching off the power switch For ATX power supplies you can press the ATX power switch after exiting or shutting down the operating system If you use Windows 9X click the Start button click Shut Down and then click Shut down the computer The power supply should turn off after Windows shuts down NOTE The message You can now safely turn off your computer does not appear when shutting down ...

Page 76: ...S at the DOS prompt to create a bootable system disk DO NOT copy AUTOEXEC BAT and CONFIG SYS to the disk 2 Type COPY D AFLASH AFLASH EXE A assuming D is your CD ROM drive to copyAFLASH EXE to the boot disk you created NOTE AFLASH works only in DOS mode It does not work in the DOS prompt within Windows and does not work with certain memory drivers that may be loaded when you boot from the hard driv...

Page 77: ... K7 Barebone System 77 5 Select 1 Save Current BIOS to File from the Main menu and press Enter The Save Current BIOS To File screen appears 6 Type a filename and the path for example A XXX XX XXX and then press Enter ...

Page 78: ...ess Enter The Update BIOS Including Boot Block and ESCD screen appears 5 Type the filename of your new BIOS and the path for example A XXX XX XXX and then press Enter NOTE To cancel this operation press Enter 6 When prompted to confirm the BIOS update press Y to start the update 5 2 2 Updating BIOS Procedures WARNING Only update your BIOS if you have problems with your motherboard and you know tha...

Page 79: ...d Flashed Successfully appears 8 Follow the onscreen instructions to continue WARNING If you encounter problems while updating the new BIOS DO NOT turn off the system since this might prevent your system from booting up Just repeat the process and if the problem still persists update the original BIOS file you saved to the disk above If the Flash Memory Writer utility was not able to successfully ...

Page 80: ...r the system provides you with the opportunity to run this program This appears during the Power On Self Tests POST Press Delete to call up the Setup utility If you are a little bit late in pressing the mentioned key POST continues to run the test routine thus preventing you from launching the Setup program If you intend to enter Setup restart the system by pressing Ctrl Alt Delete or by pressing ...

Page 81: ...ice a legend bar The keys in the legend bar allow you to navigate through the various setup menus The following table lists the keys found in the legend bar with their corresponding alternates and functions Navigation Key s Function Description F1 or Alt H Displays the General Help screen from anywhere in the BIOS Setup Esc Jumps to the Exit menu or returns to the main menu from a sub menu or Æ ke...

Page 82: ...r Esc Sub Menu Note that a right pointer symbol as shown on the left appears to the left of certain fields This pointer indicates that you can launch a sub menu from this field A sub menu contains additional options for a field parameter To display a sub menu simply move the highlight to the field and press Enter Use the legend keys to enter values or move from field to field within a sub menu jus...

Page 83: ...system to the date that you specify usually the current date The format is month day year Valid values for month day and year are Month 1 to 12 Day 1 to 31 Year 100 year range Use the Tab or Shift Tab keys to move between the month day and year fields Legacy Diskette A 1 44M 3 5 in Legacy Diskette B None Sets the type of floppy drives installed Configuration options None 1 44M 3 5 in Floppy 3 Mode...

Page 84: ...ve If auto matic detection is successful the correct values will be filled in for the remaining fields on this sub menu If automatic detection fails your hard disk drive may be too old or too new You can try updating your BIOS or enter the IDE hard disk drive parameters manually NOTE After the IDE hard disk drive information has been entered into BIOS new IDE hard disk drives must be partitioned s...

Page 85: ...al Match Partition Table Manual Cylinders This field configures the number of cylinders Refer to your drive documen tation to determine the correct value to enter into this field NOTE To make changes to this field the Type field must be set to User Type HDD and the Translation Method field must be set to Manual IMPORTANT If your hard disk was already formatted on an older previous system incorrect...

Page 86: ...e configured manually Note that when this field is automatically configured the set value may not always be the fastest value for the drive Refer to the documentation that came with your hard drive to determine the optimal value and set it manually NOTE To make changes to this field the Type field must be set to User Type HDD Configuration options Disabled 2 Sectors 4 Sectors 8 Sec tors 16 Sectors...

Page 87: ...c This field sets the time interval for displaying the first and second characters Configuration options 1 4 Sec 1 2 Sec 3 4 Sec 1 Sec 5 4 2 Keyboard Features Other options for Type are CD ROM for IDE CD ROM drives LS 120 for LS 120 compatible floppy disk drives ZIP 100 for ZIP 100 compatible disk drives MO for IDE magneto optical disk drives Other ATAPI Device for IDE devices not listed here Afte...

Page 88: ...ox as above will appear Press Enter and the password will be set to Disabled A Note about Passwords TheBIOSSetupprogramallowsyoutospecifypasswordsintheMainmenu The passwords control access to the BIOS during system startup The passwords are not case sensitive In other words it makes no difference whether you enter a password using upper or lowercase letters The BIOS Setup program allows you to spe...

Page 89: ...e bus multiple equals the CPU speed the CPU s internal frequency Note that the frequency is already set to a default of 133 MHz DRAM Frequency This field determines whether the memory clock frequency is set to be in synchronous or asynchronous mode with respect to the CPU Frequency This must be set in conjunction with CPU external Frequency to match the speed of your SDRAM When you press Enter on ...

Page 90: ... the system to detect a PS 2 mouse on startup If detected IRQ12 will be used for the PS 2 mouse IRQ12 will be reserved for expansion cards only if a PS 2 mouse is not detected Enabled will always reserve IRQ12 whether on startup a PS 2 mouse is detected or not Configuration options Enabled Auto USB Legacy Support Auto This motherboard supports Universal Serial Bus USB devices The default of Auto a...

Page 91: ...fault setting is By SPD which sets the subsequent 3 items by reading the contents in the SPD Serial Presence Detect device The EEPROM on the memory module stores critical parameter data such as memory type size speed voltage interface and module banks Configuration options User Define 7ns 143MHz 8ns 125MHz By SPD SDRAM CAS Latency This controls the latency between the SDRAM read command and the ti...

Page 92: ...ed Enabled PCI to DRAM Prefetch Enabled Configuration options Disabled Enabled Byte Merge Disabled To optimize the data transfer on PCI this merges a sequence of individual memory writes bytes or words into a single 32 bit block of data However byte merging may only be done when the bytes within a data phase are in a prefetchable address range Configuration options Disabled Enabled DRAM Read Latch...

Page 93: ...erial Port 1 and Serial Port 2 must have different addresses Configuration options 3F8H IRQ4 2F8H IRQ3 3E8H IRQ4 2E8H IRQ10 Disabled UART2 Use Infrared Disabled When enabled this field activates the onboard standard infrared feature and sets the second serial UART to support the infrared module connector on the motherboard If your system already has a second serial port connected to the onboardCOM...

Page 94: ...ration in a two way mode Configuration options Normal ECP EPP ECP EPP ECP DMA Select 3 This field allows you to configure the parallel port DMA channel for the selected ECP mode This selection is available only if you select ECP or ECP EPP in Parallel Port Mode above Configuration options 1 3 Onboard Peripheral Resource Control Onboard AC97 Audio Controller Auto Auto allows the motherboard s BIOS ...

Page 95: ...his field if you want to use the Sound Blaster emulation feature Sound Blaster I O Base Address 220h 22Fh Sound Blaster IRQ IRQ5 Sound Blaster DMA DMA 1 These fields set the I O address IRQ and DMA channel for the Sound Blaster feature MPU 401 Enabled Enable this field if you want to use the MIDI device onboard MPU 401 I O Base Address 300h 303h This sets the I O address for the onboard MIDI devic...

Page 96: ...e leave this on the default setting of Disabled Configuration options Disabled Enabled PCI Latency Timer 32 Leave on default setting for best performance vs stability SYMBIOS SCSI BIOS Auto Auto allows the motherboard s BIOS to detect whether you have a Symbios SCSI card If the Symbios SCSI card is detected the motherboard s Symbios BIOS will be enabled if no Symbios SCSI card is detected the onbo...

Page 97: ... AGP Card uses theAGP card as your primary card The default PCI Card allows your PCI graphics card to take precedence when detected Configuration options PCI Card AGP Card PCI PNP IRQ Resource Exclusion IRQ XX Reserved for Legacy Device No ICU These fields indicate whether or not the displayed IRQ for each field is being used by an onboard legacy non PnP device The default value indicates either t...

Page 98: ...ields indicate whether or not the displayed DMA channel for each field is being used by an onboard legacy non PnP device The default setting indicates either that the displayed DMA channel is not used or an ICU is being used to determine if an ISA device is using that channel Configuration options No ICU Yes ...

Page 99: ...are not using an ICU to specify its address range select a base address from the six available options the Reserved MEM Block SIZE field will then appear for selecting the block size If you have more than one legacy device onboard that requires the use of this address range you can increase the block size to 8K 16K 32K or 64K If you are using an ICU to accomplish this task leave Reserved MEM Block...

Page 100: ... is faster than the ROM Configuration options Disabled Enabled C8000 DFFFF Shadow Disabled These fields are used for shadowing other expansion card ROMs If you install other expansion cards with ROMs on them you will need to know which addresses the ROMs use to shadow them specifically Shadowing a ROM reduces the memory available between 640K and 1024K by the amount used for this purpose Configura...

Page 101: ...e your own selections in the Power menu When set to Max Saving system power will be conserved to its greatest amount The Suspend Mode field will then be set to predefined value that ensures maximum power savings This field acts as the master control for the power management modes Max Saving puts the system into power saving mode after a brief period of sys tem inactivity Min Saving is almost the s...

Page 102: ...ns Disabled 1 Min 2 Min 3 Min 15 Min Suspend to RAM Capability Disabled Suspend to RAM STR is an energy saving feature In Suspend to RAM state all devices on the computer are turned off except for the system RAM Thus the PC only consumes less than 5 watts of power Select Enabled if your power supply can provide at least 720mA on the 5VSB lead to support the STR function If the expansion card you u...

Page 103: ... dual function where pressing less than 4 seconds will place the system in sleep mode Regardless of the setting holding theATX switch for more than 4 seconds will power off the system Configuration options Soft off Suspend Suspend to RAM Capability Disabled AC PWR Loss Restart Disabled This allows you to set whether you want your system to reboot after the power has been interrupted Disabled leave...

Page 104: ... network by sending a wake up frame or signal Configuration options Disabled Enabled Wake onUSB for S3 S4 S5 State Disbled This allows you to select whether or not to wake up from S3 S4 S5 by USB device When selecting Enable make sure that jumper JP1A is placed at 2 3 and the 5VSB standby power is larger than 2 0A Otherwise STR will not work properly Automatic Power Up Disabled This allows an unat...

Page 105: ...sis fan speed in rotations per minute RPM The presence of the fans is automatically detected Set to Ignore only if necessary VCORE Voltage 3 3V Voltage 5V Voltage 12V Voltage xx xxV 686A Voltage The onboard hardware monitor is able to detect the voltage output by the onboard voltage regulators Set to Ignore only if necessary NOTE If any of the monitored items is out of range an error message will ...

Page 106: ...oppy Configuration options Disabled Legacy Floppy LS120 ZIP ATAPI MO USB FDD USB ZIP IDE Hard Drive This field allows you to select which IDE hard disk drive to use in the boot sequence Pressing Enter will show the product IDs of all connected IDE hard disk drives ATAPI CD ROM This field allows you to select which ATAPI CD ROM drive to use in the boot sequence Pressing Enter will show the product ...

Page 107: ...uring the Power On Self Test POST Configuration options No Yes Boot Virus Detection Enabled This field allows you to set boot virus detection ensuring a virus free boot sector The system halts and displays a warning message when it detects a virus If this occurs you can either allow the operation to continue or use a virus free bootable floppy disk to restart and investigate your system Configurat...

Page 108: ...selected a confirmation is asked Select Yes to save changes and exit NOTE If you attempt to exit the Setup program without saving your changes the program prompts you with a message asking if you want to save your changes before exiting Pressing Enter saves the changes while exiting Exit Discarding Changes This option should only be used if you do not want to save the changes you have made to the ...

Page 109: ...lues to the non volatile RAM Discard Changes This option allows you to discard the selections you made and re store the values you previously saved After selecting this option a confirmation is requested Select Yes to discard any changes and load the previously saved values Save Changes This option saves your selections without exiting the Setup program You can then return to other menus and make ...

Page 110: ...110 Chapter 5 BIOS Information NOTES ...

Reviews: