


ASUS Tablet and ASUS Mobile Dock E-Manual
41
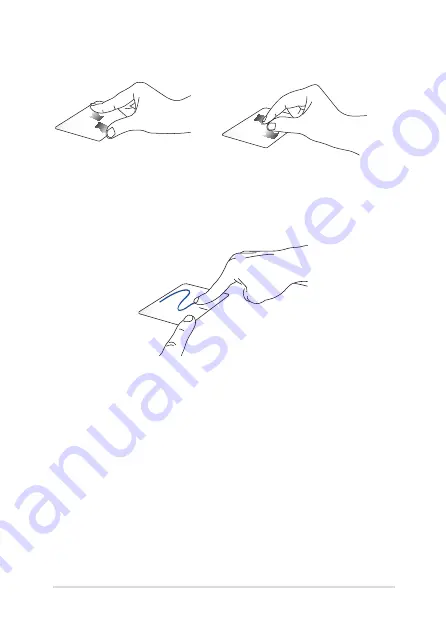
Zoom out
Zoom in
Bring together your two fingers
on the touchpad.
Spread apart your two fingers on
the touchpad.
Drag and drop
Select an item then press and hold the left button. Using your other
finger, slide down the touchpad to drag and drop the item to a new
location.
Summary of Contents for T300 Chi
Page 12: ...12 ASUS Tablet and ASUS Mobile Dock E Manual ...
Page 13: ...ASUS Tablet and ASUS Mobile Dock E Manual 13 Chapter 1 Hardware Setup ...
Page 45: ...ASUS Tablet and ASUS Mobile Dock E Manual 45 Chapter 3 Working with Windows 8 1 ...
Page 73: ...ASUS Tablet and ASUS Mobile Dock E Manual 73 Chapter 4 Power On Self Test POST ...
Page 86: ...86 ASUS Tablet and ASUS Mobile Dock E Manual ...
Page 87: ...ASUS Tablet and ASUS Mobile Dock E Manual 87 Tips and FAQs ...
Page 94: ...94 ASUS Tablet and ASUS Mobile Dock E Manual ...
Page 95: ...ASUS Tablet and ASUS Mobile Dock E Manual 95 Appendices ...
Page 113: ...ASUS Tablet and ASUS Mobile Dock E Manual 113 German Greek Italian Portuguese Spanish Swedish ...
Page 118: ......


