


34
Chapter 2: There’s no place like Home
Lock Screen
By default, the lock screen appears after turning on your device or waking it up from sleep mode.
From the lock screen, you can proceed to your device’s Android system by swiping on your touch
screen panel.
Your device’s lock screen can also be customized to regulate access to your mobile data and apps.
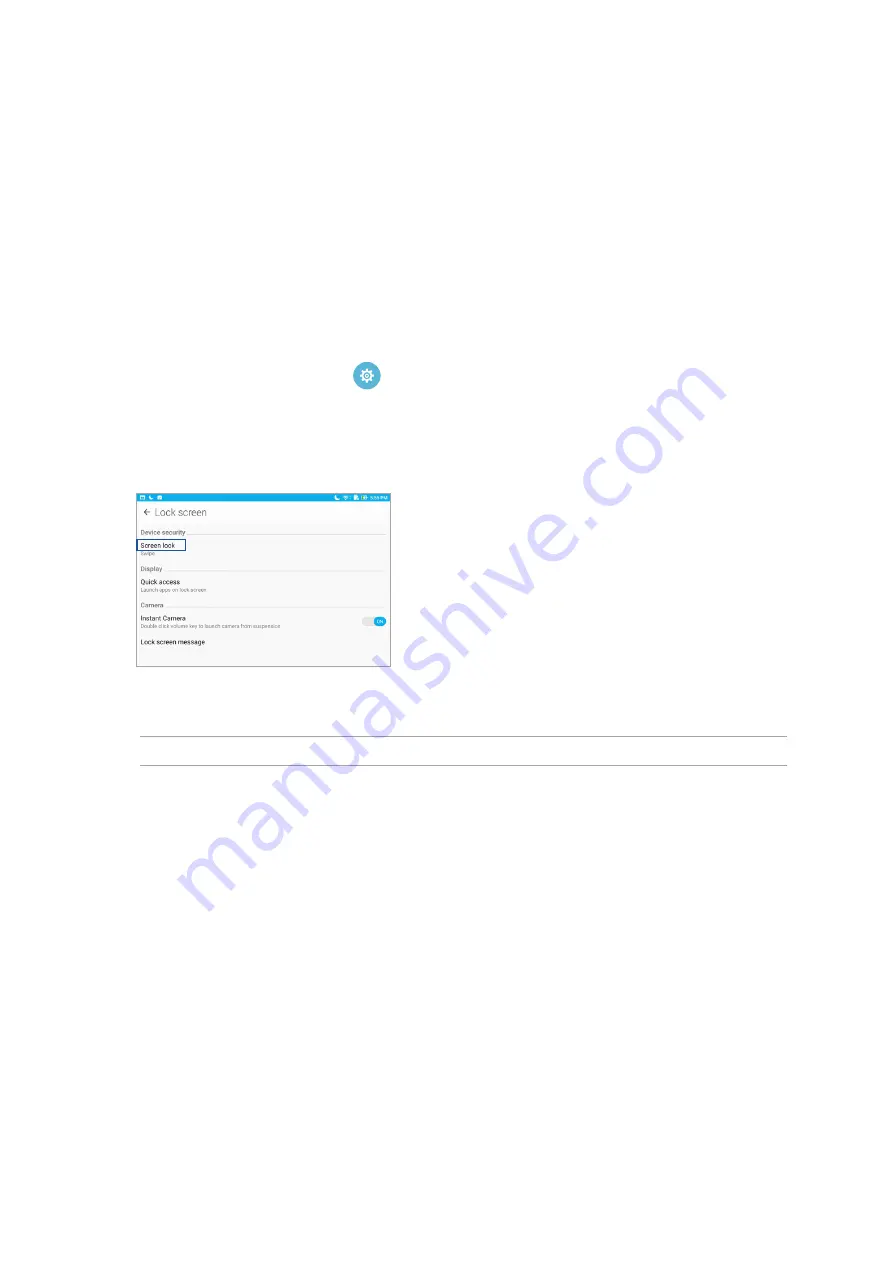
Customizing your lock screen
If you want to change your lock screen settings from the default Swipe option, refer to the
following steps:
1. Launch Quick settings then tap
.
2. Scroll down the Settings screen and select Lock screen.
3. In the next screen, tap Screen lock.
4. Tap the screen lock option you would like to use.
NOTE: For more details, see the
Securing your ASUS Tablet
section.
Summary of Contents for P027
Page 1: ...ASUSTablet ...
Page 38: ...38 Chapter 2 There s no place like Home ...
Page 48: ...Chapter 3 Keeping in touch 48 ...
Page 64: ...Chapter 4 Your precious moments 64 ...
Page 90: ...Chapter 7 Zen Everywhere 90 ...


