7
7
7
7
7
I n t e r n a l O p t i c a l D r i v e
I n t e r n a l O p t i c a l D r i v e
I n t e r n a l O p t i c a l D r i v e
I n t e r n a l O p t i c a l D r i v e
I n t e r n a l O p t i c a l D r i v e
H a r d w a r e i n s t a l l a t i o n
H a r d w a r e i n s t a l l a t i o n
H a r d w a r e i n s t a l l a t i o n
H a r d w a r e i n s t a l l a t i o n
H a r d w a r e i n s t a l l a t i o n
1.
Turn off your computer and any peripheral devices connected to it.
2.
Use a grounded wrist strap or touch a safely grounded object or a metal object, such as the power supply
case, before handling the optical drive to avoid damaging it due to static electricity.
3.
Remove the computer cover.
4.
For optical drives with IDE interface, configure the optical drive jumpers to set the device to master or slave
mode before installing it into the chassis. Use jumper blocks to short the
pins to your desired setting.
5.
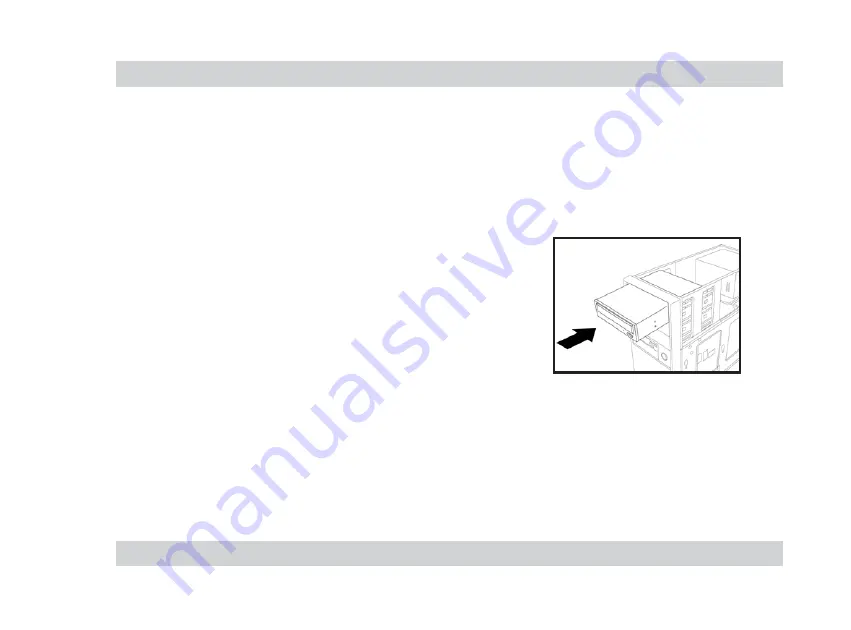
Insert the optical drive into an available 5.25-inch bay.
6.
Connect a 4-pin IDE/SATA power supply cable to the DC input connector
of the optical drive.
7.
Connect one end of the IDE/SATA ribbon cable to the IDE/SATA
connector at the back of the optical drive, matching the colored stripe
on the cable with Pin 1 on the IDE connector. Connect the other end of
the IDE/SATA cable to the IDE/SATA connector on the motherboard.
8.
Connect one end of the 4-pin audio cable to the audio output connector
of the optical drive. Connect the other end to the audio connector of an
installed sound card, or to the audio connector on the motherboard, if available.
9.
Slide the optical drive into the bay and secure it with four screws.
10. Replace the computer cover.
11. Turn on your computer.
E n g l i s h
E n g l i s h
E n g l i s h
E n g l i s h
E n g l i s h
S o f t w a r e i n s t a l l a t i o n
S o f t w a r e i n s t a l l a t i o n
S o f t w a r e i n s t a l l a t i o n
S o f t w a r e i n s t a l l a t i o n
S o f t w a r e i n s t a l l a t i o n
Windows
®
98 SE/2000/Me/XP automatically detects the current settings for your drive and installs the
appropriate driver.

