1-4
Chapter 1: Product introduction
1.5
Replacing the card bracket
The PEB-10G/57840-2T Ethernet card is bundled with a full-length bracket, a low-profile
bracket, and an ASUS proprietary bracket. By default, the card is pre-installed with a full-
length bracket.
The proprietray bracket supports ASUS Z10PH-D16 series, ESC4000 G3 series, and
RS720Q-E8 series models, etc. The supported list of models are subject to change without
prior notice.
To replace the card bracket:
1.
Get the
PEB-10G/57840-2T Ethernet card and place it on a stable and flat surface.
Ensure that the printed circuit board (PCB) is facing down.
2.
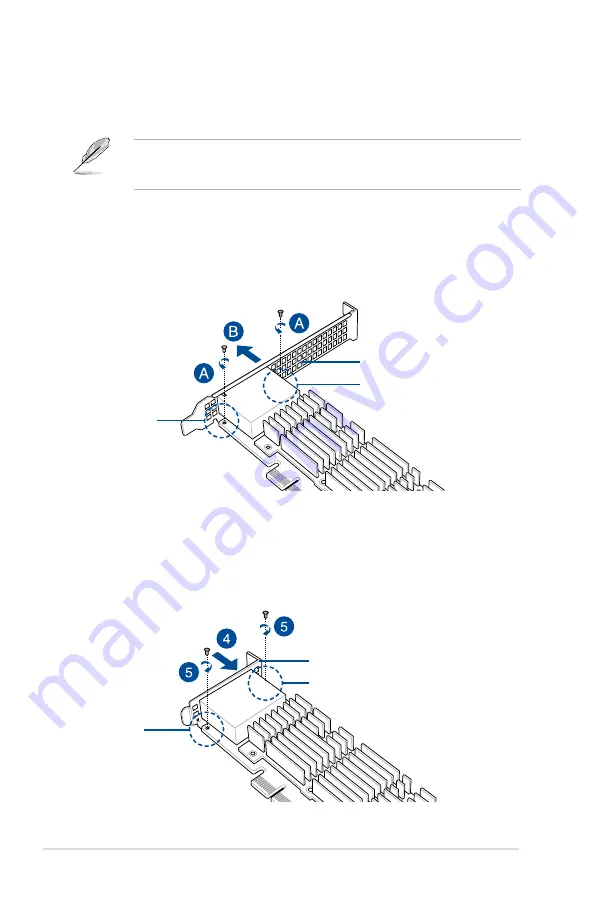
Remove the two screws that secures the PEB-10G/57840-2T Ethernet card to the card
bracket (A) then remove the card bracket (B).
3.
Get the replacement card bracket.
4.
Align and insert the PEB-10G/57840-2T Ethernet card into the mounting hole of the
card bracket. Ensure that the screw holes on the PEB-10G/57840-2T Ethernet card
matches the screw holes of the card bracket.
5.
Secure the card with the screws that you removed earlier in step 2.
screw
screw
screw
screw
replacement card bracket
default card bracket

