background image


4 

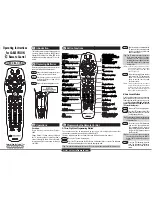
THE REMOTE CONTROL 

Your remote control can transmit on two different channels, allowing control of two separate vehicles. Up to four remote  
controls can be assigned to your vehicle.  
NOTE: The range of your remote control can be affected by a weak battery, interference from 
nearby metal structures, hydro poles, or crowded parking lots. 
Only the "Panic" command is transmitted on both channels when a single command is sent 
(alternating transmission channels). 
The transmitter provides audible (piezo) and visual (LED 

) confirmation. 

The LED lights-up green when it transmits on channel one or red when it transmits on channel two. 
The remote shown may differ from the one included in the kits. 


SELECTING TRANSMISSION CHANNEL 

CHANNEL 1


CHANNEL 2


Press desired button for two 

seconds.


Momentarily press the « » button, then as soon as a  

tone is heard or that the red LED lights-up, press the  

desired button and hold it down for two seconds.


A command will not be executed if you do not press button long enough except for the RSS-2514XR remote that 
immediately transmit when either the lock or unlock button is pressed. In that case, the command is sent at reduced power. 
Only one command is transmitted even when a button is pressed for more than two seconds, except for the "Panic" 
command, which is repeated as long as button is pressed. 
Your system may be programmed in such a way that it can distinguish between two groups of remote controls (maximum: 
two remotes per group). These groups let you activate predefined settings (seat, mirror and other) when unlocking certain 
vehicles (additional optional equipment required). 

BATTERY REPLACEMENT 

Your remote works off two 3-volt lithium CR-2016 batteries or equivalent. 
To replace the batteries, use a coin to snap open the remote casing via the slot on 
the side of the remote, remove old batteries and replace them with new ones.  
Make sure to properly replace the insulating strap around both batteries 
and to properly orient the batteries; see illustration opposite. 
Close the casing by applying a pressure on both parts while these are properly  
aligned. 


(2) CR-2016 

Summary of Contents for RSS-2514XR

Page 1: ...ted Electronics Canada inc 2008 U S E R M A N U A L Model RSS 2514XR For all gas and diesel powered vehicles This model may be equipped with an optional security system FRAN AIS AU VERSO CONSULT SAFET...

Page 2: ...designed to provide reasonable protection against harmful interference in a residential installation This equipment generates uses and can radiate radio frequency energy and if not installed and used...

Page 3: ...the vehicle at a distance it can sound an alarm and prevent engine from starting should someone try to steal your vehicle or its contents Table of contents SAFETY PRECAUTIONS__________________________...

Page 4: ...Checks on page 17 Make sure you comply with all local regulations which may prohibit leaving your engine running when vehicle is unattended in a public place To ensure continued safe operation of you...

Page 5: ...brakes and hold the pedal down 2 Move gearshift lever to neutral 3 Apply parking brake 4 Press button on your remote control 5 Remove key from ignition the system keeps the engine running 6 Depending...

Page 6: ...executed if you do not press button long enough except for the RSS 2514XR remote that immediately transmit when either the lock or unlock button is pressed In that case the command is sent at reduced...

Page 7: ...RUNTIME ALARM CONDITION AND PANIC MODE CONFIRMATION BY CHIRP OR HORN ON 2ND LOCK WHEN PROGRAMMED ON ONLY IF SYSTEM IS EQUIPPED WITH A SENSOR WHICH DETECTS WHEN TRUNK IS OPEN OPTIONAL THESE CONFIRMATIO...

Page 8: ...VEHICLE Automatic transmission vehicles Manual transmission vehicles To avoid turning the engine off when taking place behind the steering wheel do not apply the brakes until you have placed the key i...

Page 9: ...press the brake pedal TURBO MODE Activated at time of installation This mode allows the engine to be left running at idle speed for a short period of time so that the turbocharger can cool down as rec...

Page 10: ...tem cannot execute command for example hood is open confirmation will be different lights 3 When mode is deactivated Parking lights will flash twice to confirm that mode is deactivated Applying brakes...

Page 11: ...simultaneously siren parking lights dome light and or horn PREVENTIVE Depending on system s configuration the indicator light shows different alarm conditions see Zone Codes on page 12 It can also ac...

Page 12: ...ee zones prolong rearming cycle as long as they remain in violation Ignition Activated by ignition key Cancels rearming Activated by remote starter No effect Doors 2 This zone cancels rearming complet...

Page 13: ...ash if all zones are in normal condition three chirps or flashes if another zone is in violation If a zone is in violation when system is armed manually using remote and the cause of the violation is...

Page 14: ...ated To cancel this mode place ignition key in RUN position then remove it passive rearming is reactivated when you open a door You can also arm the system using the remote which cancels Temporary Val...

Page 15: ...nds during which dome light is kept on by vehicle s factory system Special condition If during dome light duration a Lock command is sent while a door is opened system arms and ignores door violation...

Page 16: ...ceived but trunk could not be released If you are not sure you have received confirmation repeat command System will repeat confirmation as often as you wish If your vehicle is equipped with a factory...

Page 17: ...rmed VALET MODE ANTITHEFT The antitheft function can be deactivated for the same reasons and in the same way as the Antitheft system See Valet mode details on page 15 INDICATOR LIGHT An optional indic...

Page 18: ...is kept running by ignition key In this case parking lights will flash once to confirm that command has been received Use the stop command to abort panic mode START FAIL CODES When a remote start atte...

Page 19: ...Open hood Hood switch must be present and operational See Safety checks on page 17 Place key in the ignition and turn to the RUN position Apply the brakes once You now have 10 seconds to turn the key...

Page 20: ...pply the brakes 2 Release the parking brake The engine must stop immediately upon releasing the parking brake If the engine does not stop which is not safe place the main switch in OFF position until...

Reviews: