


7
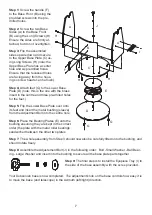
Step 1:
Screw the handle (F)
to the Base Front (B) using the
provided screws into the pre-
drilled holes.
Step 2:
Screw the two Base
Sides (A) to the Base Front
(B) using the Long Screws (H)
Ensure the sides are firmly at
-
tached, but do not overtighten.
Step 3:
Flip the assembled
sides upside down and secure
to the Upper Base Plate (C) us-
ing Long Screws (H) (note: the
Upper Base Plate has a center
hole and six predrilled holes.
Ensure that the recessed holes
are facing away from the hous-
ing so screw heads can be flush)
Step 4:
Attach feet (G) to the Lower Base
Plate (D) (note: this is the one with the brass
insert in the centre and three pre-drilled holes
for the feet.)
Step 5:
Flip the Lower Base Plate over onto
its feet and insert the metal bushing (sleeve)
from the Adjustment Bolt into the centre hole
Step 6:
Place the Bearing Plates (E) onto the
bushing ensurung they are kept in the correct
order (the plate with the metal roller bearings
sandwiched between the other two plates
Step 7:
The whole assembly from Step 3 should now also be carefully lifted onto the bushing, and
should rotate freely
Step 8:
Assemble the Adjustement Bolt (J) in the following order: Bolt -Small Washer - Ball Bear-
ing - Large Washer and insert into the bushing to secure all the base plate parts together
Step 9:
The final step is to install the Eyepiece Tray (I) to
the side of the base assembly with the scres provided.
Your Dobsoni an base is now completed. The adjustment knob on the base controls how easy it is
to move the base (and telescope) in the Azimuth (left/right) direction.
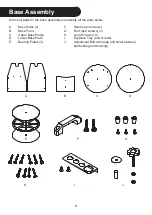
A
A
B
C
D
E
F
G
G
H
H
H
J
I
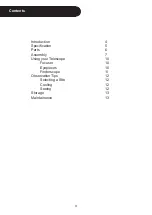
Summary of Contents for DOBSONIAN GS680
Page 14: ...14...


