ENGLISH
IMPORTANT: The instruction manual you are holding includes essential information on the safety measures to be implemented for
installation and start-up. Therefore, the installer as well as the user must read the instructions before beginning installation and start-up.
Keep this manual for future reference.
To achieve optimum performance of the Floodlamp follow the instructions provided below:
1. CHECK THE CONTENTS:
The following accessories will be found inside the box:
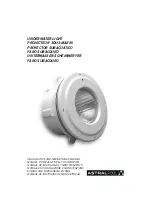
Light for prefabricated pools Reference 10892 (Fig. 1)
1.
Body and niche assembly
2.
Insert rings
3.
Three seals
4.
Niche frame
5.
Light assembly
6.
PG-16 connector
7.
Bag of screws
Light for concrete pools Reference 16003 (Fig. 2)
1.
Body and niche assembly
2.
Light assembly
3.
PG-16 connector
2. GENERAL INFORMATION
x
This light has been designed for totally submerged use in non salt water pools in accordance with international electrical
security regulations for this type of equipment, specificallly EN 60598-2-18, namely a class 3 item with a low security
voitage of 12V.
x
The light can be fitted in a inclined position and on moving the light beam downwards by 4° the glare above the level of
the water is reduced. (Fig. 14)
x
The light contains an automatic temperature operated disconnection system which actuates in cases of abnormal
functioning or if the light is connected when it is above the water.
x
The electrical cable comes through the niche via a component, subsequently referred to as a roto-hub, which allows the
cable to exit the niche in one of 8 different possitions, (Fig. 11)
3. INSTALLATION ADVICE
On considering the installation of underwater pool lights, the following points must be taken into account:
x
To clearly illuminate a swimming pool, one 300W light must be used for each 25 or 35 m2 of water surface area.
x
In especially deep pools, one 300W light must be used for each 30 o 40 ms of water volume.
x
To avoid dazzling, Install the lights facing away from any house or normal view of the pool.
x
If a training or competition pool is illuminated, the lights should be Installed in the sides in order to avoic dazzling the
swimmers during night trials.
x
Bearing in mind the need to change the bulb, the light should be Installed in an accesible place. It is recom mended that
the light be fitted in the upper part of the pool does not have drained in order to change the bulb. (Fig. 3)
x
This light Is designed for totally submerged use fixed to vertical pool walls.
4. NICHE MOUNTING
The method of fixing the niche to the wall depends whether the light is for use in concrete or prefabricated pools.
The lights for concrete pools should be installed in the wall at around 700mm from the water surface. (Fig. 3)
In any case, the niche position is as shown in Figure 4 in which the hole in the niche which incorporates the roto-hub is in
the upper part of the vertical axis.
Before mounting the niche in the wall, the roto-hub should be correctly positioned. (Fig. 11)
CONCRETE POOLS:
The niche for concrete pools varies depending on whether it is covered with a liner or gresite.
x
Concrete pool (Fig. 4): Fit the protection cover to prevent ingress of the concrete. Bring the concrete level with the mouth
of the niche and position the fixing plate with Its 2 screws.
x
Concrete pool with gresite (Fig. 5): Fit the protection cover to prevent ingress of the concrete. Bring forward the mouth of
the niche, smooth it in to the level of the gresite and position the fixing plate with its 2 screws,
Summary of Contents for SKIMMER FLOTANDO
Page 24: ...Fig 1 Fig 2 Fig 3 Fig 4...
Page 25: ...Fig 5 Fig 6 Fig 7 Fig 8...
Page 26: ...Fig 9 Fig 10 Fig 11 Fig 12...
Page 27: ...Fig 13 Fig 14 Fig 15 Fig 16...

