


23
Adding & using devices
.
Armed
22
23
Adding & Using Devices
•
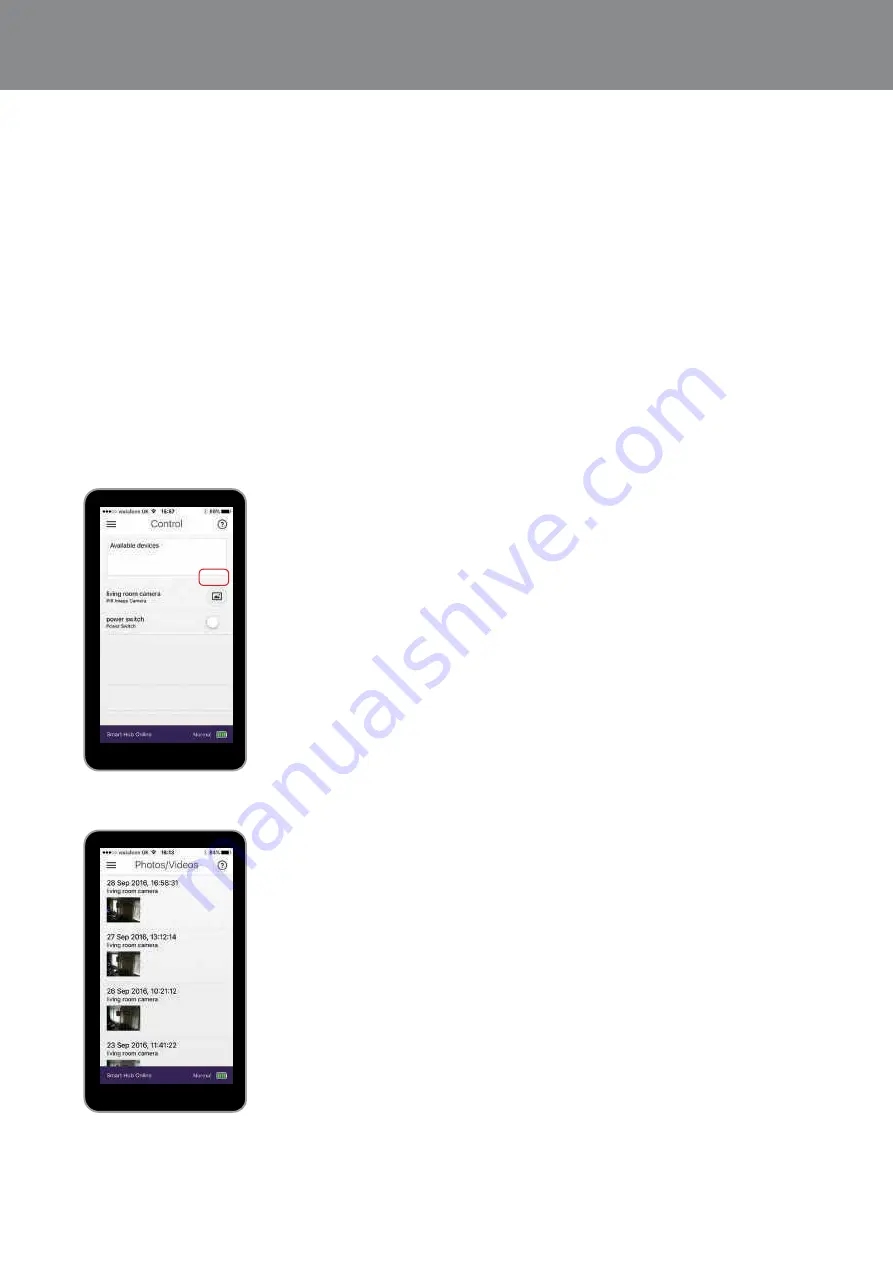
Manually requesting PIR Images
During an alarm, the PIR Image Camera will send
images to your phone. You can also manually
request these images in the ‘control’ section of the
app by pressing the image icon next to the device
in the contol list. Still images take an average of 15
seconds before showing on your phone. Click on
“image” to view images.
Go to app menu and select Control
Note: Up to 50 images can be kept in the Yale
Server (the oldest images are automatically deleted
to make space). Users are advised to delete
unwanted images. Images will be stored for no
longer than 30 days.
Take Photo
View Photo
Setting up Part Armed Mode
Adding & using devices
•
Key Fob
• Use the Key Fob to remotely arm, part arm or
disarm your alarm when within 30m range of
your Smart Hub.
• To add a Key Fob, see page 11.
• Pressing the panic button on the Key Fob will
immediately sound the alarm.
• To cancel the panic alarm you will need to enter
your PIN code on your Key Pad.
Key Pad
/
Part Arm
Panic
ale
Y
1
2
3
6
5
4
7
8
9
0
Panic button A
Panic button B
Disarm
HomeArm
LED
Learn button=
Press 8 and 9 together
/
Away
Part arm
Summary of Contents for Yale Secure Connect MZ-1
Page 34: ...34 Notes 34 ...
Page 35: ...35 Notes 35 ...


