background image

P/N YRL-PB-MNL-0017 Rev A

1

 ®

Yale Assure Lever

Keypad (YRL216) and Key-Free Keypad (YRL236)

Installation and Programming Instructions

FAILURE TO FOLLOW THESE INSTRUCTIONS COULD RESULT IN DAMAGE TO THE PRODUCT AND VOID THE FACTORY WARRANTY

Before you begin

for step-by-step installation

instructions & to register

your product

DOWNLOAD

THE BILT APP

WARNING

This product can expose you to lead

 which is known to the state of 

California to cause cancer and birth defects or other reproductive harm. 
For more information go to www.P65warnings.ca.gov.

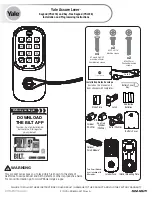
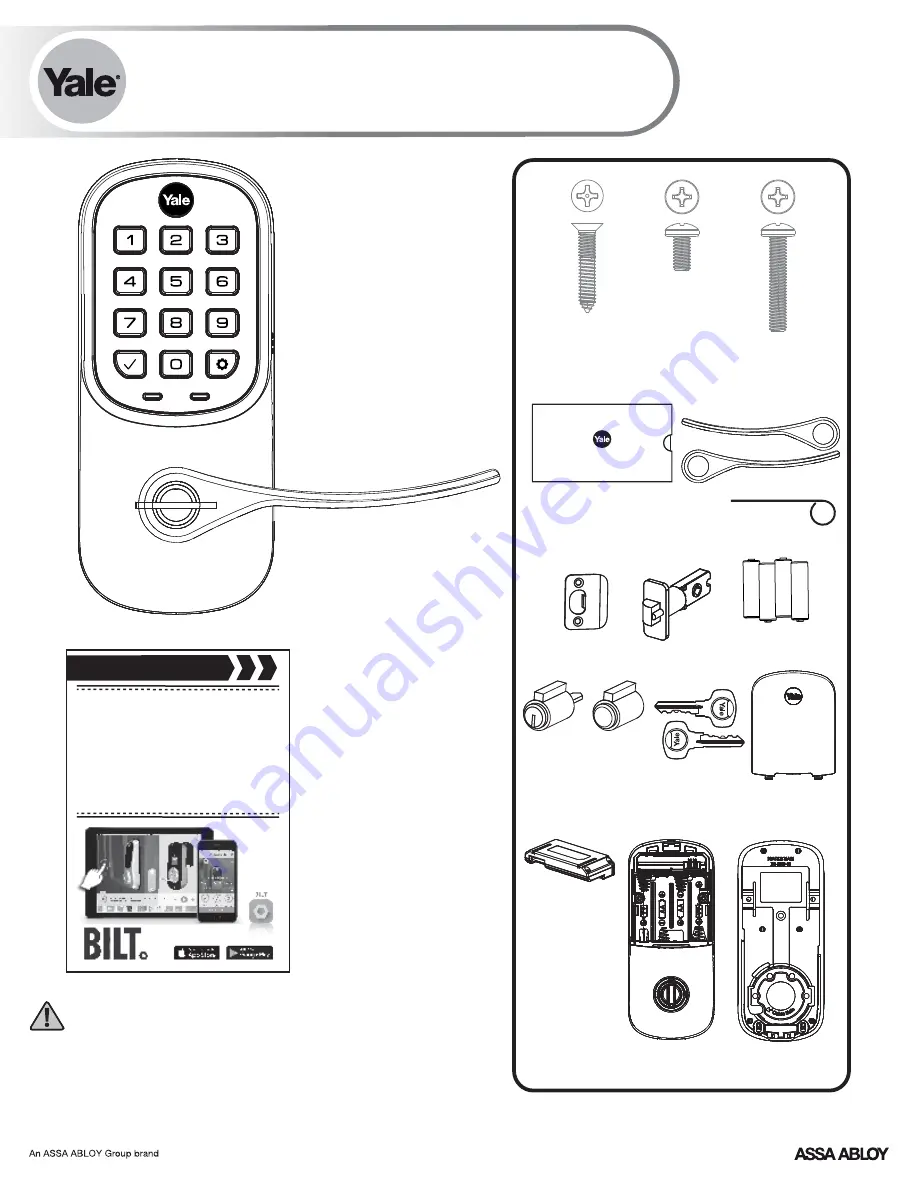
Battery Cover

Key

AA Alkaline

Batteries

Latch

Strike Plate

Interior Mounting Plate

Interior Lock

Battery Cover

Levers

Cylinder

(YRL216)

Optional
Smart Module*

Keys (YRL216)

Installation Guide Envelope

(Includes this manual and

door checker with template)

Let's Get Started

*Yale Smart Module 
is not included with 
NR models.

Key-Free

Cylinder

(YRL236)

OR

#7 wood & #8-32

machine x 20mm

Combination screws 

x4

M4 x 22mm

Pan head machine

screws

x2

#8-32 x 5/16"

Machine screws

x2

Summary of Contents for Yale Assure Lever YRL216

Page 1: ...wn to the state of California to cause cancer and birth defects or other reproductive harm For more information go to www P65warnings ca gov Battery Cover Key AA Alkaline Batteries Latch Strike Plate Interior Mounting Plate Interior Lock Battery Cover Levers Cylinder YRL216 Optional Smart Module Keys YRL216 Installation Guide Envelope Includes this manual and door checker with template Let s Get S...

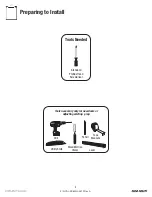
Page 2: ...MNL 0017 Rev A 2 Preparing to Install Tools Needed Standard Phillips Head Screwdriver Utility Knife Drill Wood Mortise Chisel Pencil Tape Measure Level Tools necessary only for new doors or adjusting existing prep ...

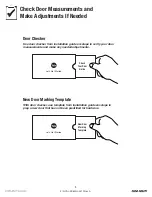
Page 3: ...Use door checker from installation guide envelope to verify your door measurements and make any needed adjustments With door checker use template from installation guide envelope to prep a new door that has not been predrilled for hardware Let s Get Started New Door Marking Template Let s Get Started Check Your Door Guide ...

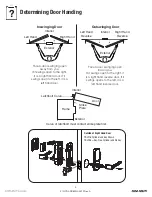
Page 4: ...r Interior Left Hand Reverse Right Hand Reverse Face a door swinging open toward you If it swings open to the right it is a right hand reverse door If it swings opens to the left it is a left hand reverse door Exterior Outswinging Door Interior Curve of latchbolt must contact strike plate first Frame Door Latchbolt Curve Strike Plate Exterior Interior Outside of Right Hand Door YRL216 Cylinder and...

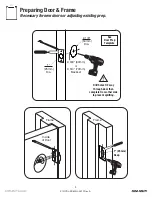
Page 5: ...cessary for new doors or adjusting existing prep 1 25mm Deep Drill holes 1 2 way through door then complete from other side to prevent splitting 2 1 8 54mm Dia 2 3 8 60mm or 2 3 4 70mm Backset 1 25mm Dia See Door Prep Template Inside of Door Frame Frame ...

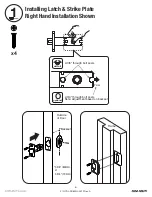
Page 6: ...6 x4 1 Installing Latch Strike Plate Right Hand Installation Shown 2 3 8 through bolt posts 2 3 4 through bolt posts Note Adjustment based on backset O optional default PULL Outside of Door Frame Backset 2 3 8 60mm or 2 3 4 70mm ...

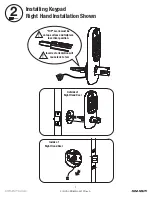
Page 7: ...ev A 7 2 Outside of Right Hand Door Inside of Right Hand Door Installing Keypad Right Hand Installation Shown TOP mark must be on top surface and tailpiece in vertical position Incorrect orientation will cause lock to fail ...

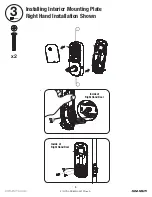
Page 8: ...P N YRL PB MNL 0017 Rev A 8 x2 3 Installing Interior Mounting Plate Right Hand Installation Shown Inside of Right Hand Door Inside of Right Hand Door ...

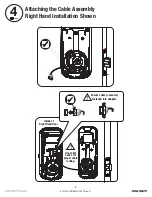
Page 9: ...9 4 P N YRL PB MNL 0017 Rev A Attaching the Cable Assembly Right Hand Installation Shown Inside of Right Hand Door Ensure cable is securely fastened into adapter Use cable hooks for proper cable routing ...

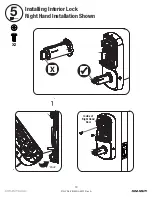
Page 10: ...P N YRL PB MNL 0017 Rev A 10 5 X2 Installing Interior Lock Right Hand Installation Shown X Inside of Right Hand Door Click ...

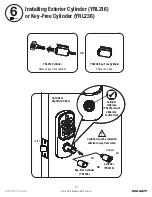
Page 11: ...L236 Outside of Right Hand Door Cylinder must be installed with bar away from latch Latch Bar Bar Tailpiece Cylinder YRL216 Key Free Cylinder YRL236 OR YRL216 Cylinder YRL236 Key Free Cylinder Remove key from cylinder OR There is no key Cylinder Tailpiece YRL216 must slide into vertical slot ...

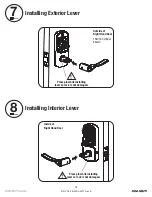
Page 12: ...stalling Exterior Lever Installing Interior Lever Inside of Right Hand Door Press pin while installing lever so lock is not damaged Outside of Right Hand Door YRL216 Cylinder Shown Press pin while installing lever so lock is not damaged ...

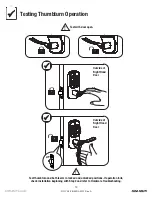
Page 13: ...n Operation Outside of Right Hand Door Outside of Right Hand Door Test with door open Test thumbturn and both levers in locked and unlocked positions If operation fails check installation beginning with Step 2 and refer to Hardware Troubleshooting ...

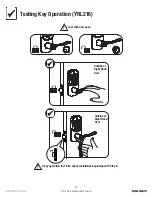
Page 14: ...P N YRL PB MNL 0017 Rev A 14 Testing Key Operation YRL216 Outside of Right Hand Door Outside of Right Hand Door Test with door open If key operation test fails check installation beginning with Step 6 ...

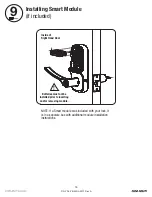
Page 15: ...art Module if included NOTE If a Smart module was included with your lock it is in a separate box with additional module installation instructions Inside of Right Hand Door Batteries must not be installed prior to inserting and or removing module ...

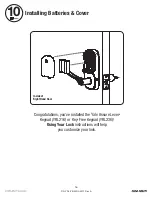
Page 16: ...Rev A 16 10 Inside of Right Hand Door Installing Batteries Cover Congratulations you ve installed the Yale Assure Lever Keypad or Key Free Keypad YRL236 YRL216 Using Your Lock instructions will help you customize your lock ...

Page 17: ...created upon installation or after resetting the lock to factory default Programming and use of lock is not possible until this step has been successfully completed See of Using Your Lock instructions below 1 If keypad operation test fails check installation beginning with Step 2 Enter Entry Code Press ...

Page 18: ...rior lock to access the reset button 3 The reset button see image above is marked 4 Re insert 3 batteries and hold the reset button for 3 seconds 5 While still holding the reset button insert the 4th battery and hold the reset button for an additional 3 seconds 6 Release the reset button 7 Re install the interior lock onto the door Upon reset Master Entry Code creation is the only option available...

Page 19: ...rm b Check that thumbturn does not have anything preventing it from physically rotating c Verify that you can rotate thumbturn freely My lock is not making any sound when I push buttons a Use the programming tree in the manual to verify that Audio is enabled b If Audio is enabled ensure that the white cable that connects the keypad to the interior of the lock is not pinched or broken When rotating...

Page 20: ...rty 30 seconds Located on the inside lock Shows active status Locked of lock and can be enabled or disabled in the Advanced Lock Settings Main Menu selection 3 When the latch is retracted activating the keypad will extend the latch during Auto Re lock duration or when Auto Re lock is disabled When One Touch Re lock is not in use disabled any valid Entry Code will re lock the lock The audio setting...

Page 21: ...r Mechanical Key YRL216 Back up entry method While Yale has included several features to prevent lockout 9 Volt battery jumper low battery warnings it is still possible for a lockout situation to occur Because the YRL236 does not have a key Yale recommends using YRL236 in an environment where there are additional entry points into dwelling NOTE TO INSTALLER AND CONSUMER All Code Lockout Mode keypa...

Page 22: ...Entry Code Enter 4 8 digit Master Entry Code Creating a Master Entry Code must be performed upon installation or after resetting the lock to factory default Programming and use of lock is not possible until this step has been successfully completed Press Press ...

Page 23: ...Press Press code flashes Press Enter Master Entry Code Press Master Entry Code must be created first Max Entry Codes 250 with Smart Module and 25 without Enter 4 8 digit Entry Code Press Adding more Entry Codes To end programming Enter 4 8 digit Entry Code Press Press ...

Page 24: ...nter Master Entry Code Press Press Enter 4 8 digit Entry Code Press Press Press Enter Press Press To delete all Entry Codes Does not delete Master Entry Code To delete one Entry Code you must enter the Entry Code you wish to delete Deleting one Entry Code ...

Page 25: ...P N YRL PB MNL 0017 Rev A 25 4 Unlocking Door with Entry Code Enter Entry Code Press Duplicate if necessary User Name Entry Code Code Chart Entry Code Management Master Homeowner Babysitter ...

Page 26: ...60 sec 3 min 2 min Disable 1 Press any key to wake lock 2 Enter Master Entry Code followed by icon 3 Enter digit corresponding to the function to be performed followed by the icon The Master Entry Code must be created prior to any other programming of the lock Network Module Setting function appears only with Yale Smart module installed Here is an example of how to set Auto Lock to 30 seconds Mast...

Page 27: ...he Master Entry Code can enable disable All Code Lockout Mode Contact the Master user The Yale logo displays intermittent RED flashes Check that keypad cable assembly is fully connected and not pinched Entry Code cannot be added Entry Codes must consist of 4 to 8 digits Entry Code has already been added or maximum number of codes has been reached Management of Entry Codes is set by the authority of...

Page 28: ... provide reasonable protection against harmful interference in a residential installation This equipment generates uses and can radiate radio frequency energy and if not installed and used in accordance with the instructions may cause harmful interference to radio communications However there is no guarantee that interference will not occur in a particular installation If this equipment does cause...

Page 29: ... If you re adding a new Yale Smart Module follow the instructions included with it P N AYR202 ZW INSTAL FUL Rev E Removing a Yale Z Wave Plus Smart Module from your Assure Lock Z Wave System 1 Install the Yale Smart Module into the slot above the battery compartment IMPORTANT The batteries must be removed before removing the Yale Smart Module Remove battery cover Remove batteries Insert or remove ...

Page 30: ...on is subject to the following two conditions 1 this device may not cause interference and 2 this device must accept any interference including interference that may cause undesired operation of the device Industry Canada Ÿ Consult the dealer or an experienced radio TV technician for help THIS DEVICE COMPLIES WITH PART 15 OF THE FCC RULES OPERATION IS SUBJECT TO THE FOLLOWING TWO CONDITIONS En ver...

Page 31: ...rated nodes within the network will act as repeaters regardless of vendor to increase reliability of the network To Enroll the Module Inclusion Mode Enter the 4 8 digit Master code followed by the key PIN Press the key followed by the key Press the key followed by the key To Unenroll the Module Exclusion Mode Enter the 4 8 digit Master code followed by the key PIN Press the key followed by the key...

Page 32: ...ice may not cause interference and 2 this device must accept any interference including interference that may cause undesired operation of the device Le présent appareil est conforme aux d Industrie CNR Canada applicables aux appareils radio exempts de licence L exploitation est autorisée aux deux conditions suivantes 1 l appareil ne doit pas produire de brouillage et 2 l utilisateur de l appareil...

Reviews: