Asko OP8664A Instructions For Use Manual Download Page 10

EN 10

FIRST USE

Before first use

•  Clean the appliance interior and accessories with hot water and washing-up liquid.  

Do not use aggressive cleaning agents, abrasive sponges and similar.

•  The appliance will emit a particular odor when it is used for the first time; this is normal. 

Make sure that there is good ventilation during initial use.

When the appliance is first plugged in or after connection when the appliance was 
disconnected from the power mains for a long period of time, you have to set ‘Language’, 

‘Date’ and ‘Time’. 

Setting the language

English

Nederlands

12:00

Language

Français

In case you are not comfortable with the language on the display, you can select another 
language. The default setting is ‘English’.

1.  Turn the selection knob and select your preferred language from the displayed list.

2.  Confirm the setting by touching the confirm key.

The next screen will be displayed.

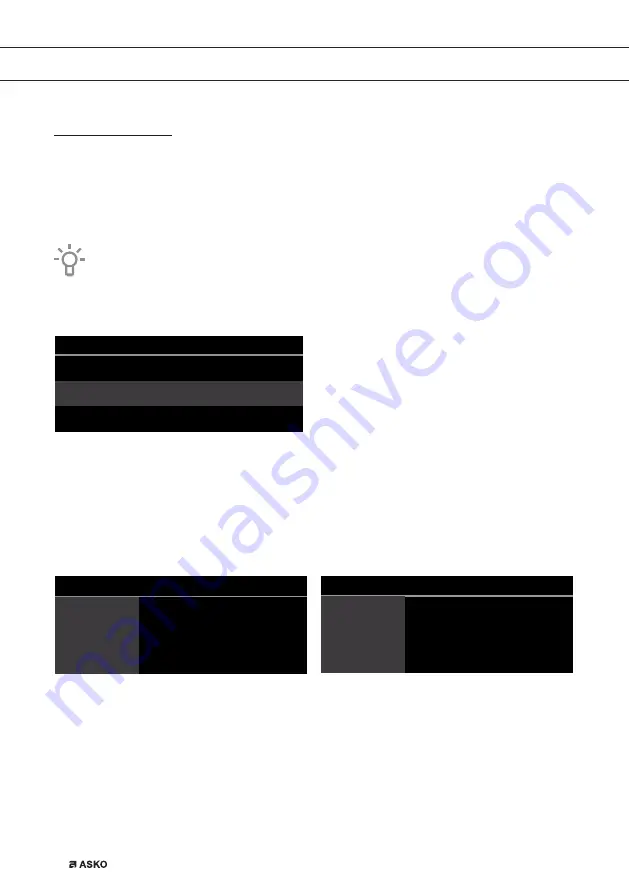
Setting the date and time

English

Nederlands

12:00

Language

Français

12:00

Year

01

01

2017

2018

12:00

Hours

30

11

13

12

1.  Turn the selection knob and change the first setting (Year). 

2.  Confirm this setting by touching the right navigation key or by touching the selection knob.
3.  Turn the selection knob and change the next setting (Month). 

4.  Confirm this setting by touching the right navigation key or by touching the selection knob.

5.  Turn the selection knob and change the last setting (Day). 
6.  Confirm this setting by touching the confirm key.

The next screen will be displayed. Now set the hours and minutes with the selection knob 

and navigation key. Confirm your setting by touching the confirm key.

Summary of Contents for OP8664A

Page 1: ...Instructions for use OVEN OP8664A BO6PY4S3 42 OP8664B BO6PY4S3 42 OP8664S BO6PY4S3 42...

Page 2: ...EN User manual EN 3 EN 29 Pictograms used Important information Tip...

Page 3: ...nctions 14 Description of the sub functions 15 Plus menu 18 Operation Using the appliance cooking functions 19 Culisensor 20 Settings Settings menu 21 Maintenance Cleaning the appliance 22 Pyrolysis 2...

Page 4: ...se this oven In addition to information about operating the appliance you will also find background information that may be useful when using the appliance Please read the separate safety instructions...

Page 5: ...s A number of shelf levels can have fully retractable telescopic guide rails depending on the model Pull the telescopic guide rails out of the oven cavity completely and place the oven rack baking tra...

Page 6: ...n with food can also be placed on the oven rack The oven rack is equipped with a safety peg Lift the rack slightly at the front to slide it out of the oven Do not use the oven rack for microwave funct...

Page 7: ...16 17 1 10 11 6 7 8 9 5 4 3 2 1 Function knob in Off position 2 Defrost 3 Programs 4 Fast preheat 5 Oven 6 Eco hot air 7 Plate warming 8 Warming 9 Cleaning 10 Display 11 Selection knob 12 On off key...

Page 8: ...ext available setting appears in the active area 4 Touch the selection knob or the right navigation key to confirm the chosen sub oven function or setting The active area grey background moves to the...

Page 9: ...time when set See Plus menu Cooking time cooking time counting up or counting down when cooking time has been set Finishing time when cooking time has been set Stand by mode The stand by display will...

Page 10: ...ult setting is English 1 Turn the selection knob and select your preferred language from the displayed list 2 Confirm the setting by touching the confirm key The next screen will be displayed Setting...

Page 11: ...set and the display will show the stand by screen The appliance is now ready for use The language time and date can be adjusted in the settings menu see Settings menu chapter The settings menu can be...

Page 12: ...nge the settings that are in the active area See Control panel general use for more information Go to the next setting Touch this knob to go to the next setting The next to change setting will be in t...

Page 13: ...vate the child lock function The oven s control panel can be locked by means of the Child Safety Lock to protect the oven against unintended use Plus key To open the settings menu see Settings Touch t...

Page 14: ...from a list of pre programmed dishes Defrost With this function the air circulates by means of the fan The air will be heated to a temperature of 30 C Dishes are defrosted quickly and efficiently ECO...

Page 15: ...ng the pyrolytic self cleaning process the oven door is automatically locked above a certain temperature The outside of the oven becomes hotter than usual When the oven is completely cool the inside c...

Page 16: ...ement This mode can be used with dishes and baked goods that require a distinctive bottom crust or browning Use just before the end of the baking or roasting time Place the oven rack in the upper part...

Page 17: ...king tray or oven rack in the middle of the oven Suggested temperature 150 C 2 Bottom heat Heating only by means of the lower heating element This mode can be used with dishes and baked goods that req...

Page 18: ...tly of the oven function When the egg timer goes off a message pop up will appear and an acoustic signal will sound Touch the stop key to switch off the signal and close the pop up menu The sound will...

Page 19: ...unction the oven temperature the cooking time The next sub function or setting becomes active if available Go back to an previous selection or setting by touching the left navigation key If preferred...

Page 20: ...mpletely into the food The display will show the culisensor screen and icon 3 Set the function and temperature Instead of the time you need to set the core temperature between 30 100 C 4 Start the pro...

Page 21: ...witch off manually Night mode Start and end time for lower display brightness First display set start timer second display set end time Appliance to stand by Auto switch off after 1 hour Always on Coo...

Page 22: ...esent incinerate at this high temperature and only ash remains With average use of the oven we recommend running the pyrolysis function once per month Caution First remove all accessories and guide ra...

Page 23: ...oven there may be visible deposits on the door and below in the oven cavity This is best removed using a non abrasive sponge and a mild solution of warm water and washing up liquid Only warm water and...

Page 24: ...old room illumination The lamp is a consumer item and therefore not covered by warranty Replace the defective lamp with a lamp of the same type Disconnect the appliance from the power supply by removi...

Page 25: ...tly close the door until it reaches a 45 angle 4 Remove the door by lifting and tilting it towards the oven C The hinges need to come out of the slots in the oven Install the oven door 1 Hold the door...

Page 26: ...left and right of the door to release the glass A 2 Grab the glass A at the bottom and gently lift 3 and shift 4 it to remove it from the upper support 3 The inner glass B depending on the model can b...

Page 27: ...tes remove the mains plug from the socket or switch the circuit breaker to off then reconnect the appliance and switch it on Sparking in the oven space Ensure that all cover panels from the lamps are...

Page 28: ...Then reconnect it and set the current time Consult a service technician if the error persists Storing and repairing the oven Repairs should only be performed by a qualified service technician If main...

Page 29: ...out waste container This indicates that household appliances must be disposed of separately This means that the appliance may not be processed via the regular waste flow at the end of its useful life...

Page 30: ...EN 30...

Page 31: ...EN 31...

Page 32: ...on the inside of the appliance When contacting the service department have the complete type number to hand You will find the addresses and phone numbers of the service organisation on the guarantee...

Reviews: