background image

Engl

is

h

5

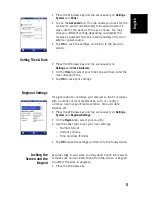
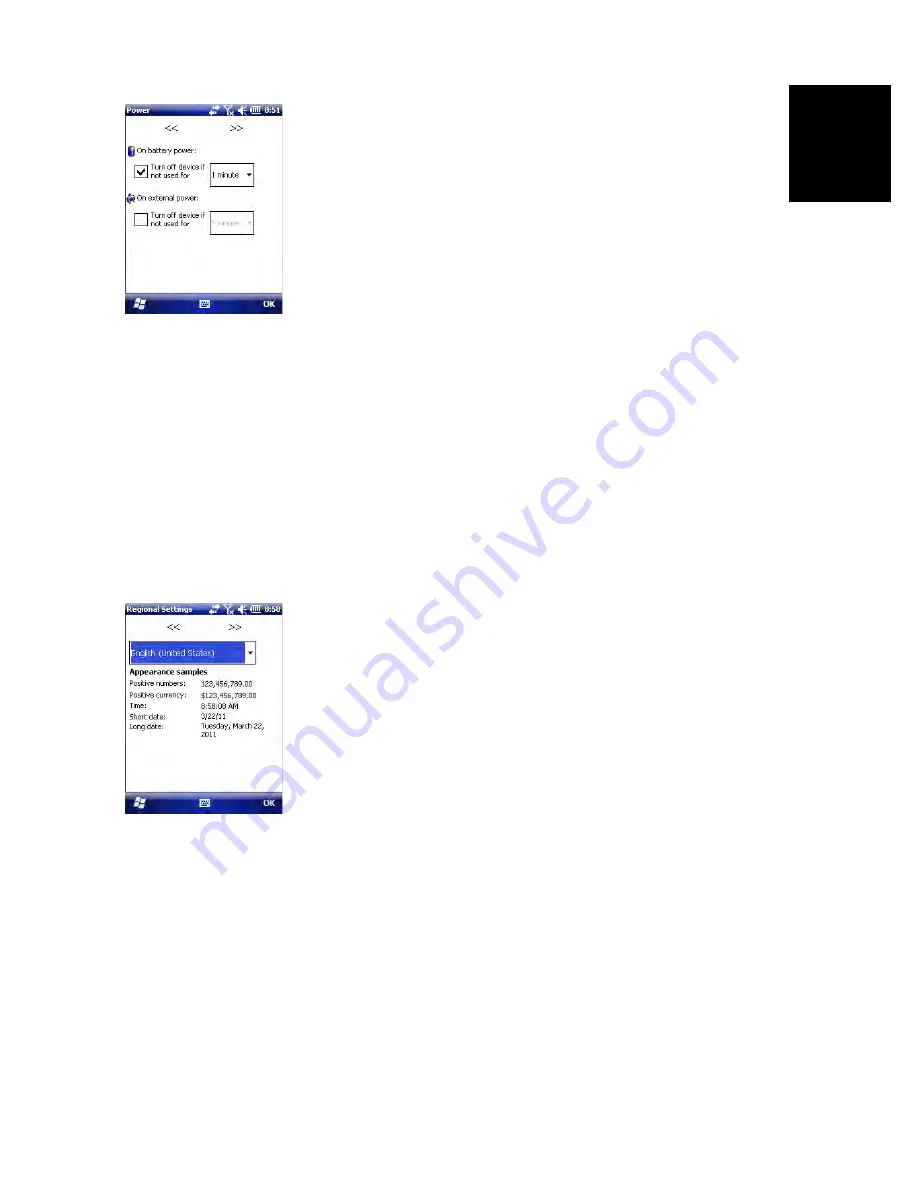
Press the Windows key and tap successively on 

Settings

System

 and 

Power

.

Tap on the 

Advanced

 tab. This tab allows you to ask for the 

receiver to switch automatically to Suspend mode if it 
stays idle for the period of time you choose. You may 
choose a different setting depending on whether the 
receiver is powered from the internal battery or from an 
external power source.

Tap 

OK

 to save the settings and return to the previous 

screen.


Setting Time & Date


Press the Windows key and tap successively on 

Settings

,and 

Clock & Alarms

.

On  the 

Time

 tab, select your time zone and then enter the 

local date and time.

Tap 

OK

 to save your settings.


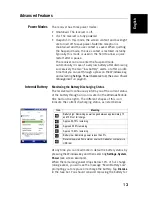
Regional Settings

It’s a good idea to customize your receiver so that it complies 
with a number of local preferences, such as country’s 
currency, decimal point representation, time and date 
formats, etc.

Press the Windows key and tap successively on 

Settings

System

 and 

Regional Settings

.

On  the 

Region

 tab, select your country.

Use the other tabs to set your local settings:

– Number format

– Currency choice

– Time and date formats

Tap 

OK

 to save the settings and return to the Today screen.


Locking the

Screen and the

Keypad

At some stage in your work, you may need to lock the receiver 
to make sure no user intervention from the screen or keypad 
can affect the work in progress. 

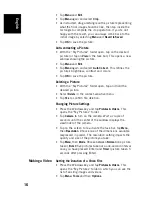
Press the Windows key.
Summary of Contents for MobileMapper 10

Page 1: ...White Paper MobileMapper 10 Getting Started Guide ...

Page 2: ...ode 7 Turning the Receiver Off 7 Receiver Description 8 Front View 8 Power Key 8 Windows key 8 Display Screen 8 Scroll Enter keys 8 Function keys 8 Microphone 9 Built in GPS Antenna 9 Earpiece 9 Rear View 9 External GPS Antenna Input 9 Loudspeaker 9 Camera Lens 9 Back Strap 9 Battery Compartment 10 Bottom View 10 GNSS Toolbox 11 GNSS Settings 11 GNSS Status 11 Reset 12 About 12 Advanced Features 1...

Page 3: ...nding a Video 17 Playing Back a Video 17 Renaming a Video 18 Deleting a Video 18 Voice Setting 18 Platform Specifications 19 GNSS Characteristics 19 Accuracy Specifications 19 Processor 19 Operating System 19 Communication 19 Physical Characteristics 20 User Interface 20 Memory 20 Environmental Characteristics 20 Power Requirements 20 Multimedia Sensors 20 Standard Accessories 20 ...

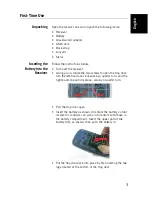
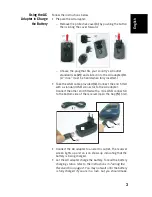
Page 4: ...screws to open the trap door turn the left hand one clockwise by a quarter turn and the right hand one anticlockwise also by a quarter turn Pull the trap door open Insert the battery as shown Orientate the battery so that its electric contacts can come into contact with those in the battery compartment Insert the upper part of the battery first as shown then push the battery in Put the trap door b...

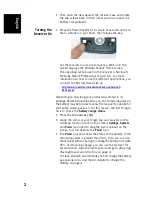
Page 5: ... before being shipped to you the remaining power in the battery may be too low to allow the receiver to operate for your entire working session For this reason the first thing to do is to check the battery charge status Press the Windows key 2 Using the stylus or your finger tap successively on the following function icons on the screen Settings System and Power you need to drag the stylus upward ...

Page 6: ...ect the end fitted with a standard USB connector to the AC adapter Connect the other end fitted with a mini USB connector to the bottom side of the receiver open the flap 5 first Connect the AC adapter to an electric outlet The receiver screen lights up and an icon shows up indicating that the battery is being charged Let the AC adapter charge the battery To read the battery charging status refer ...

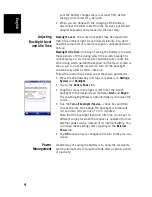
Page 7: ...tically after a certain idle time Follow the instructions below to set these two parameters Press the Windows key and tap successively on Settings System and Backlight Tap on the Battery Power tab Drag the cursor to the right or left to set the screen backlight to the desired level between Dark and Bright The resulting brightness is obtained when you release the cursor Tick the Turn off backlight ...

Page 8: ...ime zone and then enter the local date and time Tap OK to save your settings Regional Settings It s a good idea to customize your receiver so that it complies with a number of local preferences such as country s currency decimal point representation time and date formats etc Press the Windows key and tap successively on Settings System and Regional Settings On the Region tab select your country Us...

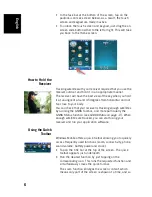
Page 9: ... You can check that your receiver is tracking enough satellites by running the GNSS Toolbox and more particularly the GNSS Status function see GNSS Status on page 11 When enough satellites are tracked you can start using your receiver and run your application software Using the Quick Toolbar Windows Mobile offers a quick toolbar allowing you to quickly access frequently used functions zoom connect...

Page 10: ...ight is off The receiver however continues to track satellites and the use context is saved To switch to Suspend mode just press briefly on the Power button 1 The receiver screen is turned off instantly To wake up the receiver just press briefly the same button again This will instantly switch the screen back on and restore the use context in which the receiver was before entering the Suspend mode...

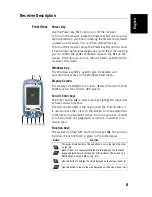
Page 11: ...reen 240 x 320 pixels Scroll Enter keys The Enter button 4 is used to accept highlighted input and initiate various functions The Scroll button 5 is the ring around the Enter button It is used to move the cursor on the screen from one data field to the next on a parameter screen from one option to another in a menu from one geographical location to another on a map screen Function keys The receive...

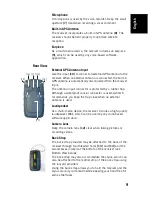
Page 12: ... rubber flap Although a waterproof coaxial connector is used Ashtech recommends you keep the flap close when no external antenna is used Loudspeaker As a multi media device the receiver includes a high quality loudspeaker 11 which can be used by any voice based software application Camera Lens Keep the camera lens 12 clear when taking pictures or recording videos Back Strap The back strap provided...

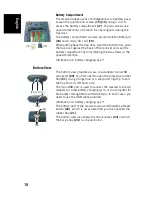
Page 13: ...Information on battery charging see Bottom View The bottom view provides access to a standard mini USB connector 20 You first need to open the protective rubber flap 21 using a finger nail or a sharp and rigid tip to pull the flap from its left hand side The mini USB port is used to connect the receiver to the AC adapter for a fast battery charging cycle or to a computer for file transfer through ...

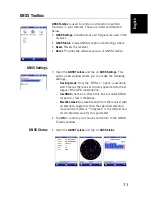
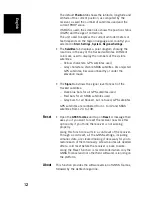
Page 14: ...is opens a new window where you can make the following settings Tracking mode Only the GPS L1 option is available which means the receiver can only operate from the L1 signal of the GPS constellation Use SBAS check box Check this box to enable SBAS reception clear it otherwise Elevation mask Any satellite seen from the receiver with an elevation angle less than the specified elevation mask will be...

Page 15: ... mask The Signal tab shows the signal level for each of the tracked satellites Dark blue bars for all GPS satellites used Red bars for all SBAS satellites used Grey bars for all tracked but not used GPS satellites GPS satellites are numbered from 1 to 32 and SBAS satellites from 120 to 138 Reset Open the GNSS Toolbox and tap on Reset A message then asks you if you want to reset the receiver now Us...

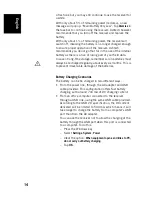
Page 16: ...ttery Monitoring the Battery Discharging Status The receiver will continuously inform you of the current status of the battery through an icon located in the Windows Mobile title bar on the right The different shapes of this icon indicate the current discharging status as listed below At any time you can read more in detail the battery status by pressing the Windows key and then selecting Settings...

Page 17: ...bout every six months This is to prevent irreversible damage of the batteries Battery Charging Scenarios The battery can be be charged in two different ways From the power line through the AC adapter and USB cable provided This configuration offers fast battery charging with around 700 mA of DC charging current From an office computer connected to the receiver through a USB line using the same USB...

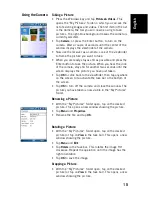
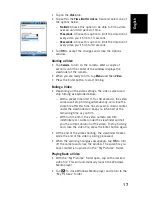
Page 18: ...until the screen displays the picture you have just taken Tap OK to come back to the viewfinder then tap anywhere on the screen to re activate the task bar a the bottom of the screen Tap OK to turn off the camera and close the window The picture you have taken is now visible in the My Pictures folder Renaming a Picture With the My Pictures folder open tap on the desired picture This opens a new wi...

Page 19: ...d picture Select Delete in the context sensitive menu Tap Yes to confirm file deletion Changing Picture Settings Press the Windows key and tap Pictures Videos This opens the My Pictures folder Tap Camera to turn on the camera Wait a couple of seconds until the center of the window displays the viewfinder of the camera Tap on the screen to re activate the task bar tap Menu then Resolution Choose on...

Page 20: ...top filming as explained below With a preset time limit 15 or 30 seconds the video camera will stop filming automatically and close the video file after this time has elapsed A down counter under the viewfinder will keep you informed of the remaining time as you film With no time limit the video camera will film indefinitely A counter under the viewfinder will tell you the current duration of the ...

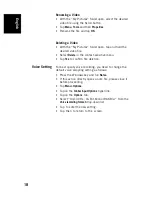
Page 21: ...sitive menu Tap Yes to confirm file deletion Voice Setting For best quality voice recording you need to change the default voice sampling setting as follows Press the Windows key and run Notes If this action directly opens a note file please close it before proceeding Tap Menu Options Tap on the Global Input Options hyperlink Tap on the Options tab Select 44 100 Hz 16 Bit Mono 86 KB s from the Voi...

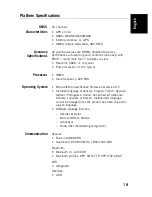
Page 22: ...uency 600 MHz Operating System Microsoft Windows Mobile Professional version 6 5 Installed language at delivery English French Spanish German Portuguese Italian Simplified Traditional Chinese Japanese or Korean Installed OS language cannot be changed once the product has been shipped in a given language Software package includes Internet Explorer Microsoft Office Mobile ActiveSync Transcriber hand...

Page 23: ... 256 MB NAND Flash non volatile Micro SDHC memory card up to 8 GB Sandisk Kingston recommended Environmental Characteristics Operating temperature 10 to 60 C 14 to 140 F Storage temperature 30 to 70 C 13 to 158 F Humidity 95 non condensing Waterproofness IP54 Free drop 1 2 m on concrete Power Requirements Battery life 20 hours 20 ºC with GPS on Bluetooth and WiFi disabled and screen backlight used...

Page 24: ... 9838 4229 n Fax 65 6777 9881 In China 86 10 5802 5174 n Fax 86 10 5802 5135 www ashtech com Ashtech follows a policy of continuous product improvement specifications and descriptions are thus subject to change without notice Please contact Ashtech for the latest product information 2010 Ashtech All rights reserved The Ashtech logo is a trademark of Ashtech LLC All other product and brand names ar...

Page 25: ...residential installation This equipment generates uses and can radiate radio frequency energy and if not installed and used in accordance with the instructions may cause harmful interference to radio communications However there is no guarantee that interference will not occur in a particular installation If this equipment does cause harmful interference to radio or television reception which can ...

Page 26: ...n compromettre le fonctionnement SAR Information The SAR limit adopted by USA FCC is 1 6 Watts kilogram W kg averaged over one gram of tissue Device types FCC ID NZI802140 has also been tested against this SAR limit The highest SAR value reported under this standard during product certification for the body is 0 792 W kg This device was tested for typical body worn operations with the back of the ...

Reviews: