


3
AS A LOCATION IS SELECTED, KEEP THE FOLLOWING MIND
1. The chimney connection should be as airtight as possible. The heater must have its own chimney flue. Do not
connect this unit to a chimney flue serving another appliance. If there is no chimney near where you wish to
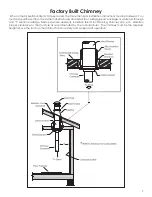
place the heater, you can use a UL 103HT Residential Type and Building Heating Appliance Chimney.
2. Place the heater on solid masonry or solid concrete. Manufactured floor protector conforms to UL 1618, that
provides at minimum type 1 ember protection. The floor protector should be under the stove, 16” beyond
the front and 8” beyond each side of the fuel loading and ash removal opening. Have the floor protector
with the specified dimensions. The floor protector must extend under the product and two (2) inches on
either side of the chimney connector
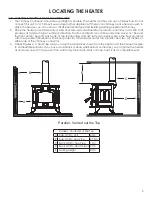
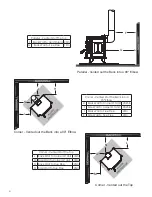
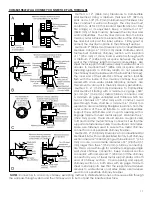
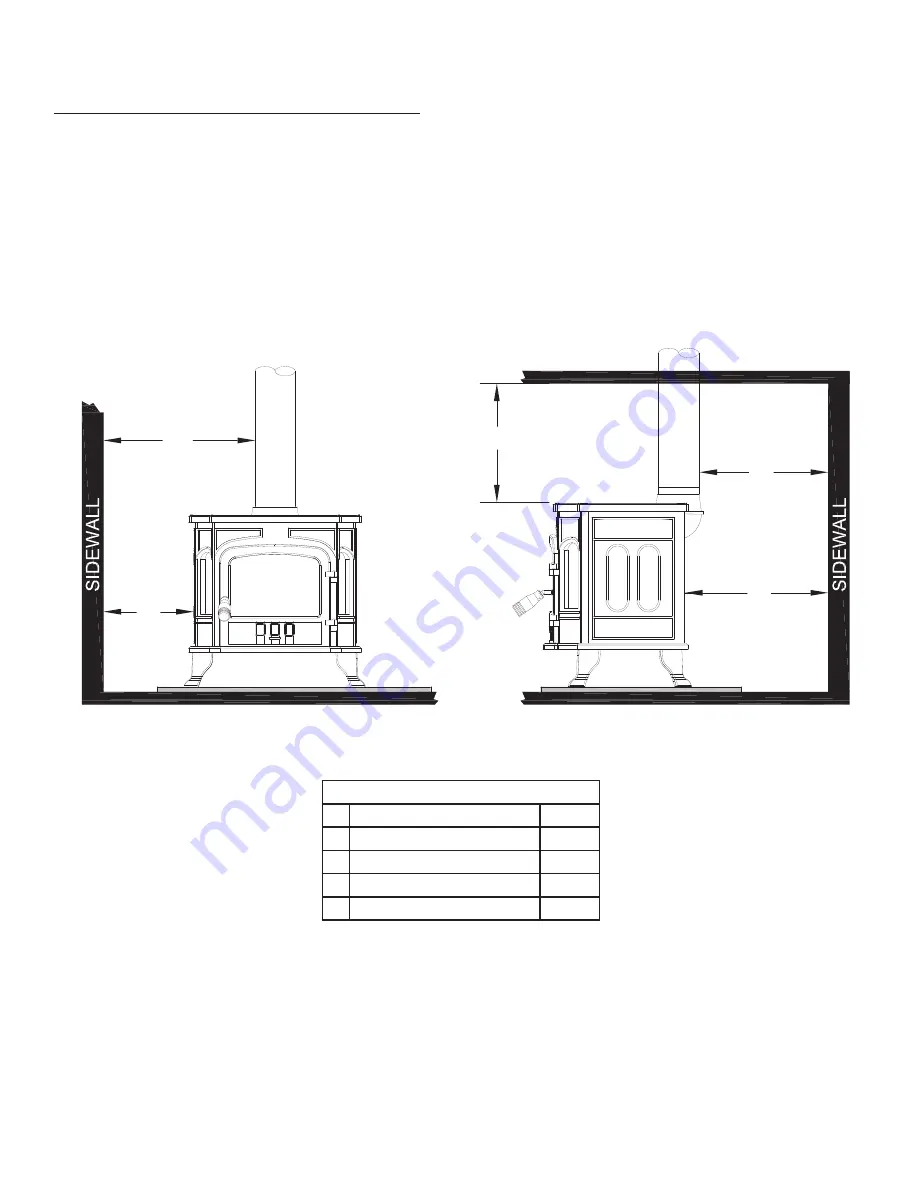
3. Check Figures 2, 3, and 4. Be sure you have the clearances shown from the heater and the connector pipe
to combustible surfaces. If you have a solid brick or stone wall behind your heater, you can place the heater
as close as you wish to the wall. If the wall is only faced with brick or stone, treat it as a combustible wall.
LOCATING THE HEATER
D
C
E
E
F
H
Parallel - Vented out the Top
B
A
Parallel - Vented Out The Top
A
Side Wall To Unit
20in
B Side Wall To Flue Pipe
27.5in
C Back Wall To Flue Pipe
19in
D Back Wall To Heat Shield
27in
E Ceiling Height
84in