background image

Page 3


Installation 

 
The Liberty Scholar 2 is supplied the following components: 

o


Main Unit 

o


EX2 Distance Camera 

o


Power supply adapter 

o


Mains cable 

o


Carry case 

 
When setting up, it is important to choose your workplace carefully to avoid an 
uncomfortable or awkward position.  The monitor should be below eye level to 
avoid strain. 


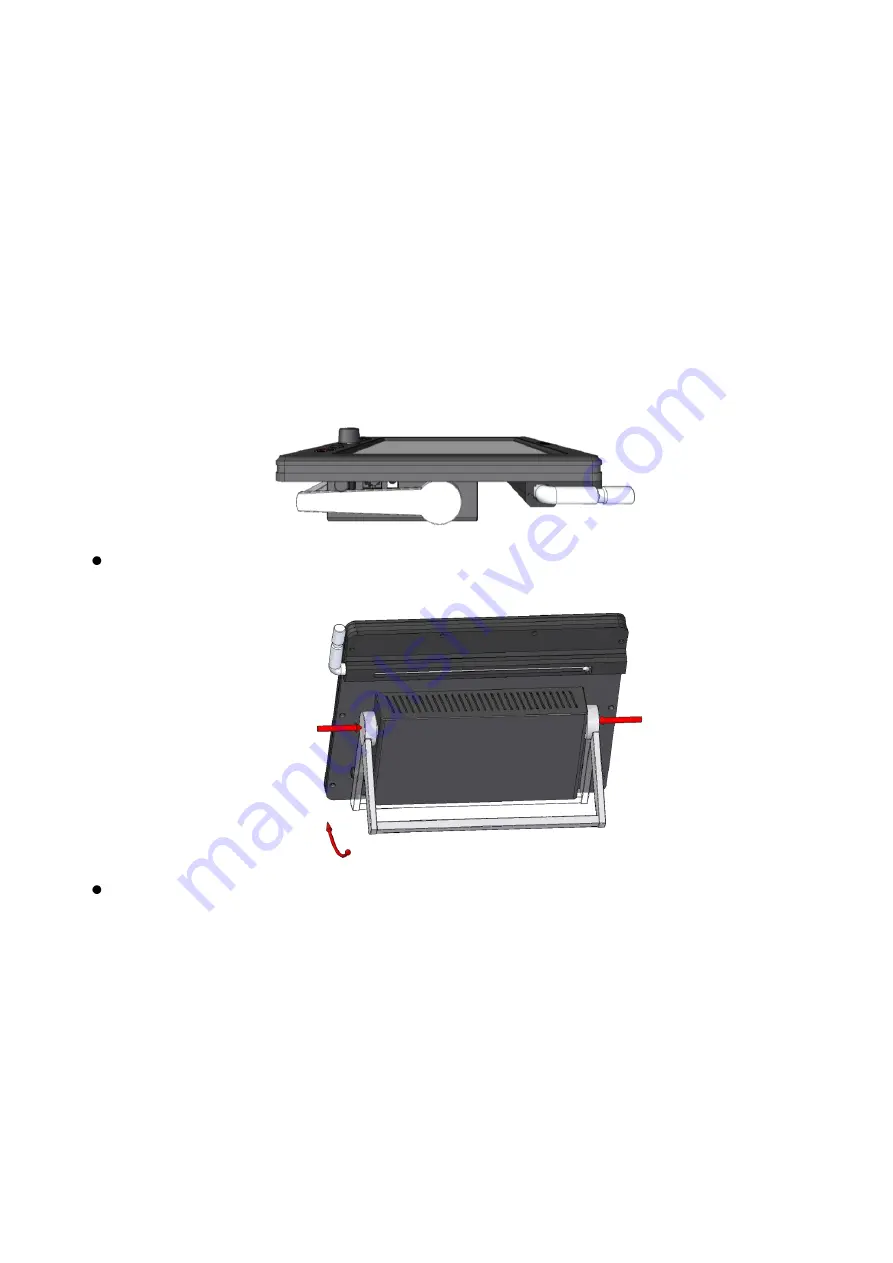
Remove the Liberty Scholar 2 main unit from its case and place on the 

work surface. 


Depress both handle release buttons and rotate the handle by two clicks 

to allow you to look onto or slightly down on the display.  

IMPORTANT!  If the handle is set back too far, the camera will not be 
able to focus on the reading material at high levels of zoom. 

The camera can focus on material up to about 25mm / 1-inch tall.  If 
you wish to look at objects taller than this, tilt the camera slightly and 
move the object appropriately to increase the distance between the 
object and the camera. 


Summary of Contents for Liberty Scholar 2

Page 1: ...Page 1 2 User Manual...

Page 2: ...9 Freeze Image 9 Focus Mode 9 Full Auto Focus 9 Push To Focus 10 Orientation 10 Factory Defaults 10 Main Unit Controls 11 Power Button 11 Mode Select Button 11 Scroll Knob 12 Function Buttons 12 Menu...

Page 3: ...Scholar 2 main unit from its case and place on the work surface Depress both handle release buttons and rotate the handle by two clicks to allow you to look onto or slightly down on the display IMPORT...

Page 4: ...amera lead into the topmost socket at the right hand side of the main unit As the unit is supplied with the battery partially charged we recommend that you initially operate the Liberty Scholar 2 from...

Page 5: ...wer up the Liberty Scholar 2 by pressing the red power button the right most button on the front panel When you aim the distance camera at anything of interest you should see the magnified image on th...

Page 6: ...Page 6 Writing with the Liberty Scholar 2 Slide the camera away from the Scholar unit as preferred and rotate the camera head down to look at the object of interest...

Page 7: ...ns down and fully into place over the camera The unit will automatically restore the last used settings for both distance viewing and close up mode Operating the Camera Zoom In Out Buttons Reading Len...

Page 8: ...ends on how the button function has been programmed Refer below to the next section Menu Zoom In Button Press to zoom in magnify At high zoom levels the camera cannot focus on objects closer than 1 me...

Page 9: ...e camera into a low zoom position allowing you to see where the camera is looking in the scene Press any button to restore previous zoom level Freeze Image Pressing the top button freezes the image be...

Page 10: ...This orientation makes it easier to flip up for distance viewing and down for close up work But the camera can also be orientated towards the user reducing the distance to the user has to stretch whe...

Page 11: ...d The icon indicates that no camera was found and the unit will now power off The last used settings are stored at power off and are restored when the unit is switched on again Removing the power cord...

Page 12: ...Buttons There are three functions buttons labeled 1 2 and 3 These perform the following functions 1 Linemarker Blinds operates in Positive Negative modes only 2 Semi color operates in Positive Negativ...

Page 13: ...s Camera orientation Orientate the camera towards the user Orientate the camera away from the user Sounds on off Display Setting Menu The Menu Structure Main Menu Opens Display Settings menu to alter...

Page 14: ...t lower levels of backlight significantly improve battery life when operating with battery power Configuration Menu Turn the sounds on or off Camera orientation Choose the orientation of the camera th...

Page 15: ...he Liberty Scholar 2 will charge when the power cable is inserted it does not have to be switched on and it will also recharge during normal use with the power cable attached The battery cannot overch...

Page 16: ...to observe stated precautions or by dropping the unit Batteries and backlighting are warranted for failure within a period of one year Pixel failures cracks scratches or similar damage to the display...

Page 17: ...rove our products this information is subject to change without notice DECLARATION OF CONFORMITY We Ash Technologies Ltd declare under our sole responsibility that this product Liberty Scholar 2 of th...

Page 18: ...amp conditions Do not open the Liberty Scholar 2 there are no user serviceable parts inside and opening it will invalidate your warranty The camera must be plugged in prior to powering the unit on or...

Page 19: ...Page 19 This page is deliberately blank...

Page 20: ...ogies Limited 2012 Ash Technologies Ltd B5 M7 Business Park Naas Ireland Made in Ireland 353 45 88 22 12 353 45 88 22 14 email info ashlowvision com web www ashlowvision com Liberty Scholar User Manua...

Reviews: