3: Configuration and Basic Operation
23
23
23
23
!
Tip:
Follow the steps
in the
for
assistance with
the Angle Align
and Reference
Frame settings.
!
Tip:
you
can also
download the
Utility by visiting
Ascension's web
site.
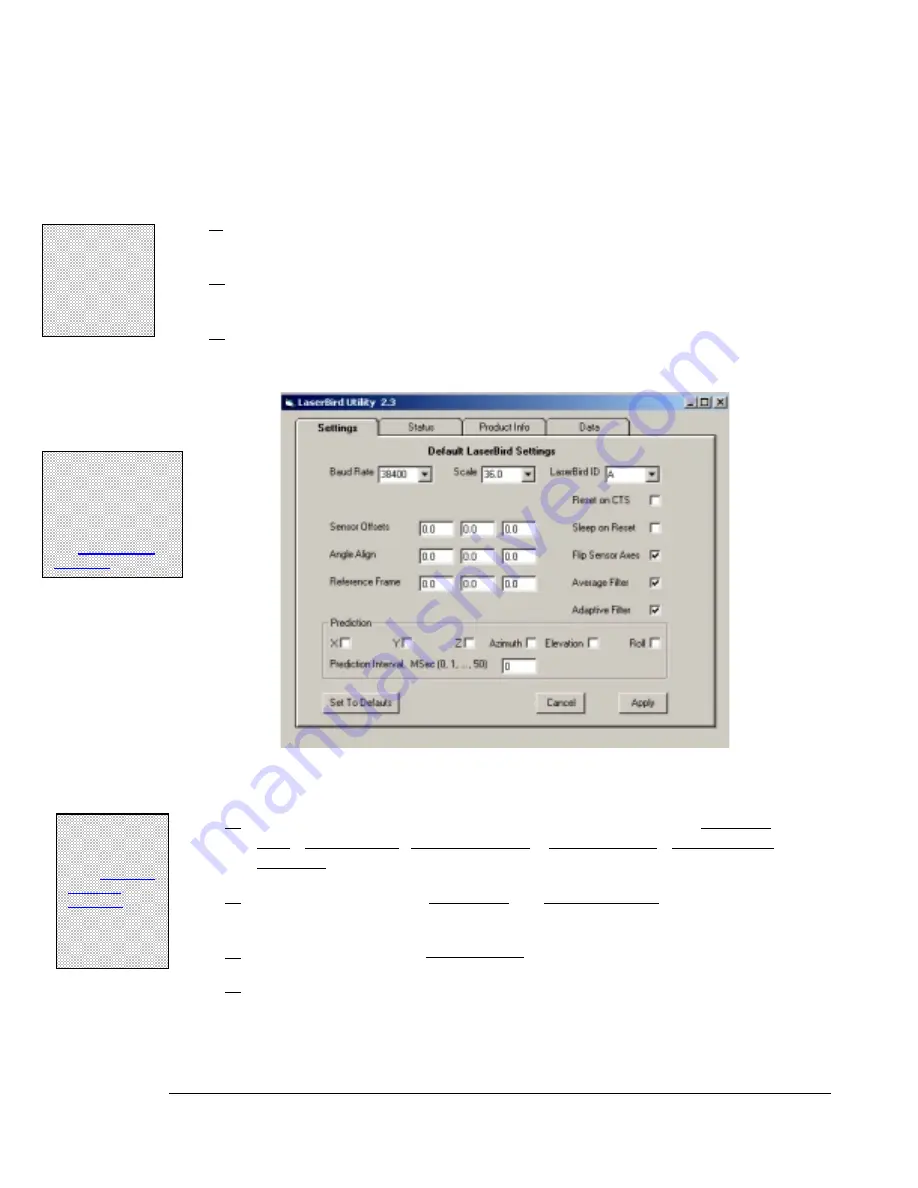
Changing Your Settings
The power-up settings are easily configured through use of the laserBIRD Utility.
1.
Make sure the laserBIRD is running, and connected to the host PC where the
utility has been installed.
2.
Start the utility by selecting
laserBIRD Utility
from the Ascension Technology
program group in the Windows® Start menu.
3.
When the utility establishes communication with the laserBIRD it will open the
main screen.
4.
Use the pull down menus and check boxes to select your desired Baud Rate,
Scale, laserBIRD ID, Flip Sensor Axes, Sleep on Reset, Reset on CTS,
Prediction, and Filter Status settings.
5.
If you've determined the Angle Align and Reference Frame settings for your
application and want to include them as defaults, enter them here in Degrees.
6.
If required, enter default Sensor Offsets for X, Y, and Z in Inches.
7.
Click
'Apply'
to download the new settings to your system's flash memory.
NOTE: Selecting the 'Set to Defaults' option (and clicking
'Apply') will restore the factory installed settings.
!
Note:
For Dual
Scanner operation,
remember to check
the laserBIRD
ID
settings in both units.
See
.
Summary of Contents for laserBIRD
Page 3: ......
Page 5: ......
Page 7: ......
Page 11: ......
Page 21: ......
Page 32: ...3 Configuration and Basic Operation 25 25 25 25 Figure 3 3 Sensor Mounting Dimensions inches...
Page 42: ...3 Configuration and Basic Operation 35 35 35 35 Figure 3 6 Horizontal Field of View...
Page 43: ...laserBIRD Installation and Operation Guide 36 36 36 36 Figure 3 7 Vertical Field of View...
Page 45: ......


