Aruba Instant On AP15 Installation Manual Download Page 4

4

Aruba Instant On AP15 Access Point

| Installation Guide

Cement/concrete—Old concrete has high levels of water dissipation, which dries out the concrete, allowing 

for potential RF propagation. New concrete has high levels of water concentration in the concrete, blocking 

RF signals.

Natural Items—Fish tanks, water fountains, ponds, and trees

Brick

RF reflectors include:

Metal Objects—Metal pans between floors, rebar, fire doors, air conditioning/heating ducts, mesh windows, 

blinds, chain link fences (depending on aperture size), refrigerators, racks, shelves, and filing cabinets.

Do not place an access point between two air conditioning/heating ducts. Make sure that access points are 

placed below ducts to avoid RF disturbances.

RF interference sources include:

Microwave ovens and other 2.4 or 5 GHz objects (such as cordless phones)

Cordless headset such as those used in call centers or lunch rooms

Access Point Installation

The AP15 access point ships with the following two mount brackets. You can choose one of them to install the 

AP: 

A ceiling mount bracket (see 

Figure 3

) to attach the AP to a 9/16” or 15/16” flat T-bar drop-tile ceiling.

A wall mount bracket (see 

Figure 7

)to attach the AP to a solid, flat surface, such as a wall.

The following sections provide instructions on how to use these mount brackets.

Using the Ceiling Mount Bracket
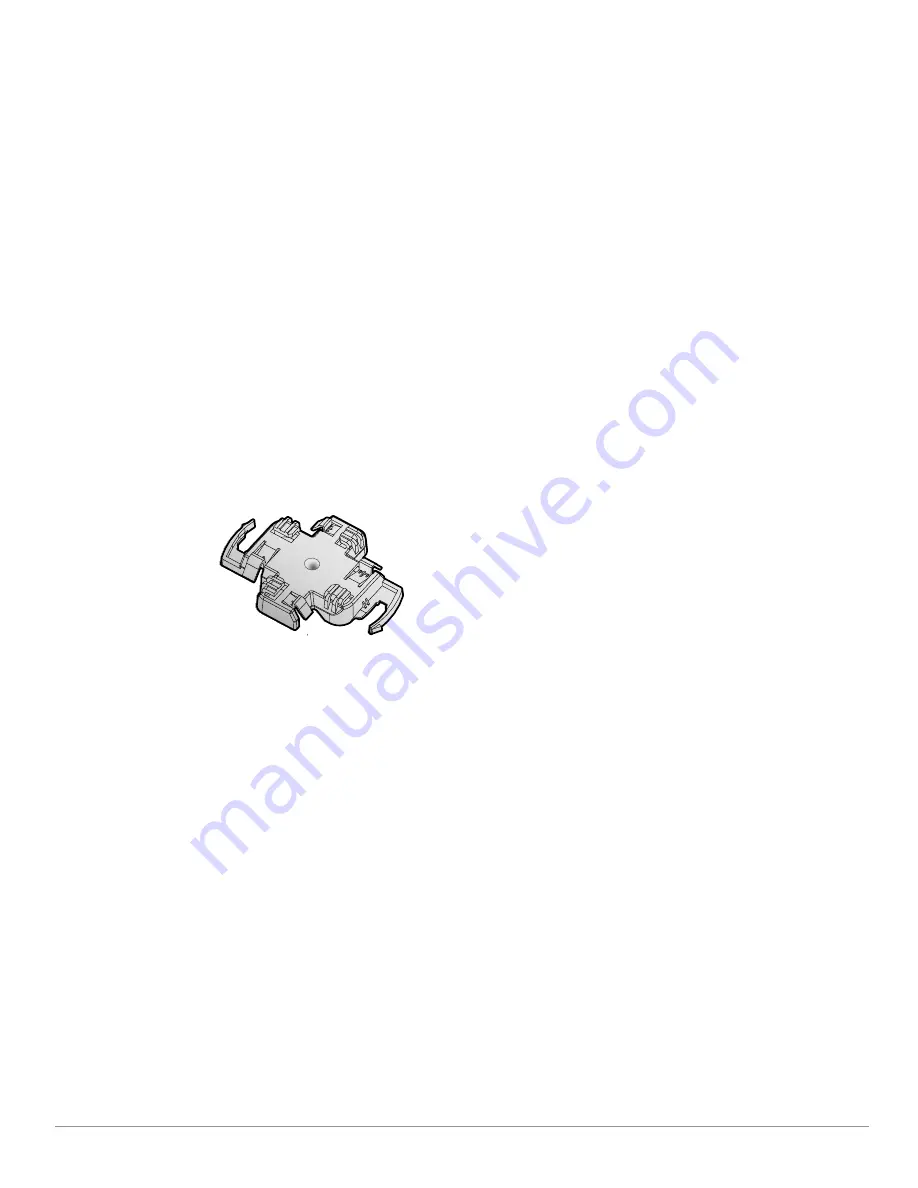
Figure 3  

Ceiling Mount Bracket

1. Pull the necessary cables through a prepared hole in the ceiling tile near where the access point will be 

placed.

2. Place the mount bracket against the back of the access point with the mount bracket at an angle of 

approximately 30 degrees to the tabs (see 

Figure 4

).

3. Twist the mount bracket clockwise until it snaps into place in the tabs (see 

Figure 4

).

Summary of Contents for Instant On AP15

Page 1: ...kage Contents The following materials are included with this product 1 x AP15 access point 1 x Ceiling mount bracket suspended ceiling rail 1 x Wall mount bracket solid surface 1 x Ethernet cable Hard...

Page 2: ...PoE from IEEE 802 3af and 802 3at compliant power sources This device accepts 56V DC 802 3at or 48V DC 802 3af nominal as a standard powered device PD Table 1 AP15 Access Point LEDs Status LED Color S...

Page 3: ...y requirements and the DC interface meets the following specifications 12 Vdc 5 and at least 18W Center positive 2 1 5 5 mm circular plug 9 5 mm length When both 802 3at and DC power sources are avail...

Page 4: ...ovens and other 2 4 or 5 GHz objects such as cordless phones Cordless headset such as those used in call centers or lunch rooms Access Point Installation The AP15 access point ships with the followin...

Page 5: ...l with the ceiling tile rail mounting slots at approximately a 30 degree angle to the ceiling tile rail see Figure 5 and Figure 6 Make sure that any cable slack is above the ceiling tile 5 Pushing tow...

Page 6: ...to the wall as shown in Figure 7 and Figure 8 a Install any necessary wall anchors Wall anchors are not included in the package b Align the screw holes in the mount bracket with the previously install...

Page 7: ...h the AP to the secured mount bracket as shown in Figure 9 a Align the AP with the mount bracket placing the AP so that it s mounting tabs are at an angle of approximately 30 degrees to the mount brac...

Page 8: ...the setup For more details please refer to the User Guide Log in to Instant On Portal Alternately you can set up the Aruba Instant On access point from a web browser Open a web browser and enter https...

Page 9: ...ondensing Regulatory Model Number AP15 RMN APIN0315 If a power adapter other than the Aruba approved adapter is used in the US or Canada it should be NRTL listed with an output rated 12Vdc minimum 2A...

Page 10: ...gulations Operation of this device is subject to the following two conditions 1 this device may not cause interference and 2 this device must accept any interference including interference that may ca...

Page 11: ...nd IE Italy IT Latvia LV Liechtenstein LI Lithuania LT Luxembourg LU Malta MT Netherlands NL Norway NO Poland PL Portugal PT Romania RO Slovakia SK Slovenia SL Spain ES Sweden SE Switzerland CH Turkey...

Page 12: ...ceptar cualquier interferencia incluyendo la que pueda causar su operaci n no deseada Morocco Russia HPE Russia 125171 16 3 7 499 403 4248 7 499 403 4677 HPE Belarus 220030 36 1 375 17 392 28 20 HPE K...

Page 13: ...in compliance with Ukrainian Technical Regulation on Radio Equipment approved by resolution of the CABINET OF MINISTERS OF UKRAINE dated May 24 2017 No 355 The full text of the UA declaration of confo...

Page 14: ...pire three years following the date of the final distribution of this product version by Hewlett Packard Enterprise Company To obtain such source code send a check or money order in the amount of US 1...

Reviews: