background image

6027 Bandini Blvd., Commerce, CA 90040 | www.artograph.com

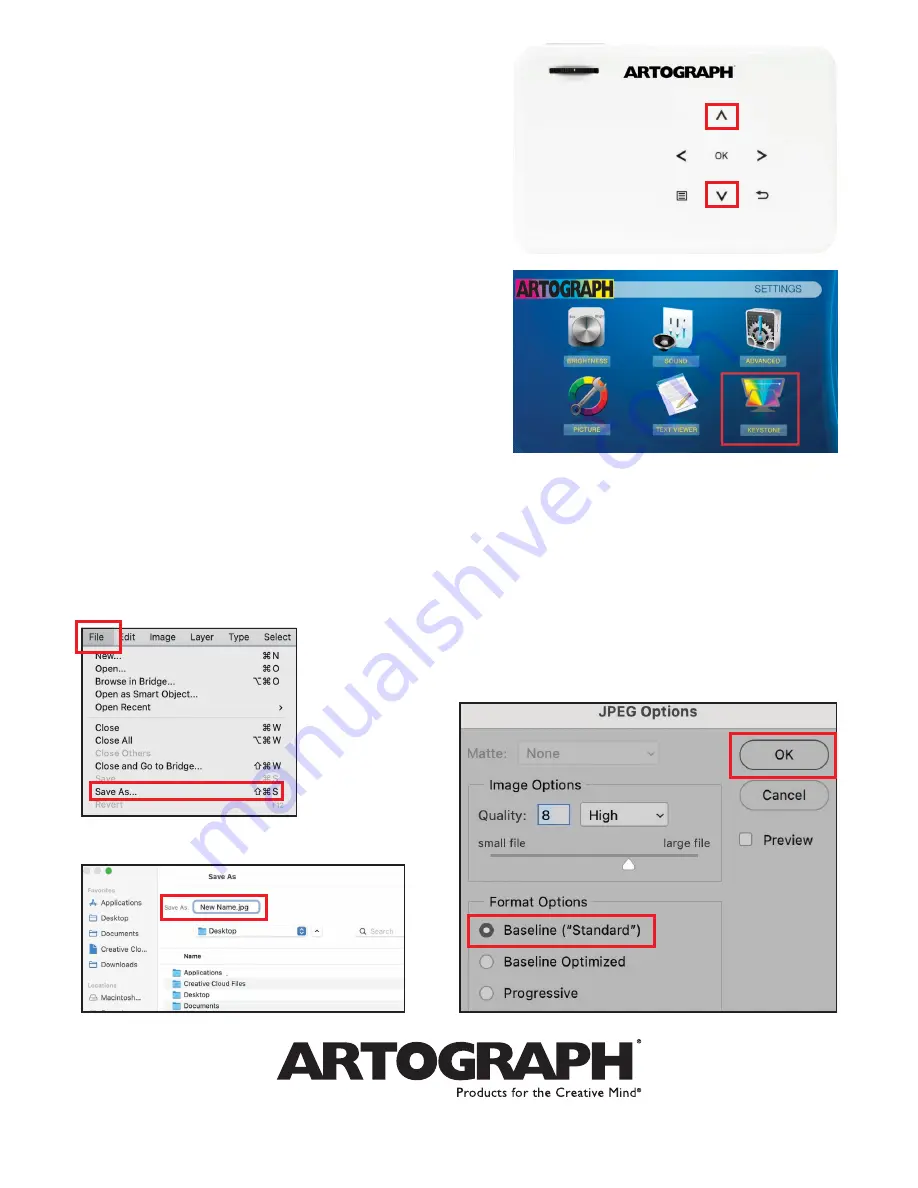
5. Using the keystone feature:

The keystone feature is available in photo or video 
mode, and can be accessed with the Up/Down 
buttons on the projector. In photo mode, pause 
the slideshow, wait for the submenu selection to 
disappear, then adjust the keystone. 

You also have the option to adjust the keystone 
before selecting your photo. To do this, hover over 
the keystone icon in the main menu and press 
“OK”. Then, use the “up” or “down” arrows to 
adjust the keystone angle to the desired setting. 
Then, follow step 3 of this Quick Start Guide to 
select your photo. 

6. Troubleshooting file formats:

A note about JPG/JPEG configurations: Not all JPG/JPEG are the same. The Flare 450 
cannot read JPG/JPEG that have been altered from Baseline JPG/JPEGs to Progressive 
JPG/JPEG in a photo editing program like Photoshop. To change the image back to a 
baseline JPG, follow these steps:

b.

 Rename the file and click “Save”.

a.

 Select “File” and “Save as”.

c.

 Once you click “Save”, the JPEG 

Options box will appear. Click “Baseline” 
or “Standard” and then “OK.” Your new 
file is now compatible with the Flare 450.

Summary of Contents for Flare450

Page 1: ...27 Bandini Blvd Commerce CA 90040 www artograph com 1 Powering on the device 2 Navigating the main menu 3 Loading files to the Flare 450 4 Accessing the grid overlays 5 Using the keystone feature 6 Tr...

Page 2: ...ojector while it is charging 1 Powering on the device Turn the device ON using the switch on the left side of the projector Set the device up so that the lens is facing a wall After a few seconds the...

Page 3: ...wheel above the lens to adjust for clarity Some models may have the focusing wheel on the side To navigate the main menu use either the arrows on the top of the projector or on the remote control Whe...

Page 4: ...B drive included HDMI cable included or TF Card not included For files loaded using a USB drive or TF Card the next step is to determine what kind of file you are trying to project If it s a video fil...

Page 5: ...pictures without having to return to the previous screen Use the arrows on the remote control or the top of the projector to navigate between the different commands on the toolbar Once you have locat...

Page 6: ...this way connect the projector to your computer or mobile device and then select the INPUTS icon in the main menu On the next screen select the VIDEOS icon The projector will then begin projecting th...

Page 7: ...rid dialog box appears you can change between different grids by simply pressing the left or right arrows on the remote control or the top of the projector To dismiss the dialog box and return to the...

Page 8: ...use the up or down arrows to adjust the keystone angle to the desired setting Then follow step 3 of this Quick Start Guide to select your photo 6 Troubleshooting file formats A note about JPG JPEG con...

Reviews: