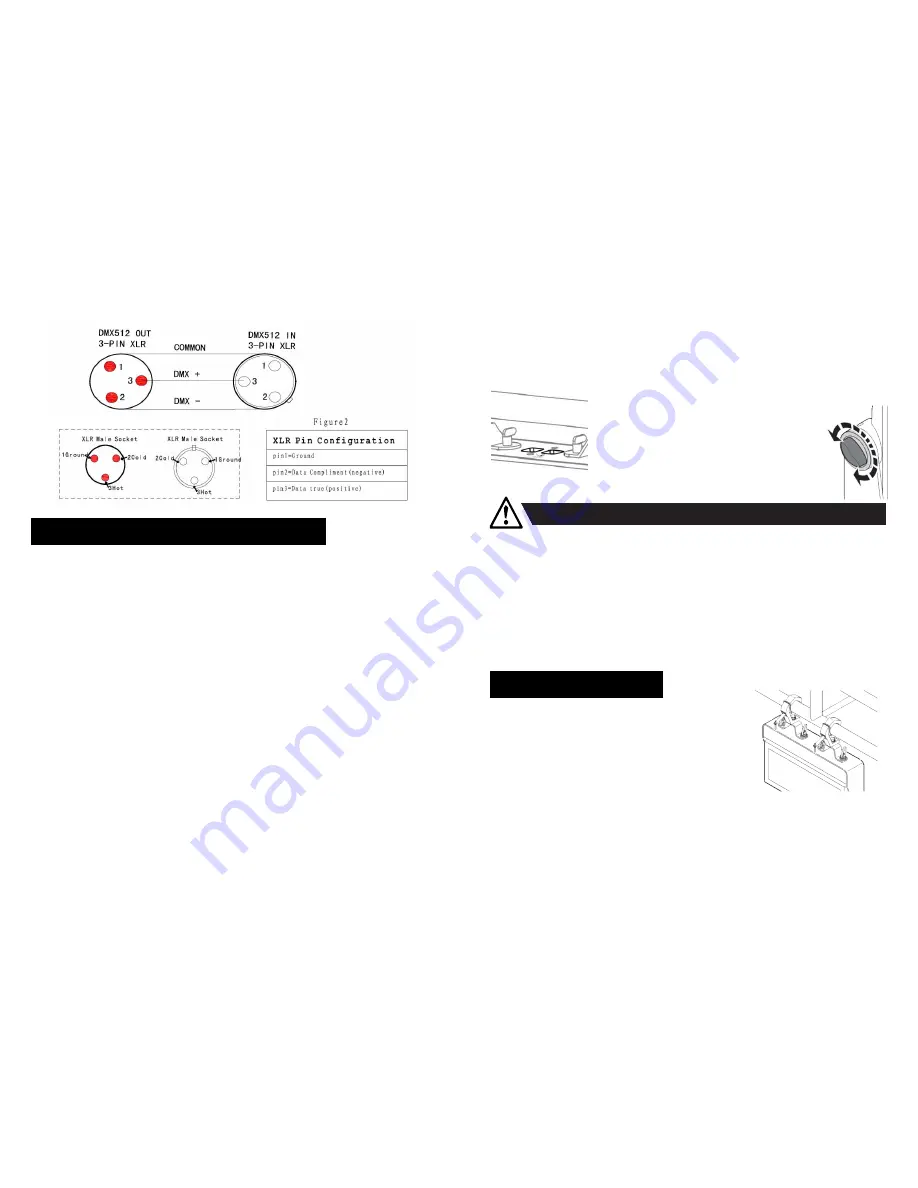
10
connectors: Pin 1: GND, Pin 2: Negative signal (-), Pin 3: Positive signal (+)
9.
Configuring the fixture for DMX control
About DMX
The fixture can be controlled using signals sent by a DMX controller on a
number of channels (which varies depending on the DMX mode that has been
set).
The first channel used to receive data from a DMX control device is known as
the DMX start address. Each fixture must have a DMX start address set. For
example, if a fixture has a DMX address of 10 and it is in 4-channel DMX mode,
then it uses channels 10, 11,12 and 13. The following fixture in the DMX chain
could then be set to a DMX address of 14. If two or more DMX fixtures of the
same type have the same DMX address, then they will mimic each other’s
behaviour. Incorrect settings will result in unpredictable responses to the
lighting controller.
Setting the DMX address
7
resistant mechanical fasteners suitable for the location.
Two quarter-turn brackets are supplied with the fixture if it is to be flown above
the ground. Remove the floor stand/base and rig the fixture to a support truss
or structure using the supplied brackets and suitable clamps.
Fasten a safety cable (not shown) between
the support structure and the attachment
point on the fixture. The safety cable must
be able to bear at least 10 times the weight
of the fixture.
The fixture can be tilted from 0° - 190°. To adjust the tilt angle, loosen the two
tilt screws, one of each side of the fixture, tilt the fixture to the angle required
and re-tighten the screws.
CAUTION:
If the fixture has been operating, always allow it to cool for 15
minutes before handling.
6.
Connecting AC Power
The fixture can operate on any 100–240 V, 50/60
Hz AC mains power supply. It draws approximately
2 amps at full power. For permanent installation,
have a qualified electrician wire the mains cable
directly to a suitable branch circuit.
The junction’s ingress protection (IP) rating must be suitable for the location.
WARNING!
Always secure an elevated fixture with a safety cable as backup.


