


40
41
FUNCTION
1
Press the FUNCTION button and use the +/YES and the –/NO buttons or the DATA WHEEL to select
the Function you wish to edit.
2
Press the ENTER button to confirm and access the sub-menu, the current setting will be shown.
3
Use the +/YES and the –/NO buttons or the DATA WHEEL to choose an option.
♫
Please note,
pressing the +/YES, –/NO buttons simultaneously will reset the Function back to it's
default value.
4
Press the ENTER button to confirm.
FUNCTION
+/
YES
ENTER
-/
NO
DATA WHEEL
001 : GRAND PIANO
Main Reverb Level
001 : GRAND PIANO
USB Play Mode
USB PLAY MODE
This function allows you to select the mode for the USB playback of the piano.
You can select Single, Play All Songs, or Random. The default value is Play All Songs.
001 : GRAND PIANO
USB Play Speed
USB PLAY SPEED
This function allows you to select the play back speed for USB on the piano.
You can select a speed of 50 to 200%, with a default value of 100.
001 : GRAND PIANO
USB Play Volume
USB PLAY VOLUME
This function allows you to adjust the USB play back volume of the piano.
You can select a value from: 0 - 127, with a default value of 127.
001 : GRAND PIANO
USB Mute Track
USB MUTE TRACK
This function allows you to mute a track on the USB play back of the piano. You can mute any track
from 01-16 by selecting it in this function menu. The default is all tracks no.
♫Please note,
this sub-menu does require an additional confirmation of the track to mute.
Use the +/YES and the –/NO buttons to scroll through the yes or no screen confirmations. Confirm
your track selection to mute by pressing the ENTER button.
001 : GRAND PIANO
2 : Play All Songs
001 : GRAND PIANO
100 : USB Play Speed
001 : GRAND PIANO
127: USB Play Volume
001 : GRAND PIANO
MuteTrack01?
001 : GRAND PIANO
No : Mute Track01
FUNCTION
1
Press the FUNCTION button and use the +/YES and the –/NO buttons or the DATA WHEEL to select
the Function you wish to edit.
2
Press the ENTER button to confirm and access the sub-menu, the current setting will be shown.
3
Use the +/YES and the –/NO buttons or the DATA WHEEL to choose an option.
♫
Please note,
pressing the +/YES, –/NO buttons simultaneously will reset the Function back to it's
default value.
4
Press the ENTER button to confirm.
001 : GRAND PIANO
Main Reverb Level
001 : GRAND PIANO
Local MIDI
LOCAL MIDI
This function allows you to turn on or off the speaker system of the piano. Normally, playing on the
keyboard generates sound while it sends MIDI messages via the MIDI connector or USB. This mode
is called Local On and is the default value. You can mute the piano sounds while still sending out the
MIDI messages. This mode is called Local Off.
♫Please note
, if the Local is off there will be no sound from your keyboard.
001 : GRAND PIANO
USB MIDI In
USB MIDI IN
This function allow you to select the MIDI reception track and turn on or off the MIDI function, the
default is MIDI on..
001 : GRAND PIANO
MIDI Out
MIDI OUT
This function allow you to select the MIDI transmission track from 01-16 or to turn the MIDI
transmission function off, the default track is channel 1.
001 : GRAND PIANO
1 : MIDI Out
001 : GRAND PIANO
On : USB MIDI In
001 : GRAND PIANO
On : Local MIDI
001 : GRAND PIANO
Half Sustain
HALF SUSTAIN
Half sustain is a piano pedal technique in which he sustain pedal is only partially pressed down. When
the half sustain feature is selected approximately half the amount of sustain will be applied when the
sustain pedal is engaged. Some classical piano pieces call for this technique.
Now the Artesia line has developed this function for their digital pianos. This function allows you to turn
on or off the half sustain feature, the default is half sustain on.
001 : GRAND PIANO
On : Half Sustain
26
27
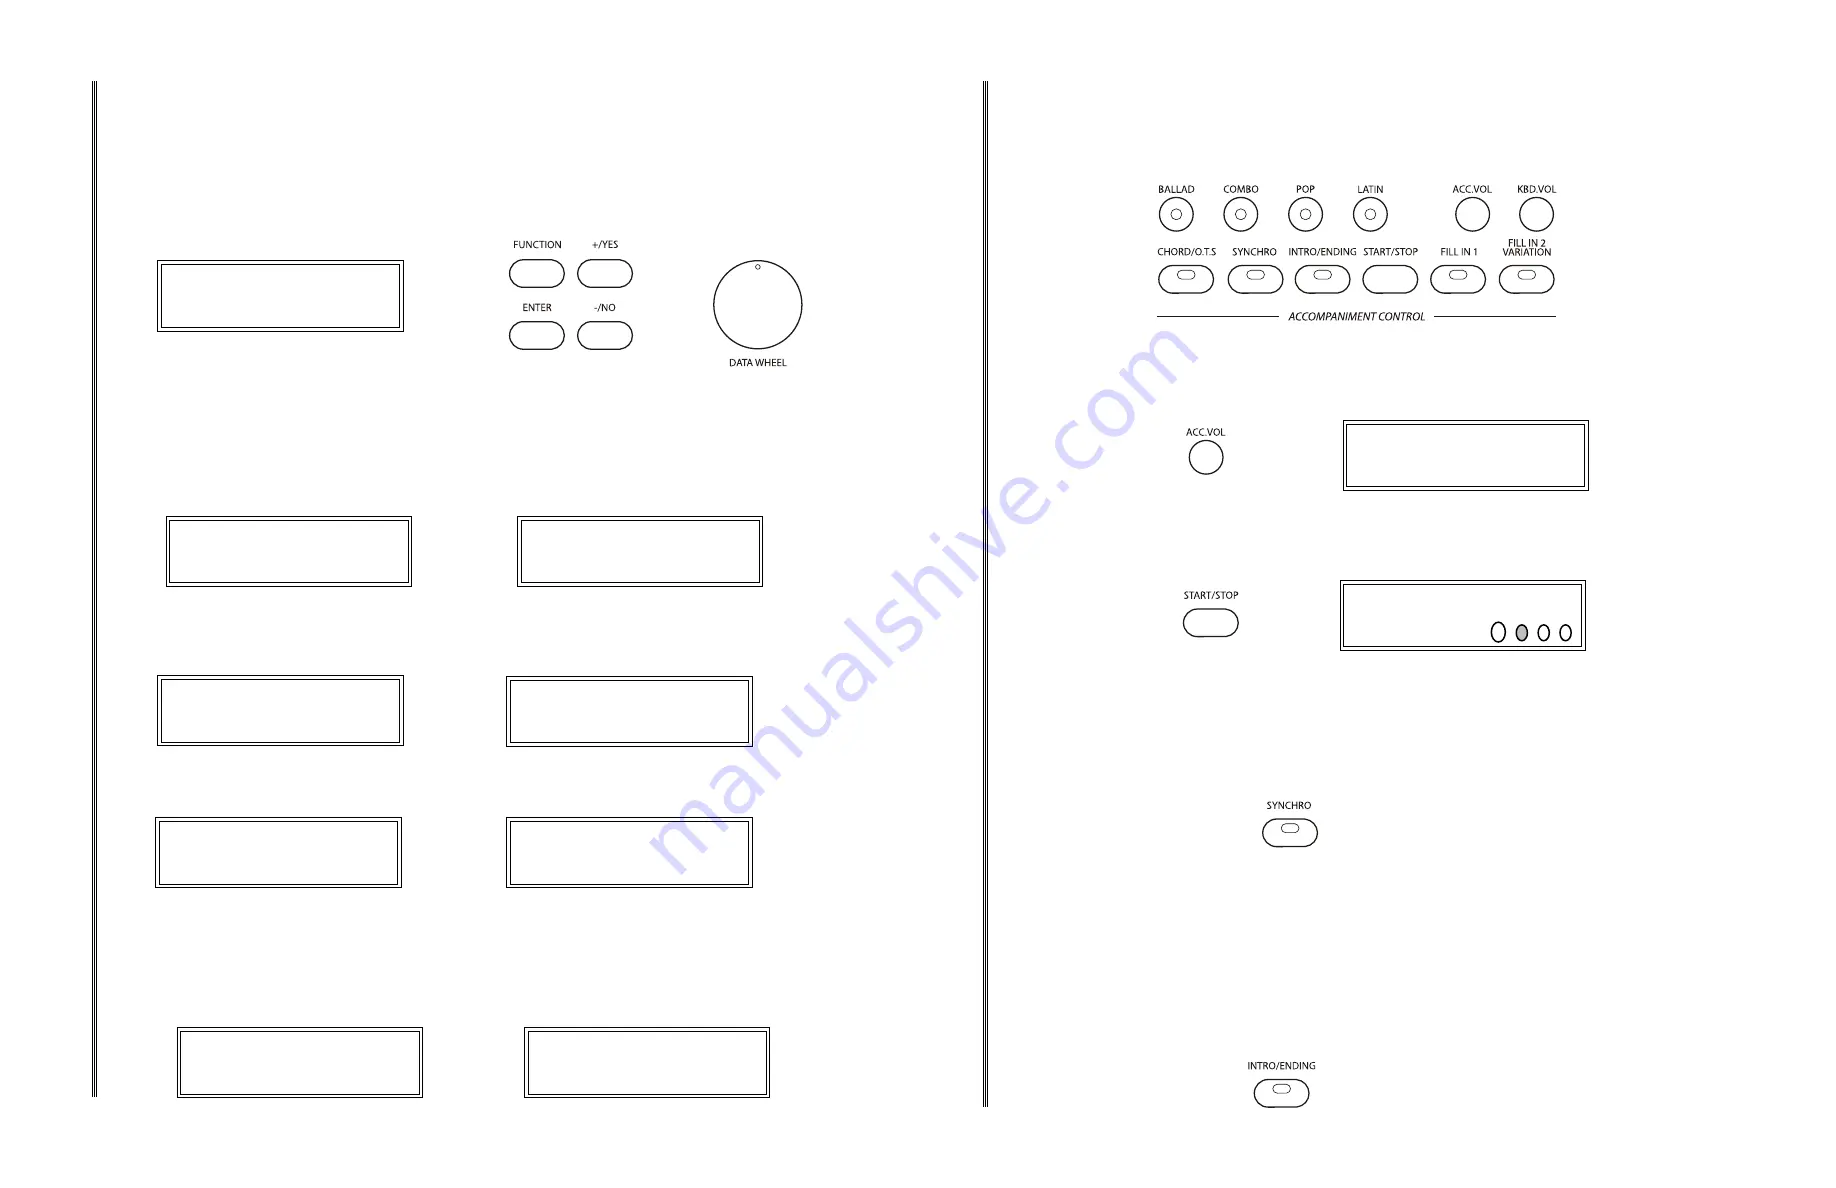
RHYTHM
USING THE RHYTHM STYLE
There are three ways to start the rhythm style; straight start, synchronized start, or with an introduction. You
can stop your rhythm style with a finishing ending pattern.
STRAIGHT START
1
The START/STOP button starts the percussive rhythm immediately. Press the START/STOP button.
The selected rhythm style will play.
2
Press the START/STOP button again to stop the rhythm style.
SYNCHRONIZED START
Synchronized Start puts the accompaniment in the standby mode.
1
Press the SYNC START button, the virtual beat indicator dots in the LCD screen will blink at the
current tempo, showing that the synchronized start mode is ready. The rhythm style will start as soon as
you play in the left hand, accompaniment, section of the keyboard.
2
Press the START/STOP or the SYNC START button again to stop the rhythm style. If the SYNC
START button is used, the synchronized start mode will be put back on standby.
INTRODUCTION AND ENDING PATTERNS
All of the 100 styles and their variations can be started with an appropriate introduction.
1
Press the INTRO/ENDING button, the rhythm of the introduction will start followed by the main
rhythm pattern.
2
Press the SYNC START button before pressing the INTRO/ ENDING button to add an introduction.
The introduction, followed by the rhythm style will start as soon as you play in the left hand section of
the keyboard.
3
Press the START/ STOP button to stop the accompaniment or press the INTRO/ENDING button
again to stop with an ending pattern. An ending pattern can be used at any time regardless of whether
you started with an introduction.
022 : SWING FUNK
ADJUSTING THE RHYTHM STYLE VOLUME
1
To adjust the volume of only the rhythm style. Press the ACC.VOL button and use the DATA WHEEL
or the +/YES or –/NO buttons to adjust the volume of the keyboard rhythm style up or down, the
keyboard voice will not be affected.
011: MUSIC BOX
113 : Acc.Vol
VARIATION
1
Press the FILL IN 2 VARIATION button at any time to select the variation of any of the rhythm styles. The
indicator will light up and the variation pattern will be selected. If the rhythm style is playing the variation will
start at the beginning of the next measure after the variation fill.
2
Press the FILL IN 1 button to revert to the main pattern from the beginning of the next measure after the
fill pattern.
RHYTHM
FILL IN
The fill in feature will insert a short rhythmic pattern of one to two measures in length, depending on the
rhythm style selected. There is a fill-in for both the main pattern and the variation. The FILL buttons can also
be used to start a rhythm style.
1
Press the FILL IN 1 or the FILL IN 2 VARIATION buttons at any time while the rhythm style is playing to
add a fill.
2
Press and hold down either FILL IN button to extend the fill indefinitely. If you hold down a FILL IN button,
the fill pattern will repeat until the button is released, and then the pattern will resume from the beginning of
the next measure.
♫
Please note,
if the METRONOME button is engaged, the metronome tick will sound at the selected
rhythm style tempo.
ADJUSTING THE TEMPO
There is a virtual four-beat indicator, within the LCD screen, that flashes with the tempo and the beat for the
rhythm style playing. Each style has its own preset tempo.
Press the TAP/TEMPO button, the current tempo value will flash on the display. Use the DATA WHEEL or the
+/YES or –/NO buttons to change the tempo.
If you press, or "tap" the button twice while a rhythm is playing it will set the tempo to the speed of your taps.
If you want to "tap" in a tempo before starting a rhythm style, tap the button 4 times to establish the tempo.
The tempo can be adjusted before or during rhythm style play.
If you change rhythm styles while a rhythm style is playing, the tempo will stay at the initial styles value, press
the TAP/TEMPO button and then press the +/YES, –/NO buttons at the same time to reset to the new style's
default tempo.
BALLAD
COMBO
LATIN
POP
METRONOME TAP/TEMPO
CHORD/O.T.S. SYNCHRO INTRO/ENDING START/STOP FILL IN 1
FILL IN 2
VARIATION
ACCOMPANIMENT CONTROL
TAP/TEMPO
002 : LATIN BALLAD
096 : TEMPO
FILL IN 2
VARIATION
FILL IN 1
022 : SWING FUNK
FillIn1
FILL IN 2
VARIATION
022 : SWING FUNK
FillIn2


