background image


Chapter 6    Technical Parameters


Receiver:


Number of Channels                    6

  Frequency Range 

                 854MHZ —— 865MHZ


  Frequency Response                   100HZ   —— 12KHZ

  System Distortion 

                  <1%

 Signal/Noise Ratio                       >85dB

  Power                                           Two 1.5V AA batteries

 Battery Life 

  Dimensions                                  82 * 62 * 21 mm

 Physical weight

the

 batteries`are excluded.

 Environmental Temperature                                                                                      -20  ——  60 

>70dB

Adjacent Channels 
Rejection

>200Mw (32

Ω

)

Output Power of 
the earphone

>20 hours( in

fl

 uenced 

by the volume.)

83 g 

32


Transmitter:

   Modulation                             FM

   Frequency Range                   854MHZ —— 865MHZ

   Output Power 


     10mW

   Frequency Response 

     100HZ —— 12KHZ

   System Distortion                   <1%

   Power                                        Two 1.5V AA batteries

   Battery Life                               >20 hours

   Dimensions                               82 * 62 * 21 mm

   Physical weight

the 

   batteries`are excluded.


    Environmental Temperature          -20 —— 60 

73 g

Summary of Contents for AGT600

Page 1: ...of the Product 2 1 4 Main Features 3 Chapter 2 Operating Instructions of AGT600 Transmitter 4 2 1 Components Names 4 2 2 The Description of Display Interface 5 2 3 Introduction of Keys 6 2 4 Operating Instructions 7 2 4 1 Advance Preparation 7 2 4 2 Power On Off 8 2 4 3 The Way of Carrying Transmitter 9 2 4 4 Mute Mode 9 ...

Page 2: ...Introduction of Keys 18 3 4 Operating Instructions 19 3 4 1 Advance Preparation 19 3 4 2 On Off System 20 3 4 3 the Way of Carrying Receiver 21 3 4 4 Volume Adjustment 21 3 4 5 Digital Mute Mode 21 3 4 6 Battery Capacity Indicator 22 3 4 7 Quick Channel Selection 23 3 5 Receiver s Function Setting 23 3 5 1 Default Setting 23 3 5 2 Channel Setting 25 3 5 3 Squelch Setting 25 3 5 4 User selectable F...

Page 3: ...taken 1 Please clean the machine by dry soft cloth Do not clean the machine with gasoline or other chemical products 2 Please do not touch the body with the antenna 3 Please do not twist or knob the antenna with the microphone wire Chapter 1 System Description 1 1 Introduction The UHF Tour Guide System AG600 series is a portable high performance wireless system composed of the AGT600 body pack Tra...

Page 4: ...picked White backlit LCD displays operation menu and status clearly Using ordinary AA size battery with high efficiency and prolonged battery life Able to use rechargeable battery and the recharging device is provided Displaying the battery capacity and clearly indicating battery consumption status Automatic power off when the battery is low to protect the battery life Setting key lock mode allows...

Page 5: ...ed power status indicator Power 2 2 The Description of Display Interface The standard display is shown as follow when the transmitter has been turned on The display shows CH 1 in which 1 represents that the first channel is used currently FM modulation indicator Battery capacity indicator Keyboard Lock mode enabled Pilot mode enabled Mute mode enabled Green audio voice level modulation indicator A...

Page 6: ...he menu counterclockwise Pressing keys simultaneously can display the present frequency of the current channel If press keys simultaneously again at this time or no key operation has occurred in 10 seconds the screen will return to the standard display The user selectable frequency function has been enabled if the standard display is unable to be returned Please refer to 2 5 4 to set When the keyb...

Page 7: ... Please ensure that the mute mode is not enabled 2 4 3 The Way of Carrying Transmitter 1 Wear the lavalier microphone or head set microphone 2 Clip the transmitter over the proper position ofwaistband through the metal clip on the rear panel of the transmitter or hang the transmitter on the front of the chest by tying an accessory string to the accessories slot 2 4 4 Mute Mode Slide the mute switc...

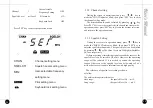
Page 8: ...attery compartment in order to prevent the damage to the product resulted from battery leakage Please recharge the batteries in time when the battery is low or the battery life will be reduced User selectable Frequency Setting Press SET key to enter the operation menu when the screen is in standard display Shown as follow CHAN Channel setting menu SENSIT Sensitivity setting menu MHz User selectabl...

Page 9: ...ress key to make the MHz indicator blink then press SET key to enter the user selectable frequency setting mode and the last set frequency value is shown on the display Press key to re select your desired frequency ranging from 854MHz to 865MHz The frequency will drop by 0 1MHz 100KHz for each pressing of key and increase by 0 1MHz 100KHz for each pressing of key If press and hold or key the frequ...

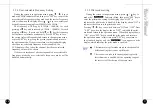
Page 10: ...shows ON it indicates the transmitter is in pilot mode now Pressing key can switch between ON and OFF Press SET key when the display shows OFF to disable the pilot mode and return to the operation menu When the display shows ON press SET key to enable the pilot mode and return to the operation menu at this time press ESC key can return to the standard display and the icon is shown on the display w...

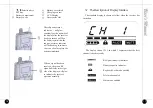
Page 11: ...the right side of the display will glow to indicate the receiver operates normally Selection keys Battery cover latch SET Key Charging contact Battery compartment LCD Display Battery cover Accessories slot 17 3 2 The Description of Display Interface The standard display is shown as follow when the receiver has turned on The display shows CH 1 in which 1 represents that the first channel is used cu...

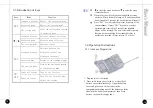
Page 12: ...aration 1 Prepare two AA batteries 2 Press two battery cover latches at the side of battery cover simultaneously Open the battery cover and place two AA batteries in the compartment making note of the battery polarity shown in the battery compartment then close battery cover until it snaps shut to select the menu clockwise to select the menu counterclockwise When the keyboard lock function is disa...

Page 13: ...he Way of Carrying Receiver Clip the receiver over the proper position of waistband through the metal clip on the rear panel of the receiver or hang the receiver on the front of the chest by tying an accessory string to the accessories slot 3 4 4 Volume Adjustment When the receiver is turned on rotate the volume control knob clockwise to increase the audio volume and rotate the knob counterclockwi...

Page 14: ...ed 15 seconds before the receiver is turned on again in order to protect the equipment and prolong the batteries life 3 segments The batteries are at 90 or greater capacity 2 segments The batteries are at 60 or so capacity 1 segment The batteries are at almost 30 capacity 0 segment The batteries are at almost 10 capacity 23 Only after the keyboard lock mode is disabled can this operation be execut...

Page 15: ...round the receiver the squelch level can be raised to Hi or mi However the operating range will be reduced If it is needed to extend the operating range of the receiver the squelch level can be lowered to Lo or mi in order to receive audio information with high quality The reference of squelch level setting is shown as follow 3 5 2 Channel setting During the screen in operation menu press key to m...

Page 16: ...ill be shown If the user set the channel after having enabled user selectable frequency mode the user selectable frequency mode will be disabled automatically The transmitter s pilot mode must have been enabled before enabling the receiver s pilot mode The receiver can reduce the annoying noise greatly after this mode is enabled but the operating range of the receiver will be shorten at the same t...

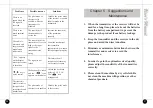
Page 17: ...and return to the standard display The current settings become invalid It is unnecessary to reset when you restart the receiver because all settings have been saved after the receiver is turned off 29 Chapter 4 Troubleshooting Problems Possible reasons Solutions The receiver can not be turned on after replacing the old batteries The receiver has no power The batteries capacity is too low Replace t...

Page 18: ...rning on the receiver again key is out of control The keyboard is locked and the icon appears on the display Unlock the keyboard refer to 2 5 5 3 5 6 The icon disappeared The receiver is unable to receive the signalwhen using other brand transmitters The pilot mode of the receiver is enabled Disable the pilot mode of the receiver 31 Chapter 5 Suggestions and Maintenance 1 When the transmitter or t...

Page 19: ...he batteries are excluded Environmental Temperature 20 60 70dB Adjacent Channels Rejection 200Mw 32Ω Output Power of the earphone 20 hours influenced by the volume 83 g 32 Transmitter Modulation FM Frequency Range 854MHZ 865MHZ Output Power 10mW Frequency Response 100HZ 12KHZ System Distortion 1 Power Two 1 5V AA batteries Battery Life 20 hours Dimensions 82 62 21 mm Physical weight the batteries ...

Reviews: