4
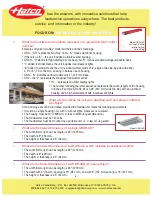
1. Read all instructions and important safeguards.
2. Remove all packaging materials and make sure items are received in good con-
dition.
3. Tear up all plastic bags as they can pose a risk to children.
4. Wash the lids, trays and serving tray support with warm soapy water using a
sponge or soft cloth. Rinse and dry thoroughly.
5. Wipe the warming base with a clean damp cloth. Do not use abrasive cleaners
or scouring pads. Do not immerse the base in water.
6. Heat the warming base without food for about 10 minutes. This will seal the
coating on the warming tray.
NOTE: The appliance itself may give off smoke or odors when heating for the
first time. This is normal.
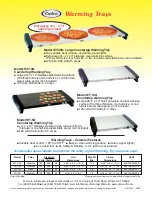
UUSSIINNGG BBUUFFFFEETT SSEERRVVEERR
BBeeffoorree FFiirrsstt UUssee::
HHOOW
W TTOO OOPPEERRAATTEE::
1. Place warming tray/base on a sturdy, level surface.
2. TToo OOppeerraattee aass W
Waarrm
miinngg TTrraayy:: Do not add serving tray support or serving trays.
TToo OOppeerraattee w
wiitthh SSeerrvviinngg TTrraayyss:: Place the serving tray support and the serving
trays on to the base.
3. Plug the power cord into a wall outlet.
4. Place food in the trays and turn the temperature dial to “LOW”. The indicator
light will illuminate to show you that the appliance is on.
5. If using the warming tray, DO NOT turn the temperature above “LOW.”
6. If using the buffet server, turn the temperature dial to “LOW”, “MED”, or
“HIGH” to adjust the temperature. NOTE: For best results turn the knob to the
“HIGH” setting to quickly reach your temperature and then turn it down to the
desired temperature.
7. Place lids over food as needed.
8. When finished using, turn the temperature knob to “OFF” and unplug the cord
from the wall outlet.
9. Food will be kept warm for a period of time after the appliance has been
turned off. Do not touch, disassemble, or clean the appliance until it has
cooled completely.
All manuals and user guides at all-guides.com
all-guides.com