CPIN003891
A5 148mm x 210mm
4
5
ADDING MORE FILES TO SD CARD / USB
PLAYING THE MEDIA FILE
For SD Card:
1. Insert to a SD card reader and connect to a
computer USB outlet.
2. For movies, choose either horizontal or vertical for
your preferred display, then select the category.
Add the movie into the selected folder.
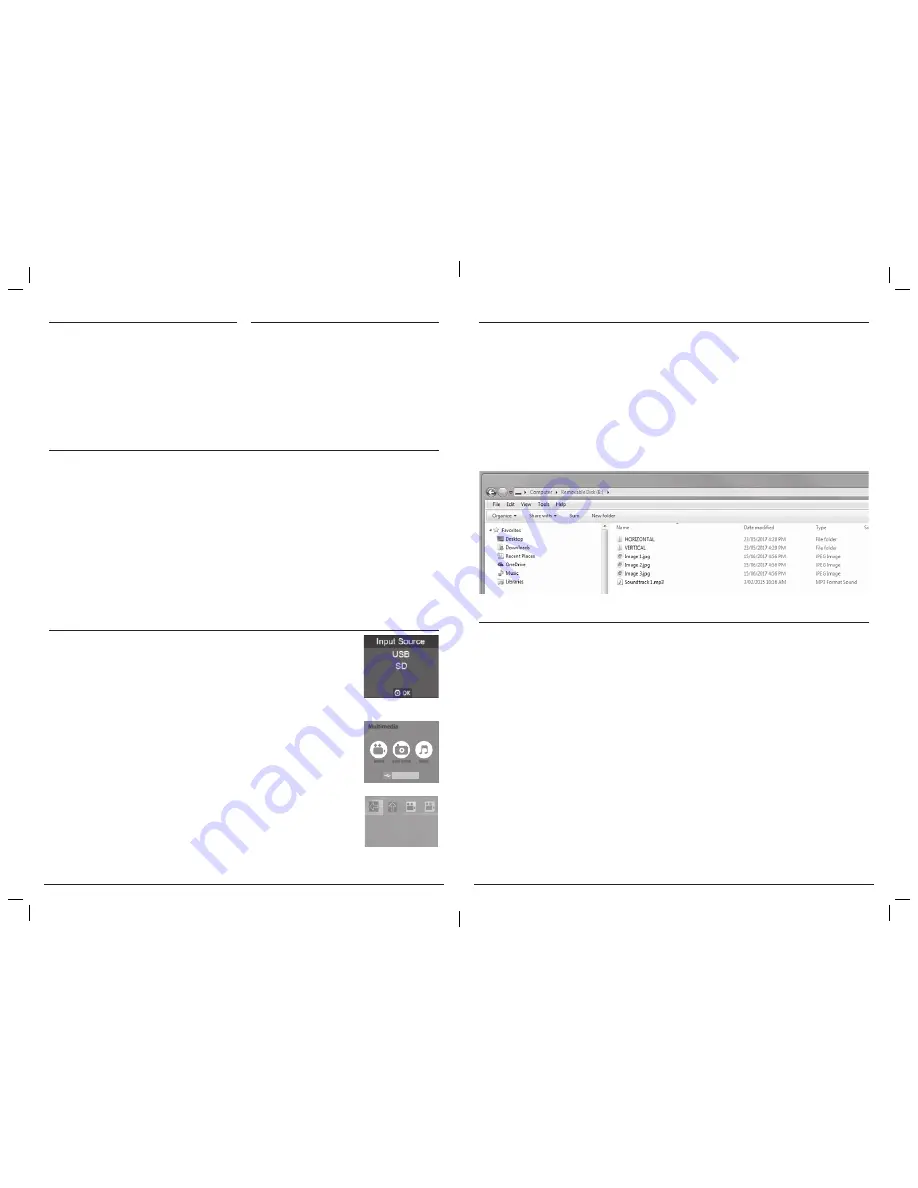
3. For slideshows or music, add them in the main
menu folder, as shown below. Once the SD card is
inserted into the projector, they are automatically
categorized in the multimedia menu.
For USB:
1. Connect the USB to a computer USB outlet.
2. Add movies, slideshows or music in the main
menu folder. Once the USB is inserted into the
projector, they are automatically categorized in
the multimedia menu.
1.
Multimedia Menu:
On selecting the Input Source, Projector will open the Multimedia
Menu where you can select the type of media file you want to play (Movies, Music or
Images). Use the arrow keys to navigate and Press OK key to select.
2.
File selection:
On selecting the Media file type, you will be directed to the file
explorer, showing the files/folders as per the media type in your input source:
Return:
Navigates back to the Multimedia menu.
Up Folder:
Returns to the portrait settings.
Horizontal/Vertical:
Selects either horizontal or vertical display.
Navigate with arrow keys and press OK to select the desired files. They will now be
marked with a check mark on the upper right corner of the icon.
Note:
Multiple media files can be selected simultaneously for sequential playback.
Only one type of media file can be played at any one time.
3.
PLAY:
After selecting the files you want to play, press the Play/Pause button to start
playing. The selected media files will play and repeat.
4.
Reverse Imaging:
If you want to watch from the other side of the screen eg. For outdoor
viewing with screen installed on clear window. Press Turn key from reverse imaging.
Input Source:
To select the input source, insert the SD Card or USB drive in slot behind
the projector. Press the Input key on projector or remote and select the source from
where you want to play your media file. Use Up and Down key to toggle between the
options. Once your desired option is highlighted press the OK key to select the source. SD
Card is set as the default source of input.
Multimedia
MOVIE
SLIDE SHOW
MUSIC
USB 2.0
If you want to use your own personal clips for your festive occasions, they can be added by inserting your SD card
to a SD card reader (not provided) or plug the USB directly to a computer:
SETTINGS
1.
Picture:
This setting lets you make changes
to display. Following settings can be adjusted
by navigating to their respective submenu and
selecting them.
a. TXT
b. COLORS
c. ASPECT RATIO
d. SCREENS
e. NOISE REDUCTION
2.
Sound:
This setting lets you make adjustments to
sound as per user requirement. Following settings
can be adjusted
a. MODE
b. AUTO VOLUME
c. SURROUND SOUND
d. EQUALIZER
3.
Time:
This setting lets you make the time related
adjustments. Following are the sub options
a. TIME SETTINGS
b. SLEEP TIMER
c. AUTO SLEEP
4.
System Settings:
This setting lets you make
changes to the system software. Following are the
sub options available
a. LANGUAGE
b. RESTORE FACTORY SETTINGS
c. SOFTWARE UPDATES
To change the settings, press the Menu key on the Projector or remote. This will open the settings screen.
Use the arrow keys to toggle between different types of settings mentioned below.
PROJECTOR OPERATION
1. Place the projector on a levelled surface, pointing
towards the screen or a wall.
2. Connect the adapter to the projector and then
switch on the AC power supply. The indicator light
on the projector will flash signalling the projector
is in stand-by mode.
3. Press the Power button on the projector or remote
to switch the projector ON.
4. The multimedia menu should now come up. If it is
out of focus, manually rotate the lens clockwise
or anti-clockwise until you receive the clearest
picture quality. If the focus is not yet achieved,
consider positioning the projector closer or further
from the screen.
5. If the picture is slightly distorted, use the
KEYSTONE tracking wheel from the rear of the
projector to balance it.
6. To return to stand-by mode, press the power
button on the projector or the remote. Pressing the
power button again to switch off the device.
INTRODUCTION
LV1987 is an animated window display projector
that is pre-loaded with 20 festive clips, including a
variety of Halloween and Christmas scenes for your
festive occasions.
The projector also comes in either horizontal
or vertical orientation mounting for your
preferred display.
PROJECTOR SET UP
Use the included projector screen with two-sided
tape to attach to your window or wall. Make sure that
screen is stretched in order to minimize creases in
the fabric. Place the projector on a levelled surface
at a distance of 1-3m from the screen. Use a tripod for
improved viewing angle.
If you want to view from outside, install the screen
on the window and direct the projector towards the
screen from indoor area. Press the turn key for
reverse imaging.


