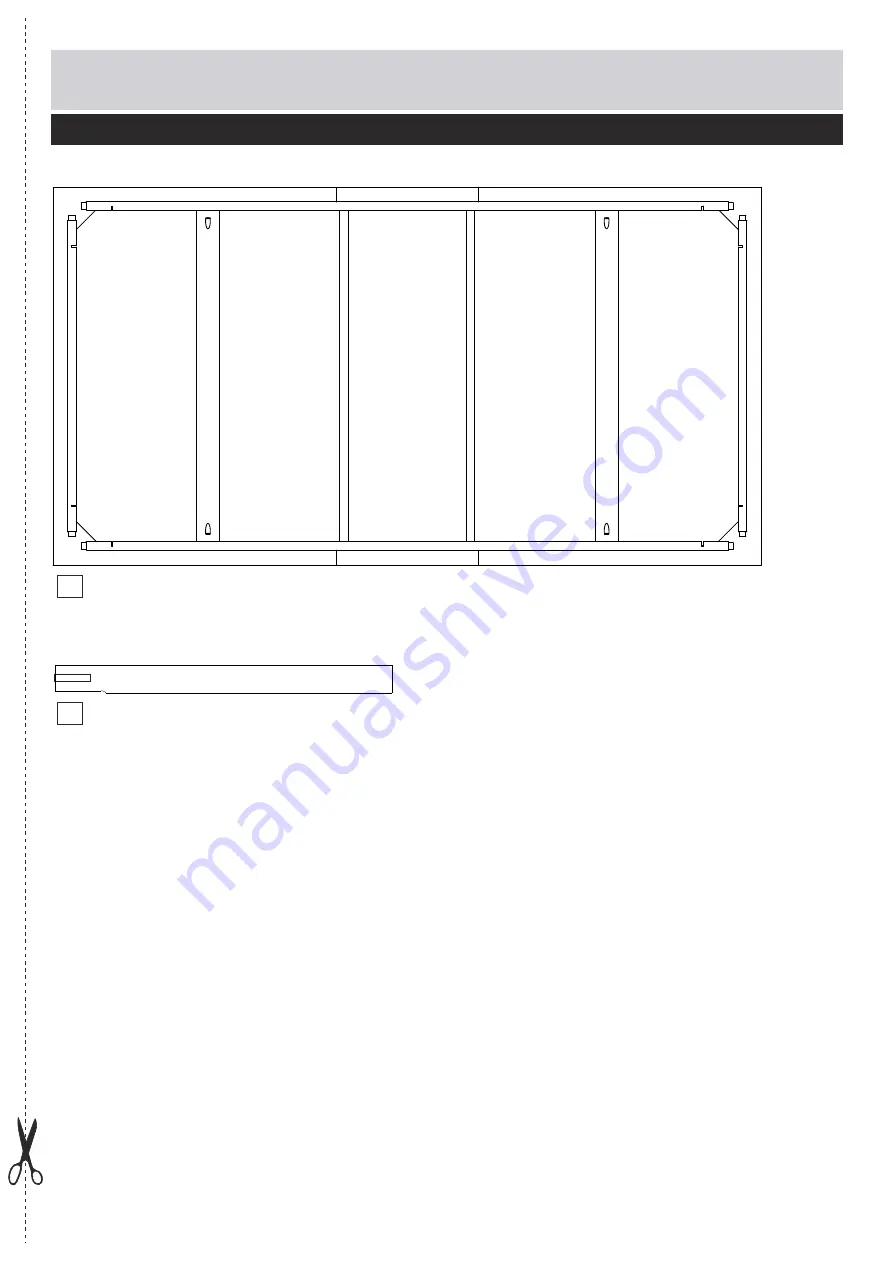
Components
- Panels
Please check you have all the panels listed below
2
02 Leg x 4 (
76,2 x 6cm
)
01
Top
panel
(
150 x 80cm
Page 1: ...lease keep for future reference If you need help or have damaged or missing parts call the Customer Helpline 03456 400 800 Important Please read these instructions fully before starting assembly Dimensions Width 150cm Depth 80cm Height 78cm Issue 1 12 11 14 ...
Page 2: ...soft level surface to avoid damaging the unit or your floor We do not recommend the use of power drill drivers for inserting screws as this could damage the unit Only use hand screwdrivers Parts of the assembly will be easier with 2 people Dispose of all packaging carefully and responsibly This product contain Natural timber you may notice some variation in the grain and colour of different compon...
Page 3: ...Components Panels Please check you have all the panels listed below 2 02 Leg x 4 76 2 x 6cm 01 Top panel 150 x 80cm ...
Page 4: ... the screws 0 5 10 15 20 25 30 35 40 45 50 55 60 65 70 75 80 85 90 95 100 105 110 115 120 125 130 135 140 145 150 155 160 165 170 Tools required Phillips screwdriver medium large Eye protection when using a hammer or glue Small hammer Ruler tape measure If you have damaged or missing components call the Customer Helpline 03456 400 800 A A A D H Top panel clip X 4 A B C 3 5 x 16mm Screw X 24 E F G ...
Page 5: ...fix foot pads as shown Turn the table upright B A C 01 02 If you need help or have damaged or missing parts call the Customer Helpline 03456 400 800 01 02 C C C C 02 02 02 Caution Carefully place the top panel sideway on a soft and clean surface to avoid damaging the 01 With help insert legs into top panel through 02 joints as shown B B A A C 4x 02 4x product ...
Page 6: ... E 04 F D screws into pre drilled G into pre drilled holes using screws as shown Make E sure they are positioned correctly Fix four top panel clips H using screws into pre drilled holes as shown E holes as shown First fix hinges at the interior of table number 1 then force the other side of hinge down in order to fix numbers 2 and 3 in the pre drilled holes Make sure to fix screws folowing the ord...