20
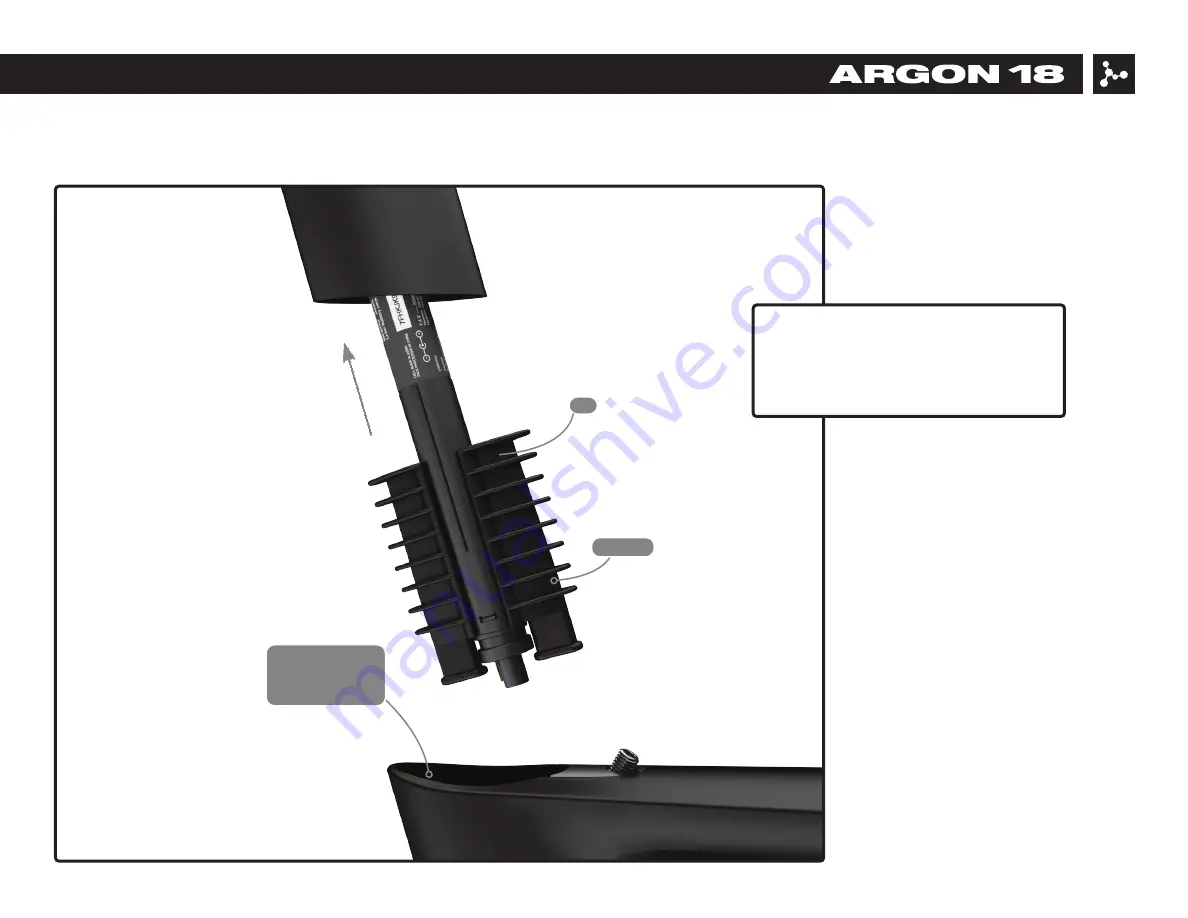
The Di2 battery is hidden in the
seatpost; use the Di2 battery holder
(2o) to fix the battery correctly. Apply a
slight amount of grease on both parts.
GREASE
CARBON FIBER
ASSEMBLY
COMPOSITE
4.7. Electronic (Di2) groupset specification
Page 1: ...1 NITROGEN DISC 340A 340B ASSEMBLY GUIDE Valid for MY2021 Nitrogen Disc 340A 340B Revision 1 0 09 29 2020...
Page 2: ...2 NITROGEN DISC 340A 340B ASSEMBLY GUIDE Valid for MY2021 Nitrogen Disc 340A 340B Revision 1 0 09 29 2020...
Page 3: ...rogen Disc Date of purchase Retailler Size Serial Number 1 Tools Needed and First Aid Kit 4 2 Frame Inspection 5 3 Frameset Parts SKUs and descriptions 6 4 1 Headset Installation 8 4 2 Seat Post Insta...
Page 4: ...er Alignment Gauge Park Tool Item DAG 2 or DAG 2 2 7 Cables and Housing Cutter 8 Carbon Paste 9 Loctite 242 10 Torque Wrench First Aid Kit Essential parts to always have on hand IN CASE OF EMERGENCY T...
Page 5: ...ou will need to adjust these parts according to their torque specifications 2 Frame Inspection BEFORE ASSEMBLING YOUR NEW NITROGEN DISC MAKE SURE THAT YOU HAVE ALL THE FOLLOWING 1 Frameset parts check...
Page 6: ...340B SP NIT_D 286A 80478 80477 Images are for reference only Proportions are not accurate Argon 18 reserves the right to modify change parts of the frameset at any moment without prior notice 80832 80...
Page 7: ...Post 38757 1 Set 24 Direct Mount Rear Derailleur Hanger Frame 80832 1 25 DT Swiss RWS Thru axle FRONT 12 x 119mm Fork 80812 1 26 DT Swiss RWS Thru axle REAR 12 x 161mm with handle Frame 80813 1 28 Obl...
Page 8: ...move freely 4 Place the seat post collar inside the frame holding it to prevent it falling inside the frame 5 Insert the seatpost on which some carbon fiber assembly paste has been applied 6 Position...
Page 9: ...6 3 5 1 Install the saddle on the rocker 3 4 and tighten the rail clamp 3 3 up to 6Nm with M5 screw 3 10 2 Adjust the angle and the offset of the saddle by hand tightening the thumb screw 3 8 3 The ro...
Page 10: ...ompressor or any equivalent must be purchased separately IMPORTANT No more than 30mm of spacers can be placed between the stem and the top cap The steerer must be trimmed no more than 5mm above the st...
Page 11: ...be adjusted according to the front derailleur angle to get an equal curve between the derailleur and the big chain ring Once at the right angle use threadlocker medium strength and screw both screws...
Page 12: ...the type of derailleur that you have Direct mount 24 Regular mount 8 2 Make sure to align the rear derailleur hanger 3 Use Derailleur Hanger Alignment Gauge like Park Tool Item DAG 2 For any assistanc...
Page 13: ...able and rear brake housing must be routed inside the frame passing over the BB sleeve axle Use the foam liner over the housings in the DT to avoid rattling sound while riding Red line brake hoses Yel...
Page 14: ...routed inside the frame passing over the BB sleeve axle Use the foam liner over the housings in the DT to avoid rattling sound while riding Red line brake hoses Yellow line derailleur cable housing A...
Page 15: ...side the frame passing over the BB sleeve axle Use the foam liner over the housings in the DT to avoid rattling sound while riding Red line brake houses Yellow line derailleur cable housing Use the ap...
Page 16: ...ube Front derailleur Remove the cable guide 9 under the bottom bracket Pass the cable housing inside the downtube until it comes out the top tube Add a plastic cap at the end of the housing pass the r...
Page 17: ...e bar the front brake hose enters the fork by the opening in the middle of the steerer Make sure to not pinch the Di2 cable For Token headset Di2 cable and brake hoses a routed through the top cap usi...
Page 18: ...specification The Di2 cable routing can be achieved easily using this simple trick use a gear cable and a metal cable end to fix the Di2 cable For more information on Shimano Di2 electronic system ins...
Page 19: ...electronic drive train use the grommet 13 to fix the front derailleur cable Use the Long Grommet DI2 35 to secure the rear derailleur Di2 cable in the chain stay hole 13 4 7 Electronic Di2 groupset s...
Page 20: ...y is hidden in the seatpost use the Di2 battery holder 2o to fix the battery correctly Apply a slight amount of grease on both parts 20 GREASE CARBON FIBER ASSEMBLY COMPOSITE 4 7 Electronic Di2 groups...
Page 21: ...21 4 8 Electronic Wireless groupset specification In the wireless groupset configuration use the Round Plug 34 to plug the chain stay hole 34...
Page 22: ...able to adjust the Saddle Height at the Minimum position Adjust the SeatPost cut length in accordance with your desired Saddle Height Required minimum SeatPost Cut length C desired Saddle Height A Exa...