background image

21

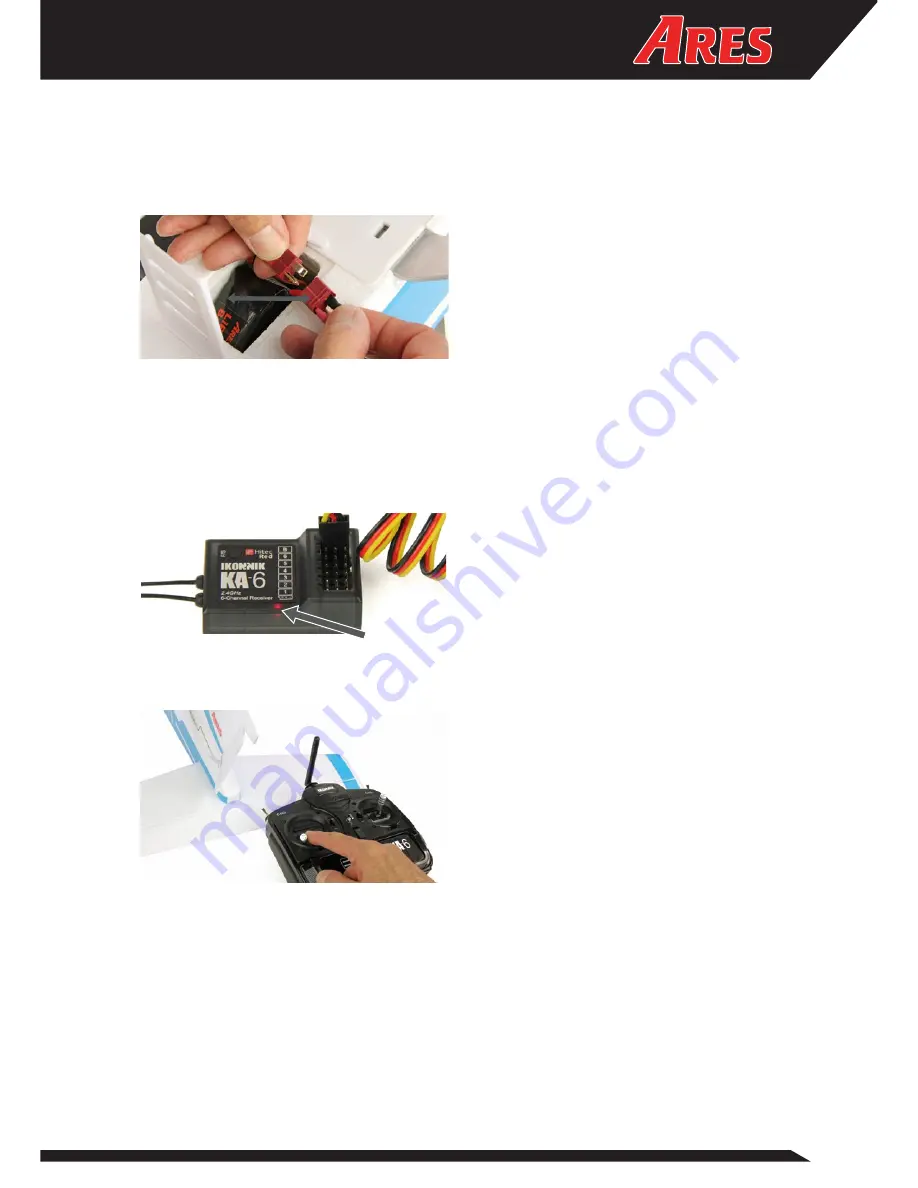
2. Power the receiver ON by connecting the LiPo battery to the ESC, as before. 

The receiver’s LED will initially flash red / blue, then change to fast-flashing 

red. For initial pairing the receiver must be powered on within 5 seconds of 

the transmitter. Once paired this time constraint is no longer necessary. 

3. Pairing will be complete when the receiver’s fast-flashing red LED turns 

solid red. This usually works without issue, however if you are attempting 

to operate multiple aircraft at the same time be sure that you only turn 

one transmitter and aircraft on at a time, waiting for the two to pair before 

moving to the next. If a mis-pair occurs simply turn off both units and begin 

the process again. 

4. You should now have full control of your Crusader. If necessary, return to 

Step 16 of this guide to complete the set-up of your model. 

45–200cm

LED

Summary of Contents for Crusader II PTF

Page 1: ...PTF US AZSA3001EU Crusader II PTF EU AZSA3001UK Crusader II PTF UK AZSA3001AU Crusader II PTF AU AZSA3000 Crusader II RTF US AZSA3000EU Crusader II RTF EU AZSA3000UK Crusader II RTF UK AZSA3000M1 Crus...

Page 2: ...ion Wingspan 54in 1380mm Wing Chord 8 63 in 219mm Wing area 465sq in Fuselage length 37 1in 942mm All up weight 40 6oz 1152g Battery 3S 11 1V 2200mAh LiPo Motor 750kV brushless ESC 40A brushless Prope...

Page 3: ...Assembly 10 Flying Your Crusader 18 Transmitter Pairing 19 Recommended Accessories 21 Replacement Parts 21 Warranty Support and Service USA 22 Warranty Conformity UK 23 Warranty Support Service AU 24...

Page 4: ...diately appreciate the Crusader s docile and forgiving flight envelope while those with experience will delight in its versatility and outstanding performance The Ares Crusader II is quite simply the...

Page 5: ...Keep all chemicals small parts and all electronic components out of the reach of children Moisture causes damage to electronic components Avoid exposing to water any electronic components parts etc t...

Page 6: ...st 15 minutes Continuing to charge or discharge a battery that has begun to balloon or swell can result in a fire A battery that has ballooned or swollen even a small amount must be removed from servi...

Page 7: ...4 x 9g servos pre installed 1 x Hitec Red enabled KA 6 receiver pre installed 1 x 3S 11 1V 2200mAh LiPo battery 1 x 12V DC 3S LiPo balance charger 1 x Mains power adapter 1 x 12 x 8 propeller prop ad...

Page 8: ...tick Digital Rudder trim ON OFF switch Digital Aileron trim Elevator Aileron stick Digital Elevator Trim Digital throttle trim LED Power indicator Mode 1 Mode 2 switch Channel 5 switch Channel 6 Switc...

Page 9: ...tick Digital Rudder trim ON OFF switch Digital Aileron trim Throttle Aileron stick Digital Throttle Trim Digital elevator trim LED Power indicator Mode 1 Mode 2 switch Channel 5 switch Channel 6 Switc...

Page 10: ...Mix Whilst the KA 6 can be used to control delta aircraft or a flying wing for Crusader II operation the Delta Mix switch must be set to FIXED WING Charging the Supplied LiPo Battery Read and fully u...

Page 11: ...the fuselage and push it fully home 3 Apply a generous but even spread of glue on either side of the vertical stabilizer as indicated by the cross hatched lines 4 Slide the vertical stabilizer into i...

Page 12: ...place 7 Join the two wing panels using the main spar noting that these do not need to be glued together 8 Connect the aileron leads to the Y lead extensions that are plugged into Channel 1 of the KA...

Page 13: ...n the underside of the fuselage insert the fully charged LiPo and slide it as far forward as it will go 12 Remove the KA 6 transmitter battery cover and insert four AA alkaline cells not included taki...

Page 14: ...the ESC is armed and operational 16 Stow the leads carefully then close and lock the hatch In the unlikely event that the servos do not operate see the PAIRING instructions at the back of this instruc...

Page 15: ...eck the alignment of the nose wheel With the rudder in the neutral position this will need to be straight If it s slightly off center adjust it in the following manner Lift the wing disconnect the ail...

Page 16: ...22 Moving the aileron stick to the left should cause the right hand aileron to move in a downward direction whilst the left hand aileron moves upward Moving the aileron stick to the left will have an...

Page 17: ...peller shaft noting its orientation b Add the spinner backplate c Fit the propeller over the shaft and seat it comfortably against the upstands of the backplate d Add the washer then loosely fit the p...

Page 18: ...n switch ON the transmitter once more and connect the battery to the ESC whilst keeping well clear of the live propeller Close the battery hatch and check once more that the control surfaces move in t...

Page 19: ...DIRECTLY INTO WIND Smoothly APPLY FULL POWER immediately before launching Always launch the model with the WINGS STRAIGHT AND LEVEL Launch the model with the NOSE POINTING SLIGHTLY UPWARD never downw...

Page 20: ...ight The Crusader offers beautifully smooth flying characteristics and a sprightly aerobatic performance that will suit pilots of all abilities You ll not tire of this aeroplane for it offers within i...

Page 21: ...complete when the receiver s fast flashing red LED turns solid red This usually works without issue however if you are attempting to operate multiple aircraft at the same time be sure that you only t...

Page 22: ...g AZSA3018 Main landing gear set AZSA3020 Control horn set AZSA3021 Motor cowl AZSA3023 Spinner AZSA3029 Brushless motor 750kV AZSA3030 ESC 40amp brushless HCT AZSA3031 Wing retainer AZSA3033 Wing spa...

Page 23: ...st for inspection Provided the warranty conditions have been met within the warranty term period the components that are found to be defective incorrectly manufactured or assembled may be repaired or...

Page 24: ...www Ares RC com REV 001...

Reviews: