SOFTWARE SETUP
To facilitate copying, please refer to doc page:
https://
www.arducam.com/docs/pico/arducam
-
camera
-
module
-
for
-
raspberry
-
pi
-
pico/spi
-
camera
-
for
-
raspberry
-
pi
-
pico/
We will keep online up
-
to
-
date continuously.
1. Get the driver
2. How to access SPI Camera using C
2.1 Cameras supported by the driver
•
OV2640 2MP_Plus JPEG format
•
OV5642 5MP_Plus JPEG format
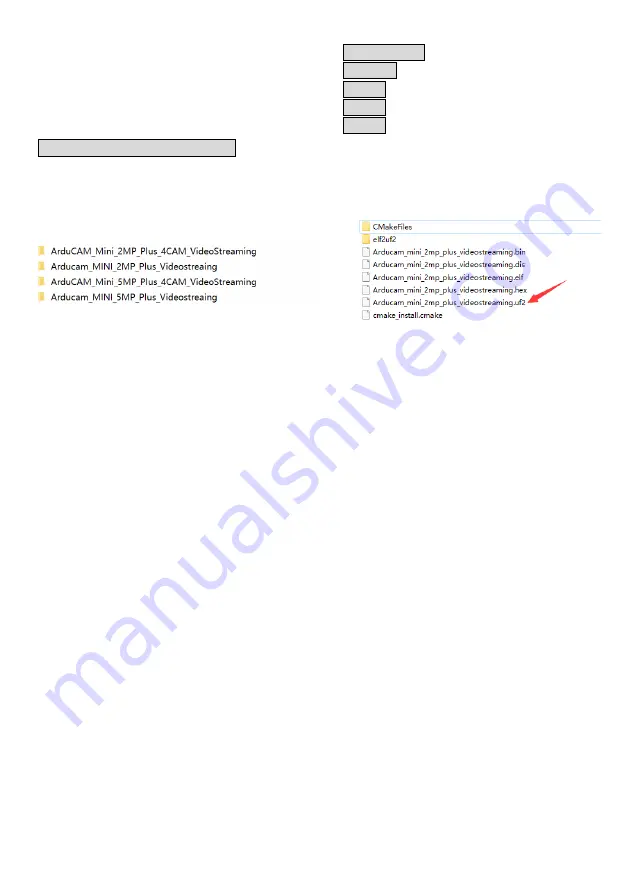
2.2 Demos provided
2.3 Compile the driver library
Note:
Refer to the official manual for the development
environment:
https://www.raspberrypi.org/
documentation/rp2040/getting
-
started/#getting
-
started
-
with
-
c
Choose the demo and input the following code to compile
it. (
default is Arducam_MINI_2MP_Plus_Videostreaing
)
git clone https://github.com/ArduCAM/PICO_SPI_CAM.git
2.4 Run the .uf2 file
•
Copy the PICO_SPI_CAM/C/build/Examples/
Arducam_MINI_2MP_Plus_Videostreaing/
Arducam_mini_2mp_plus_videostreaming.uf2
file to Pico
to run the test.
•
Open
HostApp.exe
under
PICO_SPI_CAM/HostApp
file
path, configure the port number, and click
Image
to view
the image.
cd PICO_SPI_CAM
mkdir build
cd build
cmake ..
make
3. How to access Camera using Python
(on Windows)
3.1 Download and install developing software Thonny
Refer to the official manual:
https://thonny.org/
3.2 Configure the IDE
Refer to the official manual:
https://circuitpython.org/
3.3 Run Thonny
•
Copy all the files except
boot.py
under
PI-
CO_SPI_CAM/Python/
file path to Pico
.
•
Open Thonny software
-
>Select
Interpreter
-
>Select
Circuit Python(generic)
-
> Press
OK
•
Open Device Manager to check the
Ports(COM & LPT)
of Pico and then configure port number of Circuit
Python(generic)
•
Copy all the
boot.py file
under
PICO_SPI_CAM/
Python/
file path to Pico.
•
Reboot Pico and then check the new
port number
under
Ports(COM & LPT)
, it
’
s used to USB communica-
tion.
•
Open the camera drive program
CircuitPython device
via opening file on Thonny
•
Click
Run
, and it appears
[48], CameraType is OV2640,
SPI Interface OK
means that the initialization of the
camera is completed. Note
[48]
refers to the I2C
device address of OV2640 camera.
•
Open
HostApp.exe
under
PICO_SPI_CAM/HostApp
file
path, select the port number used for USB communi-
cation, and click
Image
to view the image.
If you need our help or the API detailed information, feel
free to contact us.
Email:
Web:
www.arducam.com
Doc Page:
https://www.arducam.com/docs/pico/arducam
-
camera
-
module
-
for
-
raspberry
-
pi
-
pico/spi
-
camera
-
for
-
raspberry
-
pi
-
pico/


