


USER MANUAL: ARCTIV SERVER & NETWORK RACKS
11
© 2021 ArcTiv Technologies, LLC
ATSVR-NWR-MANUAL-01
CONFIGURATION
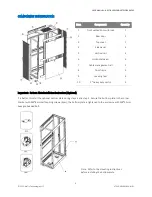
Step 1. Placement
Use the casters to move the enclosure over a level, smooth and stable surface by pushing the unit.
Step 2. Leveling
After locating the enclosure in right place, use the leveling feet on 4 corners to level the unit on the floor. Make
sure the enclosure is leveled before attempting to install equipment.
Step 3. Grounding Connection
Make sure all the parts of the enclosure are properly bonded and grounded to the frame, then connect to one of
the designated grounding locations (two M6 threaded inserts on front/rear door frame) directly to your facility's
earth ground connection with 8AWG wire. Do not use the enclosure without a proper earth ground connection.
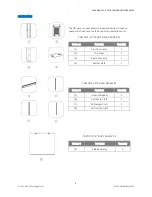
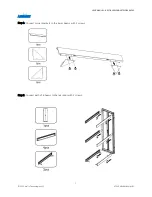
Step 4. Alignment
Align the enclosures and join them using one M5 flat-head screw (pre-installed on the door frame) per bracket-two
brackets for the front and two brackets for the rear.
Step 5. Equipment installation
Do not install any equipment until the unit is stabilized. Install the heavier equipment first and towards the bottom.
Note: The square holes at the middle of each U-shaped vertical rail are numbered and also include a small notch to
aid identification. When installing equipment, use cage nut to secure your equipment to the U-shaped vertical rail.


