22
22
LED Light Replacement
Vacation Care Instructions
If you plan to be away from home for 7 - 14 days, follow these instructions to ensure that the water
quality of your spa is maintained.
1. Adjust pH as needed.
2. Ensure you have sufficient sanitizer to last until you return.
3. Shock the spa with Arctic Pure
®
Spa Boost or Refresh.
4. Activate economy mode (see pg 17)
Upon your return:
1. Shock the spa with Arctic Pure
®
Spa Boost or Refresh.
2. Ensure you have sufficient sanitizer for regular use.
3. Return the temperature to its original setting. You can use your spa once the residual sanitizer level
falls within the ideal range.
Note: If you will not be using your spa for more then 14 days and a neighbor, friend or an outside
maintenance service is not available to check and balance the water chemistry, draining or
winterizing (for winter only) the spa is recommended.
Winterizing Your Spa
If you plan to leave your spa unused for a long period of time in severely cold weather, you should drain
the spa to avoid accidental freezing due to a power or equipment failure.
We recommend your local authorized dealer winterize your spa. Freezing can severely damage your spa.
Improper winterizing of your spa can void your warranty.
Aquatremor® or Wettunes® Stereo
(Optional)
Using the Audio Output cable provided in your spa pack, connect your own MP3 player and enjoy!
All Arctic Spas
®
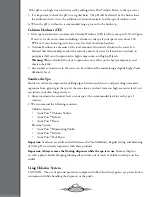
come equipped with two 12 volt blue LED
underwater lights for night use. The Northern Lights™
option uses two multicoloured LED assemblies. The
Northern Lights™ Deluxe option comes with five lights.
Should you need to change any light, follow these simple
steps:
1. Make sure the lighting is turned off, by checking the
topside be sure the light icon is not showing.
2. Remove the screws securing the equipment access doors; remove the doors.
3. Locate the reflector, which is secured into the light housing. Carefully rotate the reflector coun-
ter-clockwise until it comes off the light housing.
4. Carefully disconnect any cables (note the location of the cable(s), as the LED assembly has two
sockets) and remove the light assembly from its socket or slot.
5. Install the new LED assembly in its slot or socket, then reconnect the cables.
6. To reinstall the underwater light, rotate the lamp assembly clockwise onto the light housing until
secure.

