background image

58

Warranty

ARNOV

A

AN8G4 


21-11-2012

last modification:

CONFIDENTIAL

Drawing

Rev

1

scale 1:1

mm

Contenuto della confezione

Cavo USB

Caricatore

Guida dell’utente

Garanzia, note legali e sulla sicurezza

ARNOVA 97

 G4

Summary of Contents for ARNOVA 97 G4

Page 1: ...al As we are often updating and improving our products your device s software may have a slightly different appearance or modified functionality than presented in this Quick Start Guide Package contents Getting started Description of the device Through the wizard Connecting to a WiFi network The AndroidTM interface Getting familiar with AndroidTM Troubleshooting 2 3 4 6 7 8 12 14 ...

Page 2: ...2 Warranty ARNOVA AN8G4 21 11 2012 last modification CONFIDENTIAL Drawing Rev 1 scale 1 1 mm USB cable Charger QSG booklet Warranty legal safety booklet Package Contents ARNOVA 97 G4 ...

Page 3: ...novatech com register Charging 1 Connect the supplied power cable to the ARNOVA and to a wall outlet The ARNOVA device will start charging 2 Press the ON OFF button to turn on the device You can use your ARNOVA whilst it charges Let your device charge completely the first time you use it Use only the supplied charger ...

Page 4: ...4 4 5 7 6 8 9 10 3 2 1 12 11 Description of the device ...

Page 5: ...s Back button Webcam Loudspeaker Headphone jack Micro USB port Micro SD card slot Mini HDMI video output Power connector ON OFF button Reset button Camera 1 9 2 10 3 4 5 6 7 8 12 11 With optional Mini HDMI to HDMI cable ...

Page 6: ... up your device in the WiFi zone of the network that you will regularly be using The first time you start up your ARNOVA the installation wizard will help you set up your device Language Date time WiFi connection Location service options 3rd party apps ...

Page 7: ...re that you are in a WiFi zone You can access the WiFi settings quickly from the status bar in the bottom right corner of the screen 1 Touch the time in the status bar The status dashboard is displayed 2 Touch the time a second time in the status dashboard The quick settings will be displayed 3 Touch Settings to open the WiFi settings menu 4 If the WiFi is off slide the WiFi switch to the ON posit...

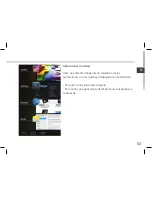
Page 8: ...8 1 2 3 5 6 7 8 4 The AndroidTM Interface ...

Page 9: ...earch Recent apps button Home button Back button All Apps button Touch this icon to show all the applications and widgets installed on your ARNOVA All your downloaded applications are here Widget AndroidTM apps shortcuts Touch to start an application The status bar Displays notifications and quick settings ...

Page 10: ...ss connections WiFi To turn on off your WiFi connection Auto rotate screen To activate deactivate automatic screen orientation as you turn your ARNOVA Brightness To adjust the screen brightness Notifications To activate deactivate incoming notifications Settings To access all your settings ...

Page 11: ...11 EN The Recent Apps Opens a list of thumbnail images of apps you ve worked with recently To open an app touch it To close an app swipe it left or right ...

Page 12: ...slide it to the desired location and release your finger Removing a home screen item Touch and hold it slide your finger towards the top of the screen and drop it over the Remove icon Uninstalling an item From the All apps screens touch and hold it slide your finger towards the top of the screen and drop it over Uninstall bin Creating application folders Drop one app icon over another on a home sc...

Page 13: ... Hold your finger on a home screen at an empty location then choose from the list Locking the touchscreen From the quick settings dashboard in the status bar touch Settings In Settings scroll down and touch Security Touch Screen lock Touch the type of lock you would like to use After you set a lock a lock screen is displayed whenever your screen wakes up requesting the pattern pin or other specifi...

Page 14: ...e reset button press the pinhole reset button by using a sharp object such as a toothpick If you want to extend the life of your battery Decrease the screen brightness and turn off the wireless connections if not in use If your device functioning is too slow Close all apps which are not currently used If your WiFi reception is too low Make sure you are not far from the WiFi hotspot Update the firm...

Page 15: ...z peut être résolu facilement Comme nous mettons à jour et améliorons régulièrement nos produits le logiciel de votre appareil peut présenter une interface ou des fonctionnalités légèrement différentes de celles décrites dans ce guide Contenu de la boîte Mise en route Description de l appareil Assistant de démarrage Se connecter à un réseau WiFi L interface AndroidTM Se familiariser avec AndroidTM...

Page 16: ...anty ARNOVA AN8G4 21 11 2012 last modification CONFIDENTIAL Drawing Rev 1 scale 1 1 mm Contenu de la boîte Câble USB Chargeur Guide d utilisation rapide Guide des garanties et des mentions légales ARNOVA 97 G4 ...

Page 17: ...nchez le câble d alimentation fourni sur le connecteur d alimentation de la tablette et sur une prise secteur Votre tablette commence à se charger 2 Appuyez sur le bouton ON OFF pour allumer l appareil Vous pouvez utiliser votre tablette pendant le chargement de la batterie Lors de la première utilisation chargez complètement la batterie de la tablette Utilisez uniquement le chargeur fourni ...

Page 18: ...18 4 5 7 6 8 9 10 3 2 1 12 11 Description de l appareil ...

Page 19: ...am Haut parleur Entrée jack audio Port micro USB Lecteur carte micro SD Sortie vidéo mini HDMI Connecteur d alimentation Bouton ON OFF Bouton de réinitialisation Appareil photo 1 9 2 10 3 4 5 6 7 8 11 12 Câble vidéo Mini HDMI vers HDMI non fourni ...

Page 20: ...recommandons de vous placer dans la zone WiFi du réseau que vous utilisez régulièrement La première fois que vous allumez votre tablette l assistant de démarrage vous permet de la paramétrer Langue Date heure Connexion WiFi Les options du service de localisation Applications tierces ...

Page 21: ...dans une zone WiFi Vous pouvez accéder rapidement aux paramètres WiFi à partir de la barre de statuts en bas à droite de l écran 1 Sélectionnez l heure dans la barre de statuts Le panneau des statuts s affiche 2 Sélectionnez l heure une deuxième fois dans le panneau des statuts Les réglages rapides s affichent 3 Sélectionnez Paramètres pour afficher la page des paramètres WiFi 4 Si le WiFi est éte...

Page 22: ...22 1 2 3 5 6 7 8 4 L interface AndroidTM ...

Page 23: ... Retour Toutes les Applications Sélectionnez pour afficher toutes les applications et les widgets installés sur votre tablette Vous retrouverez toutes vos applications téléchargées Widget Raccourcis d applications AndroidTM Sélectionnez une application pour l ouvrir Barre de statuts Elle affiche les notifications et permet l accès aux réglages rapides ...

Page 24: ...iver désactiver votre connexion WiFi Rotation automatique de l écran pour activer désactiver l orientation automatique de l écran dès que vous tournez votre tablette Luminosité pour ajuster la luminosité de l écran Notifications pour activer désactiver les notifications entrantes Paramètres pour accéder à tous vos paramètres ...

Page 25: ...ions récentes L application affiche une liste de vignettes des applications utilisées récemment Pour afficher une application sélectionnez la Pour fermer une application faites la glisser vers la gauche ou vers la droite ...

Page 26: ...isser vers l emplacement souhaité et relâchez Supprimer une icône de l écran d accueil Maintenez votre doigt appuyé sur l icône puis faites la glisser vers le haut de l écran et déposez la sur l icône Supprimer Désinstaller une application A partir de l écran Toutes les applications maintenez votre doigt appuyé sur l icône puis faites la glisser vers le haut de l écran et déposez la sur l icône Dé...

Page 27: ...uis choisissez parmi la liste d options Verrouiller votre tablette A partir du panneau des réglages rapides dans la barre de statuts sélectionnez Paramètres Faites défiler l écran vers le bas puis sélectionnez Sécurité Sélectionnez Verrouillage de l écran Sélectionnez le type de verrouillage que vous voulez utiliser Une fois que vous avez sélectionné une option un écran de verrouillage s affiche c...

Page 28: ...uton reset en utilisant un objet pointu tel qu un trombone Si vous voulez prolonger l autonomie de la batterie Diminuez la luminosité de l écran et désactivez les connexions sans fil si elles sont inutilisées Si votre appareil fonctionne au ralenti Fermez les applications qui ne sont pas en cours d utilisation Si votre réception WiFi est trop faible Assurez vous de ne pas être trop loin de la born...

Page 29: ...n Da unsere Produkte kontinuierlich aktualisiert und weiterentwickelt werden kann die Software Ihres Geräts in Erscheinung und Funktionalität geringfügige Abweichungen zu den Darstellungen in dieser Kurzbedienungsanleitung aufweisen BeschreibungdesPackungsinhalts Erste Schritte Beschreibung des Geräts Installationsassistent WiFi WLAN Verbindung Die Android TM Benutzeroberfläche Android TM kennenle...

Page 30: ...ty ARNOVA AN8G4 21 11 2012 last modification CONFIDENTIAL Drawing Rev 1 scale 1 1 mm Beschreibung des Packungsinhalts USB Kabel Ladegerät Benutzerhandbuch Garantie Impressum und Sicherheitshinweise ARNOVA 97 G4 ...

Page 31: ...ech com register Aufladen des Akkus 1 Verbinden Sie das mitgelieferte Stromkabel mit dem ARNOVA und mit einer Steckdose Daraufhin startet den Ladevorgang 2 Drücken Sie die EIN AUS Taste um das Gerät einzuschalten Sie können den ARNOVA auch während des Ladens verwenden Laden Sie Ihr Gerät vor der ersten Nutzung einmal vollständig auf Verwenden Sie nur das mitgelieferte Netzgerät ...

Page 32: ...32 4 5 7 6 8 9 10 3 2 1 12 11 Beschreibung des ARNOVA ...

Page 33: ... Webcam Lautsprecher Kopfhöreranschluss Micro USB Port microSD Karten Steckplatz Mini HDMI Video Ausgang Strom anschluss EIN AUS Taste Hardware Reset Kamera 1 9 2 10 3 4 5 6 7 8 Mit einem optionalen Video Kabel HDMI Mini HDMI 11 12 ...

Page 34: ... das Sie regelmäßig verwenden Wenn Sie Ihren ARNOVA das erste Mal in Betrieb nehmen leitet Sie der Installationsassistent durch einige Bildschirme um Ihnen dabei zu helfen die grundlegenden Einstellungen vorzunehmen Sprache Datum Uhrzeit WLAN Verbindung Standortdienst Anwendungen von Drittanbietern ...

Page 35: ...WLAN Zone aufhalten Von der Statusleiste aus können Sie schnell auf die WiFi WLAN Einstellungen zugreifen 1 Tippen Sie auf die Uhrzeit in der Statusleiste Das Status Dashboard wird angezeigt 2 Berühren Sie die Uhrzeit ein zweites Mal im Status Dashboard Die Schnell Einstelllungen werden angezeigt 3 Berühren Sie Einstellungen um das Menü WLAN Einstellungen zu öffnen 4 Wenn WLAN deaktiviert ist schi...

Page 36: ...36 1 2 3 5 6 7 8 4 Die AndroidTM Benutzeroberfläche ...

Page 37: ...k Alle Apps Berühren Sie dieses Symbol um alle auf Ihrem ARNOVA installierten Apps und Widgets anzuzeigen Alle heruntergeladenen Anwendungen befinden sich hier Widget AndroidTM Apps Die Aktivierung einer App erfolgt durch Berühren Statusleiste Auf der Statusleiste werden Benachrichtigungen und die Systemsymbole angezeigt ...

Page 38: ... WLAN Ein und Ausschalten der WLAN Verbindung Bildschirm automatisch drehen Ermöglicht die Aktivierung und Deaktivierung der automatischen Display Drehung Helligkeit Einstellung der Bildschirmhelligkeit Benachrichtigungen Aktivierung und Deaktivierung eingehender Benachrichtigungen Einstellungen Zugriff auf alle Einstellungen ...

Page 39: ...39 DE Letzte Apps Öffnet eine Liste mit Mini Abbildungen der kürzlich verwendeten Apps Zum Öffnen einer App berühren Sie diese Zum Schließen einer App wischen Sie diese nach links oder rechts ...

Page 40: ...e gewünschte Stelle schieben und loslassen Ein Element vom Startbildschirm entfernen Den Finger auf das Element legen und halten Den Finger auf dem Bildschirm nach oben bewegen und über dem Entfernen Symbol loslassen Ein Element deinstallieren Auf den Alle Apps Bildschirmen das betreffende Element berühren und halten Den Finger im Bildschirm nach oben bewegen und über dem Deinstallieren Papierkorb...

Page 41: ...des Bildschirms legen und dann aus der Liste auswählen Touchscreen sperren Berühren Sie Einstellungen auf dem Schnelleinstellungen Dashboard in der Statusleiste Scrollen Sie nach unten und berühren Sie Sicherheit Berühren Sie Bildschirmsperrung Berühren Sie die gewünschte Art der Sperrung Nach erfolgter Sperrung wird ein Sperrbildschirm angezeigt sobald der Bildschirm aktiviert wird Auf diesem ist...

Page 42: ...n Sie die EIN AUS Taste 10 Sekunden lang gedrückt oder verwenden Sie den Hardware Reset wie zuvor beschrieben Akkulaufzeit verlängern Verringern Sie die Bildschirmhelligkeit und schalten Sie die WiFi WLAN Verbindungen aus wenn diese nicht verwendet werden Das Gerät ist zu langsam Schließen Sie alle Anwendungen die nicht verwendet werden WiFi WLAN Empfang ist zu schwach Stellen Sie sicher dass Sie ...

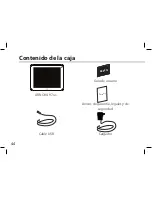
Page 43: ...u problema Tenga en cuenta que como estamos actualizando y mejorando constantemente nuestros productos el software de su dispositivo puede variar ligeramente con respecto a lo descrito en esta Guía Rápida Contenido de la caja Procedimientos iniciales Descripción del ARNOVA Asistente de inicio Conexión a una red WiFi La interfaz AndroidTM Para familiarizarse con AndroidTM Solución de problemas 44 4...

Page 44: ...4 Warranty ARNOVA AN8G4 21 11 2012 last modification CONFIDENTIAL Drawing Rev 1 scale 1 1 mm Contenido de la caja Cable USB Cargador Guía de usuario Avisos de garantía legales y de seguridad ARNOVA 97 G4 ...

Page 45: ...do de la batería 1 Para cargar el dispositivo conecte el cable de alimentación al puerto micro USB El dispositivo ARNOVA iniciará la carga 2 Pulse el botón de encendido apagado para encender el producto Puede utilizar el ARNOVA mientras se carga Deje cargar completamente el dispositivo la primera vez que lo utilice Utilice únicamente el cargador suministrado ...

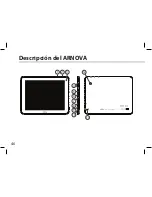
Page 46: ...46 4 5 7 6 8 9 10 3 2 1 12 11 Descripción del ARNOVA ...

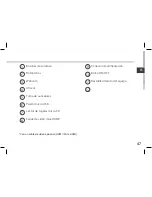
Page 47: ...cam Altavoz Toma de auriculares Puerto micro USB Lector de tarjetas micro SD Salida de video mini HDMI Conector de alimentación Botón ON OFF Restablecimiento del equipo 1 9 2 10 3 4 5 6 7 8 11 12 Con un cable de vídeo opcional HDMI Mini HDMI ...

Page 48: ...positivo en el área de la red WiFi que usted será regularmente usando La primera vez que encienda el ARNOVA el asistente de instalación le ayudará a configurar el dispositivo Idioma Fecha y hora Conexión WiFi El servicio de ubicación Aplicaciones de terceras partes ...

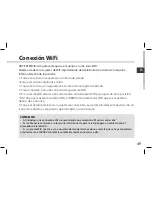
Page 49: ...a los ajustes de WiFi rápidamente desde la barra de estado de la esquina inferior derecha de la pantalla 1 Toque en la hora que aparece en la barra de estado Aparece el escritorio digital de estado 2 Toque en la hora una segunda vez en el escritorio digital de estado 3 Toque Ajustes para abrir el menú de ajustes de WiFi 4 Si el sistema WiFi está desactivado deslice el interruptor WiFi para ajustar...

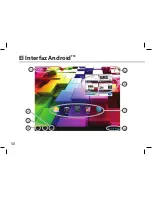
Page 50: ...50 1 2 3 5 6 7 8 4 El Interfaz AndroidTM ...

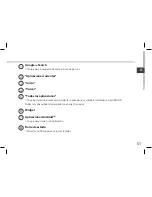
Page 51: ...ntes Inicio Volver Todas las aplicaciones Toque este icono para mostrar todas las aplicaciones y widgets instalados en el ARNOVA Todas las aplicaciones descargadas se encuentran aquí Widget Aplicaciones AndroidTM Toque para iniciar una aplicación Barra de estado Muestra notificaciones y ajustes rápidos ...

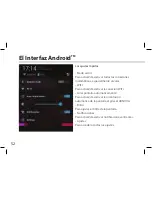
Page 52: ...ente al volar WiFi Para activar desactivar la conexión WiFi Girar pantalla automáticamente Para activar desactivar la orientación automática de la pantalla al girar el ARNOVA Brillo Para ajustar el brillo de la pantalla Notificaciones Para activar desactivar notificaciones entrantes Ajustes Para acceder a todos los ajustes ...

Page 53: ...nes recientes Abre una lista de imágenes en miniatura de las aplicaciones con las que haya trabajado recientemente Para abrir una aplicación tóquela Para cerrar una aplicación deslícela hacia la izquierda o la derecha ...

Page 54: ...la ubicación deseada y suelte el dedo Eliminación de un elemento de la pantalla de inicio Mantenga el dedo sobre él deslice el dedo hacia la parte superior de la pantalla y déjelo caer sobre el icono Eliminar Desinstalación de un elemento En las pantallas Todas las aplicaciones mantenga el dedo sobre él deslice el dedo hacia la parte superior de la pantalla y déjelo caer sobre la papelera Desinsta...

Page 55: ...bio del fondo Mantenga el dedo en la pantalla en una ubicación vacía y a continuación elija en la lista Bloqueo de la pantalla táctil En el escritorio digital de ajustes rápidos de la barra de estado toque Ajustes Desplácese hacia abajo y toque Seguridad Bloqueo de la pantalla Toque el tipo de bloqueo que desee utilizar Tras definir aquí un bloqueo aparecerá una pantalla de bloqueo cuando se activ...

Page 56: ...stauración de hardware pulse el botón de restauración con un objeto puntiagudo tal como un palillo de dientes Si desea aumentar la duración de la batería Disminuya el brillo de la pantalla y desactive las conexiones inalámbricas si no las utiliza Si el dispositivo funciona con demasiada lentitud Cierre todas las aplicaciones que no esté utilizando Si la recepción WiFi es demasiado baja Asegúrese d...

Page 57: ...roblema Poiché i nostri prodotti vengono continuamente aggiornati e migliorati è possibile che il software del dispositivo si presenti in modo leggermente diverso o con funzioni modificate rispetto a quanto presentato nella presente Guida rapida Contenuto della confezione Avvio Descrizione del ARNOVA Installazione guidata Connessione a una rete WiFi Interfaccia AndroidTM Conoscere AndroidTM Soluzi...

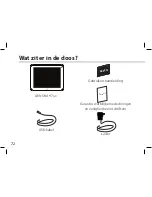
Page 58: ...arranty ARNOVA AN8G4 21 11 2012 last modification CONFIDENTIAL Drawing Rev 1 scale 1 1 mm Contenuto della confezione Cavo USB Caricatore Guida dell utente Garanzia note legali e sulla sicurezza ARNOVA 97 G4 ...

Page 59: ...della batteria 1 Collegare il cavo di alimentazione fornito al dispositivo ARNOVA e a una presa a muro Il dispositivo ARNOVA viene avviata la ricarica 2 Premere il pulsante ON OFF per accendere il prodotto Durante il caricamento è possibile usare ARNOVA Caricare completamente il dispositivo al primo utilizzo Utilizzare solo il caricabatteria incluso ...

Page 60: ...60 4 5 7 6 8 9 10 3 2 1 12 11 Descrizione del ARNOVA ...

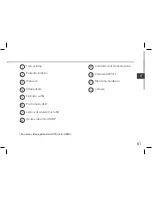
Page 61: ...Webcam Altoparlante Spinotto cuffie Porta micro USB Lettore di schede micro SD Uscita video mini HDMI Connettore di alimentazione Pulsante ON OFF Ripristino hardware Camera 1 9 2 10 3 4 5 6 7 8 11 12 Con cavo video opzionale HDMI mini HDMI ...

Page 62: ...ispositivo nella zona della rete WiFi si utilizzano regolarmente La prima volta che si avvia ARNOVA il wizard di installazione aiuterà ad installare il dispositivo Lingua Data e ora Connessione WiFi Il servizio di localizzazione Applicazioni di altri produttori ...

Page 63: ...È possibile accedere rapidamente alle impostazioni WiFi dalla barra di stato nell angolo in basso a destra dello schermo 1 Selezionare l ora nella barra di stato Si visualizza il pannello di stato 2 Selezionare l ora una seconda volta nel pannello di stato Si visualizzano le impostazioni rapide 3 Selezionare Impostazioni per aprire il menù delle impostazioni WiFi 4 Se la rete WiFi è disattivata sp...

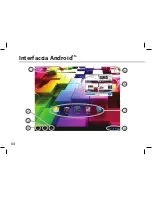
Page 64: ...64 1 2 3 5 6 7 8 4 Interfaccia AndroidTM ...

Page 65: ...plicazioni Selezionare questa icona per visualizzare tutte le applicazioni e i widget si accenderanno sul vostro ARNOVA Tutte le applicazioni scaricate sono qui Widget Applicazioni AndroidTM Selezionare per avviare un applicazione Barra di stato Che visualizza le notifiche e le impostazioni rapide 1 2 3 4 5 6 7 8 ...

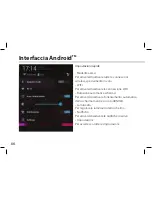
Page 66: ... volo WiFi Per attivare disattivare la connessione WiFi Rotazione automatica schermo Per attivare disattivare l orientamento automatico dello schermo mentre si ruota ARNOVA Luminosità Per regolare la luminosità dello schermo Notifiche Per attivare disattivare le notifiche in arrivo Impostazioni Per accedere a tutte le impostazioni ...

Page 67: ...icazioni recenti Apre un elenco di immagini in miniatura delle applicazioni su cui si è recentemente lavorato Per aprire un applicazione selezionarla Per chiudere un applicazione sfiorarla da sinistra o da destra ...

Page 68: ...lla posizione desiderata e togliere il dito Rimuovere una voce della schermata iniziale Selezionare e tenerla scorrere il dito verso la parte superiore dello schermo e lasciare sull icona Rimuovi Disinstallare una voce Dalle schermate Tutte le applicazioni selezionare e tenere scorrere il dito verso la parte superiore dello schermo e lasciare su Cestino disinstalla Creare cartelle di applicazioni ...

Page 69: ...lo sfondo Tenere il dito sulla schermata su una posizione vuota quindi selezionare dall elenco Blocco del touchscreen Dal pannello delle impostazioni rapide nella barra di stato selezionare Impostazioni Scorrere e selezionare protezione Bloccare il touchscreen Selezionare il tipo di blocco che si desidera usare Dopo aver impostato un blocco un lucchetto viene visualizzato ogni volta che lo schermo...

Page 70: ...dware Per usare l azzeramento Hardware premere il pulsante azzeramento foro usando un oggetto appuntito come uno stuzzicadenti Se si desidera estendere la vita della batteria Diminuire la luminosità dello schermo e spegnere le connessioni wireless non in uso Se il dispositivo funziona troppo lentamente Chiudere tutte le applicazioni non attualmente in uso Se la ricezione WiFi è troppo lenta Accert...

Page 71: ...leempje blijken Omdat we onze producten voortdurend aanpassen en verbeteren kan de software van uw apparaat er een beetje anders uitzien of een licht gewijzigde functionaliteit hebben dan voorgesteld in deze Snelstartgids Wat zit er in de doos Aan de slag Beschrijving ARNOVA Installatiewizard WiFi netwerkverbinding De AndroidTM Interface Vertrouwd raken met AndroidTM Problemen oplossen 72 73 74 76...

Page 72: ...RNOVA AN8G4 21 11 2012 last modification CONFIDENTIAL Drawing Rev 1 scale 1 1 mm Wat zit er in de doos USB kabel Lader Gebruikershandleiding Garantie wettelijke mededelingen en veiligheidsvoorschriftem ARNOVA 97 G4 ...

Page 73: ...er De batterijen laden 1 Laad uw apparaat op door de stekker van uw voedingskabel in de stroomaansluiting te steken Het ARNOVA apparaat begint op te laden 2 Druk op de AAN UIT knop om het apparaat uit U kunt uw ARNOVA gebruiken terwijl hij wordt opgeladen Laad het apparaat de eerste keer helemaal op Gebruik uitsluitend de meegeleverde oplader ...

Page 74: ...74 4 5 7 6 8 9 10 3 2 1 12 11 Beschrijving ARNOVA ...

Page 75: ...Luidspreker Hoofdtelefoonaansluiting Micro USB poort Micro SD kaartlezer Mini HDMI video uitgang Stroomaansluiting AAN UIT knop Het toestel resetten Camera 1 9 2 10 3 4 5 6 7 8 11 12 Optionele videokabel HDMI mini HDMI afzonderlijk te koop ...

Page 76: ... apparaat op het gebied van het WiFi netwerk zult u regelmatig gebruikt De eerste keer dat u uw ARNOVA inschakelt zal de installatiewizard u helpen bij het instellen van uw apparaat Taal Datum en tijd WiFi verbinding De locatieservice Toepassingen van derden ...

Page 77: ... Zorg ervoor dat u zich in een WiFi zone bevindt U kunt snel toegang tot de WiFi instellingen krijgen vanaf de statusbalk in de rechterbenedenhoek van het scherm 1 Tik op de tijd in de statusbalk Het statusdashboard wordt weergegeven 2 Tik een tweede maal op de tijd in het statusdashboard 3 Tik op Instellingen om het menu WiFi instellingen te openen 4 Als de WiFi is uitgeschakeld schuift u de WiFi...

Page 78: ...78 1 2 3 5 6 7 8 4 De AndroidTM Interface ...

Page 79: ...ps Startpagina Terug Alle Apps Tik op dit pictogram om alle applicaties en widgets weer te geven die op uw ARNOVA zijn geïnstalleerd Al uw gedownloade applicaties bevinden zich hier Widget AndroidTM apps Tik erop om een applicatie te starten Statusbalk Geeft meldingen en snelinstellingen weer ...

Page 80: ...het vliegen WiFi Om uw WiFi verbinding aan uit te zetten Scherm automatisch draaien Om de automatische oriëntatie van het scherm te activeren deactiveren als u uw ARNOVA draait Helderheid Om de helderheid van het scherm aan te passen Meldingen Om binnenkomende meldingen te activeren deactiveren Instellingen Om al uw instellingen te openen ...

Page 81: ...81 NL Recente apps Hiermee opent u een lijst van miniatuurafbeeldingen van apps waarmee u onlangs hebt gewerkt Om een app te openen tikt u erop Om een app te sluiten veegt u er van links of rechts over ...

Page 82: ...r vervolgens weer los Het verwijderen van een item op het startscherm Tik en houd uw vinger op het item en schuif dit vervolgens naar de bovenkant van het scherm en zet het op het pictogram Verwijderen Verwijderen van een item Tik in de schermen Alle apps op het item en houd uw vinger daar schuif vervolgens uw vinger in de richting van de bovenkant van het scherm en plaats het item op de prullenba...

Page 83: ...t scherm op een lege plek en maak vervolgens een selectie uit de lijst Het vergrendelen van het aanraakscherm Tik vanuit het snelinstellingen dashboard op instellingen Scroll naar beneden en tik op veiligheid Tik op Scherm vergrendelen Tik op het type slot dat u wilt gebruiken Nadat u hier een slot hebt ingesteld wordt er een vergrendelscherm weergegeven wanneer uw scherm wakker wordt dat om het p...

Page 84: ...f maak gebruik van de hardware reset Als u de levensduur van uw batterij wilt verlengen Verminder de helderheid van het scherm en schakel de draadloze verbindingen uit indien deze niet in gebruik zijn Als uw apparaat te traag werkt Sluit alle applicaties die op dat moment niet worden gebruikt Als uw WiFi ontvangst te laag is Zorg ervoor dat u zich niet ver van de WiFi hotspot bevindt Update de fir...

Page 85: ...ficante Como muitas vezes atualizamos e melhoramos os nossos produtos o seu software do dispositivo pode ter uma aparência ligeiramente diferente ou funcionalidades modificadas das apresentadas neste Guia de Início Rápido Conteúdo da embalagem Início Descrição do ARNOVA Assistente de instalação Ligação a uma rede WiFi A interface AndroidTM Familiarizar se com AndroidTM Resolução de problemas 86 87...

Page 86: ...86 Warranty ARNOVA AN8G4 21 11 2012 last modification CONFIDENTIAL Drawing Rev 1 scale 1 1 mm Conteúdo da embalagem Cabo USB Carregador Guia do usuário Garantia avisos legais e de segurança ARNOVA 97 G4 ...

Page 87: ...a 1 Conecte o cabo de alimentação fornecido ao conector de alimentação ARNOVA e para uma tomada de parede O dispositivo ARNOVA começará a carregar 2 Pressione o botão ON OFF para ligar o produto Pode utilizar o seu aparelho ARNOVA enquanto este está a carregar Carregue o dispositivo completamente antes de usá lo pela primeira vez Use apenas o carregador fornecido ...

Page 88: ...88 4 5 7 6 8 9 10 3 2 1 12 11 Descrição do ARNOVA ...

Page 89: ...oltar Webcam Coluna Saída para auriculares Porta micro USB Slot para cartão micro SD Saída de vídeo mini HDMI Conector de alimentação Botão Power Repor hardware Câmara 1 9 2 10 3 4 5 6 7 8 Com Mini HDMI opcional para cabo HDMI 11 12 ...

Page 90: ...etros do seu dispositivo na área da rede WiFi você será regularmente usando Quando iniciar o ARNOVA pela primeira vez o assistente de instalação irá ajudá lo a configurar o seu aparelho Idioma Data e hora Rede WiFi Minha localização Aplicações de terceiros ...

Page 91: ...e se de que se encontra numa zona WiFi Pode aceder rapidamente às definições WiFi a partir da barra do estado no canto inferior direito do ecrã 1 Toque na hora na barra do estado É apresentado o painel do estado 2 Toque novamente na hora no painel do estado Serão apresentadas as definições rápidas 3 Toque em Definições para abrir o menu de definições WiFi 4 Se a funcionalidade WiFi estiver desliga...

Page 92: ...92 1 2 3 5 6 7 8 4 A Interface AndroidTM ...

Page 93: ...es recentes Ecrã Principal Anterior Todas as Aplicações Toque neste ícone para visualizar todas as aplicações e widgets instalados no seu ARNOVA Estão aqui todas as aplicações descarregadas Widget Aplicações AndroidTM Toque para iniciar uma aplicação Barra do estado Apresenta notificações e definições rápidas ...

Page 94: ...almente durante voos WiFi Para ligar desligar a sua ligação WiFi Rodar ecrã automaticamente Para activar desactivar a orientação automática do ecrã enquanto roda o ARNOVA Brilho Para ajustar o brilho do ecrã Notificações Para activar desactivar as notificações recebidas Definições Para aceder a todas as suas definições ...

Page 95: ...icações recentes Abre uma lista de imagens em tamanho reduzido das aplicações que utilizou recentemente Para abrir uma aplicação toque na mesma Para encerra uma aplicação mova a para a esquerda ou para a direita ...

Page 96: ...a deslize o para a posição pretendida e solte o dedo Remover um item do ecrã inicial Toque continuamente no mesmo deslize o seu dedo para o topo do ecrã e largue o sobre o ícone Remover Desinstalar um item A partir do ecrã Todas as aplicações toque continuamente no mesmo deslize o seu dedo para o topo do ecrã e largue o sobre o caixote Desinstalar Criar pastas de aplicações Largue o ícone de uma a...

Page 97: ...a o dedo no ecrã sobre uma localização vazia em seguida seleccione a partir da lista Bloquear o ecrã táctil A partir do painel de definições rápidas na barra do estado toque nas Definições Desloque para baixo e toque em Segurança Toque em Bloquear ecrã Toque no tipo de bloqueio que pretende utilizar Depois de definir aqui um bloqueio será apresentado um ecrã de bloqueio sempre que activar o ecrã a...

Page 98: ...iar o hardware Para utilizar a opção Reiniciar o hardware prima o botão orifício de reinício Se pretender aumentar a autonomia da bateria Diminua o brilho do ecrã e desligue as ligações sem fios se não estiverem a ser utilizadas Se o funcionamento do aparelho for demasiado lento Encerre todas as aplicações que não estejam a ser utilizadas Se a recepção WiFi for demasiado lenta Certifique se de que...

Page 99: ...ожет оказаться не столь уж значительной Мы часто обновляем и улучшаем свою продукцию поэтому графический интерфейс или функциональность программного обеспечения Вашего устройства могут несколько отличаться от представленных в настоящем Кратком руководстве пользователя Содержимое упаковки Начало работы Описание устройства Мастер настройки Подключение к сети Wi Fi Интерфейс AndroidTM Знакомство с An...

Page 100: ...ranty ARNOVA AN8G4 21 11 2012 last modification CONFIDENTIAL Drawing Rev 1 scale 1 1 mm Содержимое упаковки Кабель USB Зарядное устройство Краткое руководство Гарантии и инструкции по безопасности ARNOVA 97 G4 ...

Page 101: ...чтобы включить устройство Вы можете пользоваться устройством ARNOVA во время зарядки Перед первым использование устройство должно полностью зарядиться Разрешается использовать только зарядное устройство из комплекта поставки СОВЕТ Зарегистрируйте свое изделие чтобы получать обслуживание в более полном объеме При работе с компьютером перейдите по ссылке www arnovatech com register ...

Page 102: ...102 4 5 7 6 8 9 10 3 2 1 12 11 Описание устройства ...

Page 103: ...зад Веб камера Громкоговоритель Разъем для наушников Порт Micro USB Слот для карты Micro SD Mini HDMI видеовыходу Разъем питания Кнопка ВКЛ ВЫКЛ Кнопка аппаратного сброса камера 1 9 2 10 3 4 5 6 7 8 11 12 С опциональным переходным кабелем Mini HDMI HDMI ...

Page 104: ...лнять настройку устройства в зоне Wi Fi сети которой Вы будете регулярно пользоваться При первом запуске устройства ARNOVA мастер установки поможет выполнить настройку Язык Дата и время Соединение Wi Fi Опции службы геолокации Сторонние приложения ...

Page 105: ...i Fi Быстрый доступ к настройкам Wi Fi осуществляется из строки состояния в нижнем правом углу экрана 1 Нажмите на значок времени на системной панели На экране появится информация о статусе подключения 2 Нажмите на значок времени еще раз на системной панели Отобразятся быстрые настройки 3 Нажмите значок WiFi для доступа к настройкам 4 Если связь Wi Fi выключена переместите переключатель WiFi в пол...

Page 106: ...106 1 2 3 5 6 7 8 4 Интерфейс AndroidTM ...

Page 107: ...й Кнопка Домой Кнопка Назад Кнопка Все приложения Прикоснитесь к этой пиктограмме чтобы отобразить все приложения и виджеты установленные в Вашем ARNOVA Здесь находятся все загруженные Вами приложения Виджет Ярлыки приложений AndroidTM Прикоснитесь к пиктограмме для запуска приложения Строка состояния Отображаются сообщения и быстрые настройки 1 2 3 4 5 6 7 8 ...

Page 108: ...ыключение соединения Wi Fi Auto rotate screen Активация деактивация автоматической ориентации экрана при повороте устройства ARNOVA Brightness Регулировка яркости экрана Notifications Активация деактивация входящих сообщений Settings Доступ ко всем настройкам ...

Page 109: ...109 RU 109 RU Последние приложения Открывается список эскизов приложений с которыми Вы недавно работали Чтобы открыть приложение нажмите на него Чтобы закрыть приложение сдвиньте его влево или вправо ...

Page 110: ...о в требуемое положение и отпустите палец Удаление элемента домашнего экрана Выберите необходимый элемент и удерживая палец проведите его к верхней части экрана и поместите его в корзину Remove удалить Удаление элемента Выберите необходимый элемент на экране Все приложения и удерживая палец проведите его к верхней части экрана и поместите его в корзину Uninstall удалить Создание папок приложений П...

Page 111: ...берите обои из списка Блокировка сенсорного экрана Нажмите на Settings настройки на панели быстрых настроек в строке состояния На экране Settings выполните прокрутку вниз и нажмите на значок Security защита Нажмите на значок Screen lock блокировка экрана Выберите тип блокировки который хотите использовать После того как будет установлена блокировка при каждом включении экрана будет отображаться эк...

Page 112: ...реи Уменьшите яркость экрана и выключите беспроводные соединения если они не используются Если устройство функционирует слишком медленно Закройте все приложения которые в данный момент не используются Если принимаемый сигнал Wi Fi слишком слаб Убедитесь что не находитесь слишком далеко от узла доступа Wi Fi Обновите встроенную микропрограмму устройства http www arnovatech com support Сбросьте и по...

Page 113: ... the 2 4 GHz band has been ongoing in recent years to allow current relaxed regulation Full implementation planned 2012 Italy None If used outside of own premises general authorization is required Luxembourg None General authorization required for network and service supply not for spectrum Norway Implemented This subsection does not apply for the geographical aera within a radius of 20 km from th...

Page 114: ... the relevant copyright and licensing terms You may obtain a copy of Apache License Version 2 0 at http www apache org licenses LICENSE 2 0 You may also obtain a copy of GNU General Public License Version 2 at the Free Software Foundation INC 51 Franklin Street Fifth Floor Boston MA 02110 1301 USA Until the date that is three years after our last shipment of this product you may obtain a copy of t...

Reviews: