


2
Navigation keys
The Navigation keys steer the cursor in Setup menus
or on-screen menus. They also replicate the navigation
functions of original remotes supplied with other home
entertainment devices in your system.
O
confirms a
setting.
Volume control
By default, the CR402 is set up so that the
volume control and mute buttons (
"
,
/
and
@
)) always control the volume of the
AVR, regardless of which Device Mode the
remote is currently set for. This is known as
volume ‘punch through’.
For example, if you are listening to a CD, you will
probably have the CR402 in
CD
Device Mode to control
the CD player. You can use the volume controls on
the remote directly to adjust the volume of the AVR
without first having to press
A
to put the remote into
AMP
Device Mode. The volume buttons ‘punch through’
the
CD
Device Mode on the remote to the
AMP
Device
Mode.
Volume ‘punch through’ can be disabled individually for
any Device Mode if desired.
Customising the CR402
The CR402 offers a Code Learning feature that allows
you to copy functions from an original remote control
onto the CR402 keypad. For details of this, and other
customisation features, see “customising the CR402” on
page 7.
Useful information
Backlight
A backlight comes on for eight seconds whenever a key
is pressed. This helps you use the handset in subdued
lighting conditions.
Power LED blinks
A blink indicate a valid key press.
Multiple blinks convey information (such as a device
code) or signal the beginning and successful completion
of a programming sequence.
The symbol ‘
*
’ is used in the manual to indicate a
power LED blink.
Timeouts and unassigned keys
Time out
– After 30 seconds the CR402 exits the
programming state and returns to normal operation.
Stuck key timeout
– After any key is pressed
continuously for 30 seconds, the CR402 stops sending
IR transmission to conserve battery life. The CR402
remains off until all keys are released.
Unassigned keys
– the CR402 ignores any unassigned
key presses for a particular Device Mode and does not
transmit IR.
Low voltage indicator
When the batteries are running down, the LED flashes
five times whenever you press a button:
*
*
*
*
*
If this happens, fit two new AAA alkaline batteries as
soon as possible.
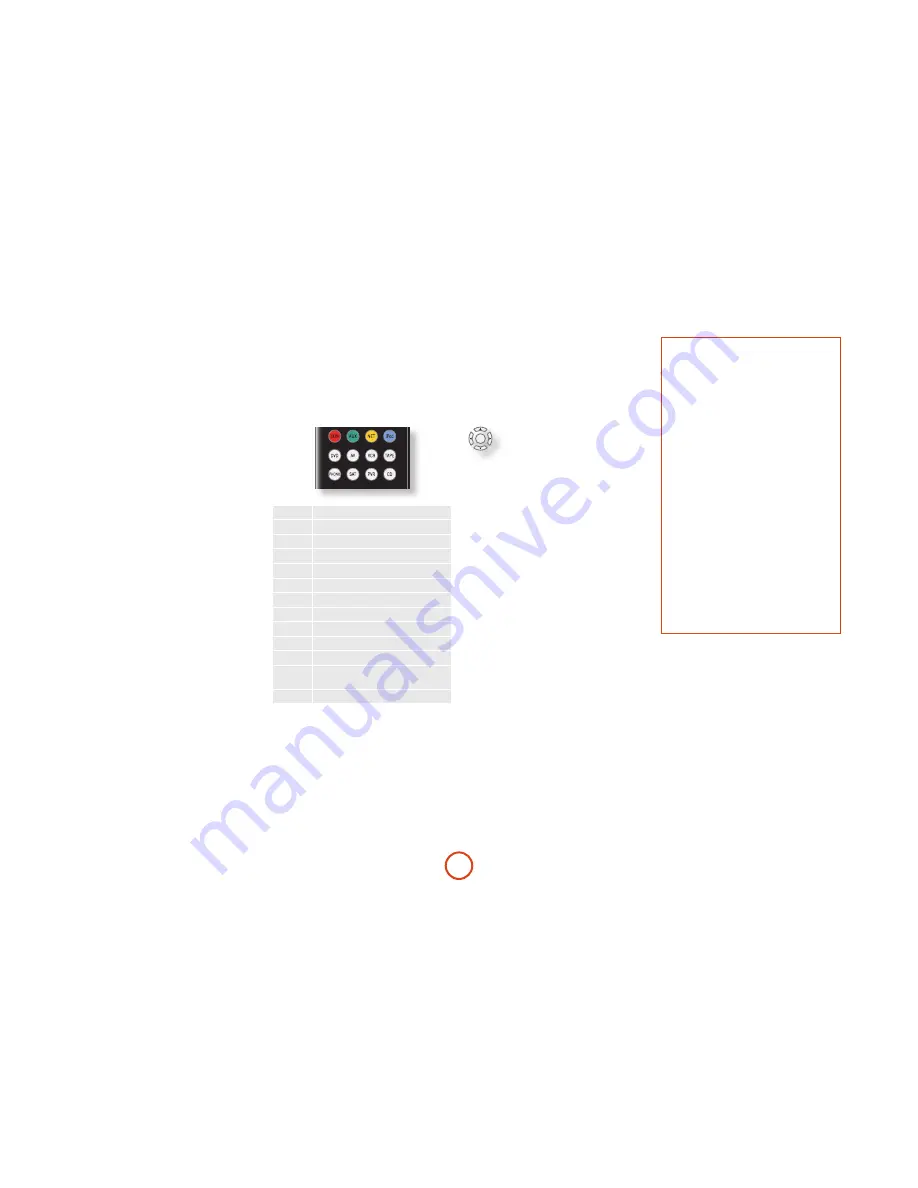
Device Mode / Source keys
As the CR402 can control your AVR as well as a range of
other equipment: many of the buttons have more than
one function depending on the ‘device mode’ selected
on the remote control.
The Device Mode keys (shown below) select the source
on the AVR. If one of these keys is pressed briefly,
a command is transmitted to change the source on
the unit. Also the functionality of the remote control
changes to operate the selected source device; it’s like
having a bundle of different remotes in your hand!
CR402
H
Multi-channel input
T
Internal FM or DAB tuner input
x
Auxiliary input
N
Ethernet input (e.g. Internet radio)
e
iPod, input
d
DVD or Blu-ray disc player
a
Audio-visual sound input (use with TV)
w
Video Cassette recorder input
E
Tape input
p
Phono input
z
Satellite input
v
Personal Video Recorder (or Digital
Video Recorder) input
c
Compact Disc player input
Each Device Mode changes the behaviour of many
of the CR402 keys to control the source device
appropriately. For example: in
CD
mode
Y
plays the
previous CD track, but in
AV
mode
Y
issues the TV
‘channel down’ command.
The CR402 remains in the last selected Device Mode
so it is not necessary to press a Device Mode key before
every command key if all you are doing is playing or
skipping tracks on a CD, for example.
Pressing the
p
or
E
keys will put the remote into
AMP
Device Mode.
OK
The CR402 complies with Part 15 of the
FCC rules
This equipment has been tested and found to
comply with the limits for a class B digital device,
pursuant to part 15 of the FCC Rules. These limits
are designed to provide a reasonable protection
against harmful interference in a residential
installation. This equipment generates, uses, and can
radiated radio frequency energy and if not installed
and used in accordance with the instructions,
may cause harmful interference to radio
communications. However, there is no guarantee
that interference will not occur in a particular
installation. If this equipment does cause harmful
interference to radio or television reception, which
can be determined by turning the equipment off
and on, the user is encouraged to try to correct
the interference by one or more of the following
measures:
Reorient or relocate the receiving antenna.
Increase the separation between the equipment and
receiver.
Connect the equipment into an outlet or a circuit
different from that to which the receiver is
connected.
Consult the dealer or an experienced radio/TV
technician for help.


