2.3 Rear Panel Identification and Connectors
7
and
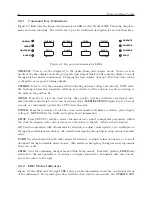
POWER A
and/or
POWER B
LED should be lit. While the clock is collecting position and
timing information the
LEARN
LED may be lit and the
NORMAL
LED may be off. The following
definitions apply to these indicators:
•
LEARN
: Illuminates orange when clock is finding its position and stabilizing: approximately
24 hrs. GNSS anti-spoofing is not active.
•
NORMAL
: Illuminates green when the clock is operating in normal mode, and follows after
the learn mode inactive; the learn LED will be off, and GNSS anti-spoofing is active.
•
UNLOCKED
: Illuminates red when the clock has not yet synchronized, or has lost synchro-
nization, with the GNSS.
•
ALARM
: Illuminates red when an alarm has been activated.
•
OPERATE
: Illuminates green when the clock is operating.
•
POWER A
: Illuminates green when power supply A is providing power to the clock.
•
POWER B
: Illuminates green when power supply B is providing power to the clock.
•
FAULT
: Illuminates red when one of the faults
has been activated.
2.2.3
LCD Display
The Model 1201B/C has an LED backlit liquid crystal display (LCD), which provides a 20-character
by 2-line readout. The readout displays instrument status, time, date and event data. If configured
to do so, the readout may also display the current configuration of operating parameters.
2.2.4
Large LED Display: Model 1201C
The Model 1201C adds a six-character, 20 millimeter (0.8 inch) LED time and date display. The
LED display can indicate the time, in hours minutes and seconds, in local or UTC time zones.
Pressing the
TIME/DATE
key will also display the date format as MM/DD/YY or DD.MM.YY.
Configure date format from front panel or through the serial port.
2.2.5
Enabling and Disabling the Keypad and Display
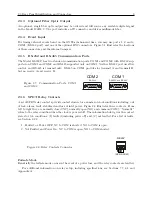
The Model 1201B/C also has two RS-232 ports (COM1 and COM2) that provide levels of control
over the operation of the keypad and display. To enable or disable the front panel keys you will
need to use the Model 1201 utility software. See Section 7.3 for details on setting passwords and
levels of security in the Model 1201B/C. With no security set up, you can enable configuration
from the front panel or with two-letter commands from either serial port (see Section 11.2.7).
2.3
Rear Panel Identification and Connectors
This section contains information to assist you in identifying where to connect inlet power, the
GNSS antenna cable and all of the input and output connections on the Model 1201B/C. Figure 2.3
illustrates the rear panel of the Model 1201B/C.
1
see Fault Indications on page 35.
Summary of Contents for 1201B
Page 4: ...iv ...
Page 153: ...B 7 Four Fiber Optic Outputs 135 Figure B 4 Jumper Locations ...


