


44
PSCSV Basics – Starting, Connecting and Logging In
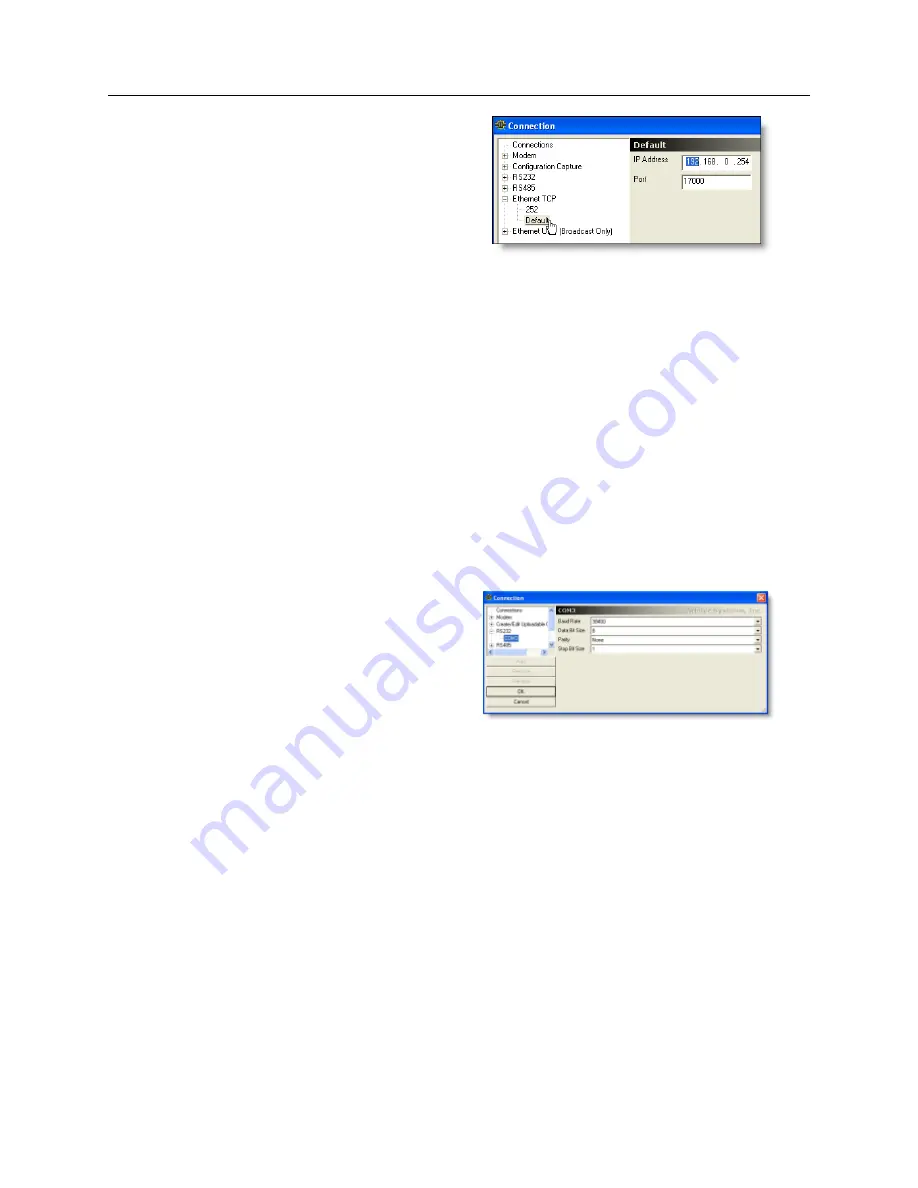
Figure 6.10: Connection List
−
shows Ethernet selected
1. Prior to connecting, the Main Toolbar and the Connection Toolbar should appear with several
icon buttons active: Open a File, PSCSV Homepage and Open a Connection.
2. First-time users can open communications with the 1133A by selecting Connection
>
Open
or by clicking the Open a Connection button.
3. Select a connection from the list as shown in the left pane of the Connection Window. Expand
the connection type from the list shown in the left pane by selecting the “+” sign. This should
expand the list to a specific COM port or IP Address.
RS–232 and RS–485
Select the desired COM port that appears in the left pane (either RS-232 or 485), and the
communication parameters should appear in the right pane of the Communication window. Note
that these communication parameters refer to the computer connected to the 1133A.
Figure 6.11: Connection List
−
shows RS-232 selected
Modem
Select Modem on COM1 or COM2 and the selection window should provide a space to type in the
phone number and initialization string. Parameters refer to the computer / modem connected to
the 1133A.
Ethernet TCP
1. Select the “+” next to Ethernet TCP. If connecting for the first time, choose “Default,” and
the parameters should be similar to those shown in Figure 6.10. Those listed are the default
values installed at the factory. The IP Address is for the 1133A connected to the network.
2. Select OK and the port should open.
3. Later, you can add, remove or rename any of these connections. See Section 7.3 on page 50
for more information.


