36
The Setup Menus
7.4.1
Set Daylight Saving Time (DST)
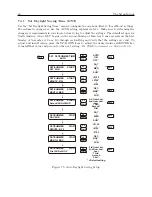
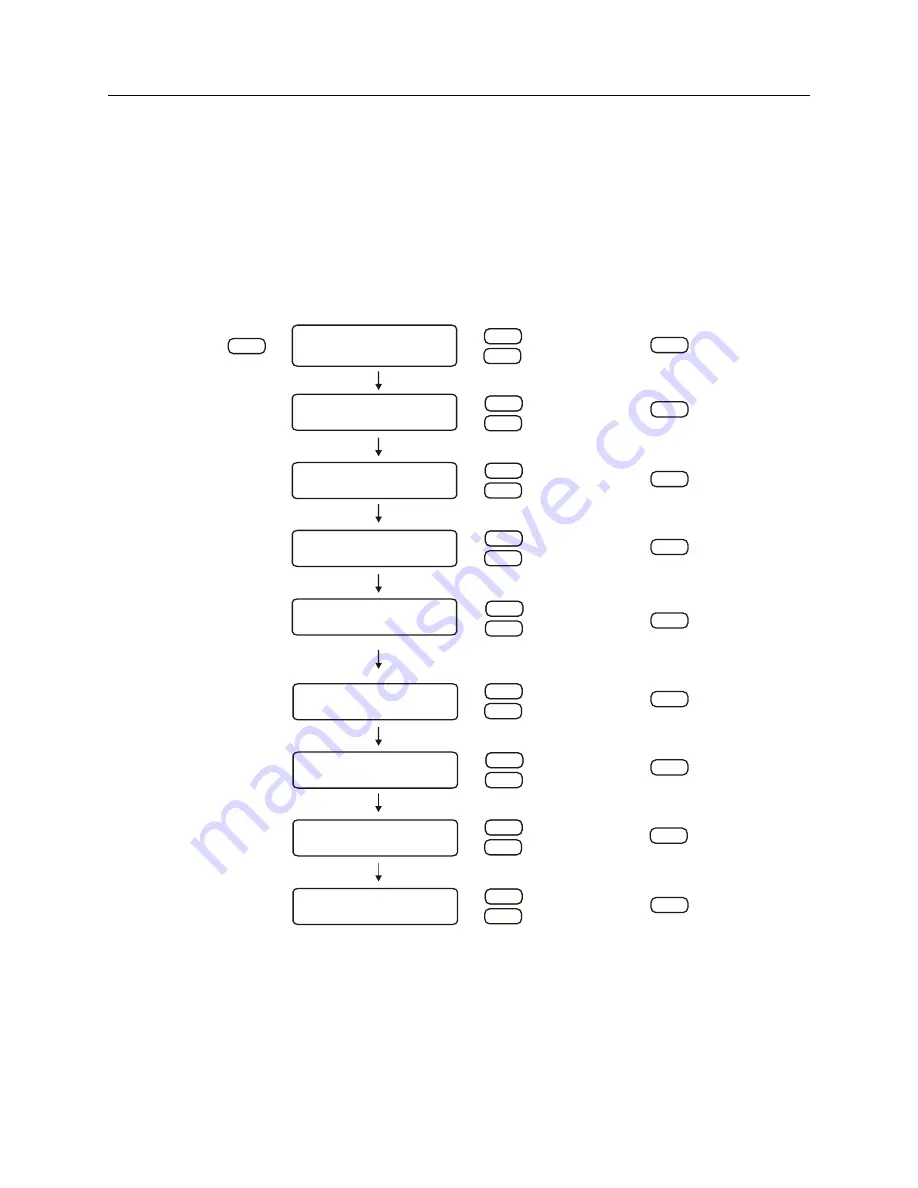
Use the “Set Daylight Saving Time” menu to configure the one-hour offset to “Local Hour” settings.
For automatic changeover, use the AUTO setting explained above. Make sure to determine the
changeover requirements in your locale before trying to adjust the settings. The default setup is for
North America, where DST begins on the second Sunday of March at 2 am and ends on the first
Sunday of November at 2 am. Go through each setting and verify that the settings are valid. To
adjust and install values, press the UP/DOWN keys to adjust the desired value and ENTER key
to install that value and proceed to the next setting.
For RS-232 command, see Section 10.2.6
SET DST/SUMMER TIME?
AUTO
ENTER
SETUP
DST/SUMMER START?
DAY: SUN
DST/SUMMER START?
MINUTE: 0120
SAT
|
WED
|
SUN*
+0720
|
+0120*
|
-0720
DOWN
UP
AUTO
ON
OFF*
DST/SUMMER START?
MONTH: MAR
DEC
|
MAR*
|
JAN
DOWN
UP
DST/SUMMER START?
Second SUN of MAR
3rd from Last
2nd from Last
Last
Third
Second*
First
DST/SUMMER STOP?
DAY: SUN
DST/SUMMER STOP?
MINUTE: 0120
SAT
|
WED
|
SUN*
+0720
|
+0120*
|
-0720
DST/SUMMER STOP?
MONTH: NOV
DEC
NOV*
|
JAN
DST/SUMMER STOP?
First SUN of NOV
3rd from Last
2nd from Last
Last
Third
Second
First*
* = Default setting
DOWN
UP
DOWN
UP
DOWN
UP
DOWN
UP
DOWN
UP
ENTER
ENTER
ENTER
ENTER
ENTER
ENTER
ENTER
ENTER
DOWN
UP
DOWN
UP
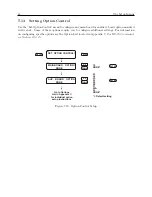
Figure 7.5: Auto Daylight Saving Setup
Summary of Contents for 1092A
Page 4: ...iv ...
Page 18: ...xviii LIST OF TABLES ...
Page 129: ...C 10 Option 20A Four Fiber Optic Outputs 111 Figure C 7 Option 20A Jumper Locations ...
Page 131: ...C 11 Option 27 8 Channel High Drive 113 Figure C 8 Option 27 Jumper Locations ...
Page 148: ...130 Options List Figure C 10 Option 29 Connector Signal Locations ...

