background image


19 

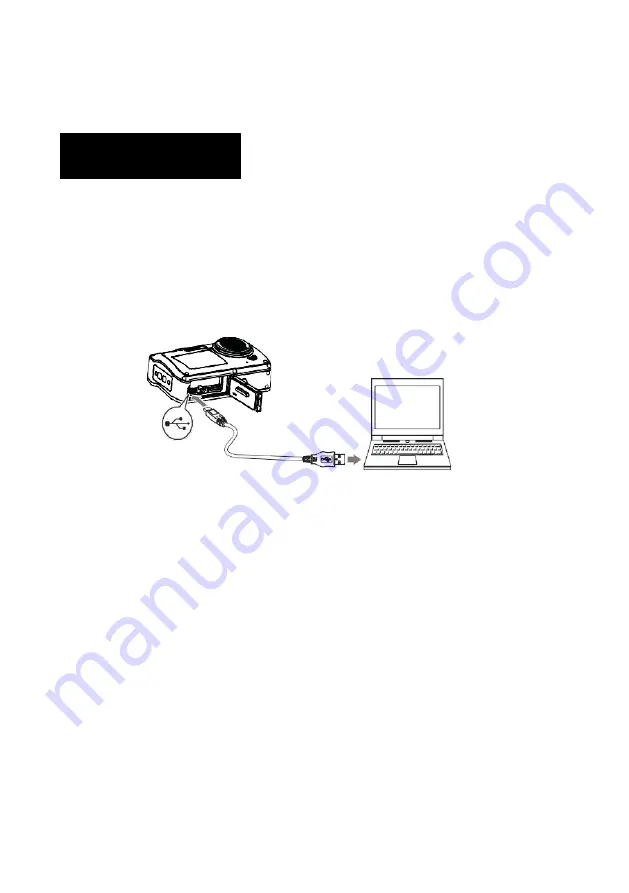
Transferring files from camera to computer 


Disconnect all other USB-powered devices from the computer.   
Connecting the camera and other USB-powered devices to the same 
computer simultaneously may cause a camera malfunction or excessive power 
supply from the computer, which could damage the camera or memory 
card. 


WINDOWS: 

1.


Use the USB cable that came with your camera to connect your camera 
to your computer. 

2.


Turn on the camera. 

3.


MSDC appears on the TFT screen. 

4.


A window appears with a list of options. Select “Open folder to view 
files” and click OK. 

5.


Open the DCIM folder and the folder inside to view the media files. 

6.


Select the media and copy the files from this folder into your computer.   
Alternatively, select the files and choose Copy from the Edit menu.   
Then select a folder and choose Paste from the Edit menu.   

7.


Do not disconnect the cable during transfer.   
Doing so will cancel the current transfer of any files to your computer. 

NOTICE 

Summary of Contents for W3048 EDGE

Page 1: ...su Internet ES Puede encontrar un manual en su idioma en Internet PT Um manual em seu idioma pode ser encontrado na Internet PL Instrukcj w swoim j zyku mo esz znale na stronie SWE En handbok p ditt s...

Page 2: ...irst steps Preparing your camera for first use 10 1 Battery and memory card installation 10 2 Charging the battery 11 3 Format your memory card 12 Camera functions 13 Photo mode 14 Video mode 15 Playb...

Page 3: ...is publication please notify us All pertinent state regional and local safety regulations must be observed when installing and using this product For reasons of safety and to help ensure compliance wi...

Page 4: ...ach person who uses the product has read these warnings and instructions and follows them Keep all safety information and instructions for future reference and pass them on to subsequent users of the...

Page 5: ...for use anywhere selfies photos or videos are taken It s 3m waterproof rating means it can also be completely submerged and used under water WATERPROOF AND DUSTPROOF PERFORMANCE The waterproof and du...

Page 6: ...amera in hot springs hot tubs or jacuzzis where it can be exposed to extreme water temperature Safety instructions This product is only suitable for the purpose described the manufacturer is not liabl...

Page 7: ...uct Do not short circuit the battery terminals Avoid battery terminal contact with jewellery hairpins or other metal objects The battery should only be recharged in the camera Insert the battery and m...

Page 8: ...e is maintained from objects that generate strong magnetic fields or radio waves such as electrical appliances In the unlikely event of overheating smokes or unpleasant odors coming from the unit disc...

Page 9: ...ore entering the water To prevent damage please ensure that you do not open the camera while in the water After use in swimming pool water or sea or lake salt water please rinse it with clean tap wate...

Page 10: ...button 4 Delete Down button 5 Playback Mode Return button 6 Menu OK button 7 Main Screen 8 Indicator LED 9 Flash light 10 Camera lens 11 Front screen for Selfies 12 Microphone 13 Speaker 14 Power butt...

Page 11: ...e camera 1 Battery and memory card installation Move the Lock Unlock Switch on the battery cover to the unlock position and open the battery cover by sliding it in the direction of the arrow see Fig 1...

Page 12: ...the battery compartment door and connect the camera to a USB AC adaptor using the Micro USB cable provided Connect the AC Adaptor to a power outlet The indicator LED confirms the battery is charging...

Page 13: ...n be found in the camera s settings menu Menu Format Memory Card The maximum memory card capacity supported is 128 GB Use of memory cards exceeding the maximum recommended capacity may result in file...

Page 14: ...Down buttons to select your preferred language and confirm your setting By pressing the OK button DATE AND TIME SETTING Press the Left W and Right T buttons to select the Time and Date settings screen...

Page 15: ...eady and use the display to frame your photo Use the W button to capture a wider image or the T button to zoom in and capture a larger subject See Fig 2 Press the shutter button to capture your image...

Page 16: ...ress the Mode button to go back to the Video mode 4GB MAX MOVIE SIZE Individual movie les cannot exceed 4 GB in size even when there is su cient free space on the memory card for longer recordings The...

Page 17: ...the Up and Down buttons to scroll through your photos and videos o Up Previous image o Down Next image Press the Shutter button to Play and Pause videos Alternatively you can view your images and vid...

Page 18: ...file delete all files or cancel Press OK to confirm your selection Choose YES NO to complete or abort the process It is also possible to delete the last photo or video recorded while you are in Photo...

Page 19: ...selfie shots For example you can take photos and videos of yourself underwater and always keep a perfect view of the perfect detail Just switch between the displays and see yourself on the front scre...

Page 20: ...connect your camera to your computer 2 Turn on the camera 3 MSDC appears on the TFT screen 4 A window appears with a list of options Select Open folder to view files and click OK 5 Open the DCIM fold...

Page 21: ...ide to view the media files 6 Select the files and drag them to your computer Alternatively select the files and choose Copy from the Finder s Edit menu Then select a folder and choose Paste from the...

Page 22: ...nd battery may not work properly at low temperatures The inside of the camera has become hot Leave the camera o until the inside of the camera has cooled and then try turning it on again The screen is...

Page 23: ...les may be seen coming from the water drain holes of the camera such as openings in the microphone or speakers This is not a malfunction Do not use soap or detergents as they could negatively affect t...

Page 24: ...D 1920x1080 Movie resolution 4K 3840x2160 10fps 2 7K 2688x1520 25fps FHD 1920x1080 HD 1280x720 Dual Display 2 0 5 0cm 4 3 IPS front screen 3 0 7 6cm 16 9 IPS main screen External Memory Compatible wit...

Page 25: ...For disposal separate packaging into different types Cardboard and board must be disposed of as paper and foil must be recycled Disposal of Waste Electrical and Electronic Equipment and or Battery by...

Page 26: ...ill help to conserve natural resources and ensure that it is recycled in a manner that protects human health and environment Declaration of conformity For the product W3048 EDGE we hereby confirm that...

Reviews: