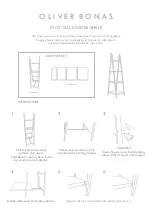
STEP 1
•
Lay one of the side panels (H) down on a flat surface.
•
Each step (C) has a groove where the riser will slide in
which is located on the bottom of each step.
•
Line up a step (C) by positioning the connected
dowels on the step with two of the round holes on the
side panel (H). NOTE: Make sure that the treads on the
step are facing towards the TOP of the side panel (the
skinnier part of panel) and that the riser groove on the
step is towards the back of the step.
•
Push the step until it clicks in place. Repeat for each of
the three remaining steps (C). If necessary, you may
use the rubber mallet or hammer with wood on top to
tap into place.
STEP 2
•
Insert a riser (D) between each
of the steps. Locate the hole
in the center of the riser. This
hole should face towards the
back of the side panel.
•
The riser should slide right into
the grooves on the steps and
the square notches should fit
right into the recessed
openings on the panel.
•
Elect the riser position you
want the light to be installed
and slide the step bright riser
into that position. (Note: you
will have an extra riser when
assembly is complete)
•
Repeat for each of the three
remaining risers.
STEP 3
•
Once all risers are in place, line up second
side panel with the connected dowels on
installed steps.
•
Push down on side panel to lock in place,
if necessary use rubber mallet or
(hammer with piece of wood) to fully seat
side panel.
TOP OF PANEL
5


