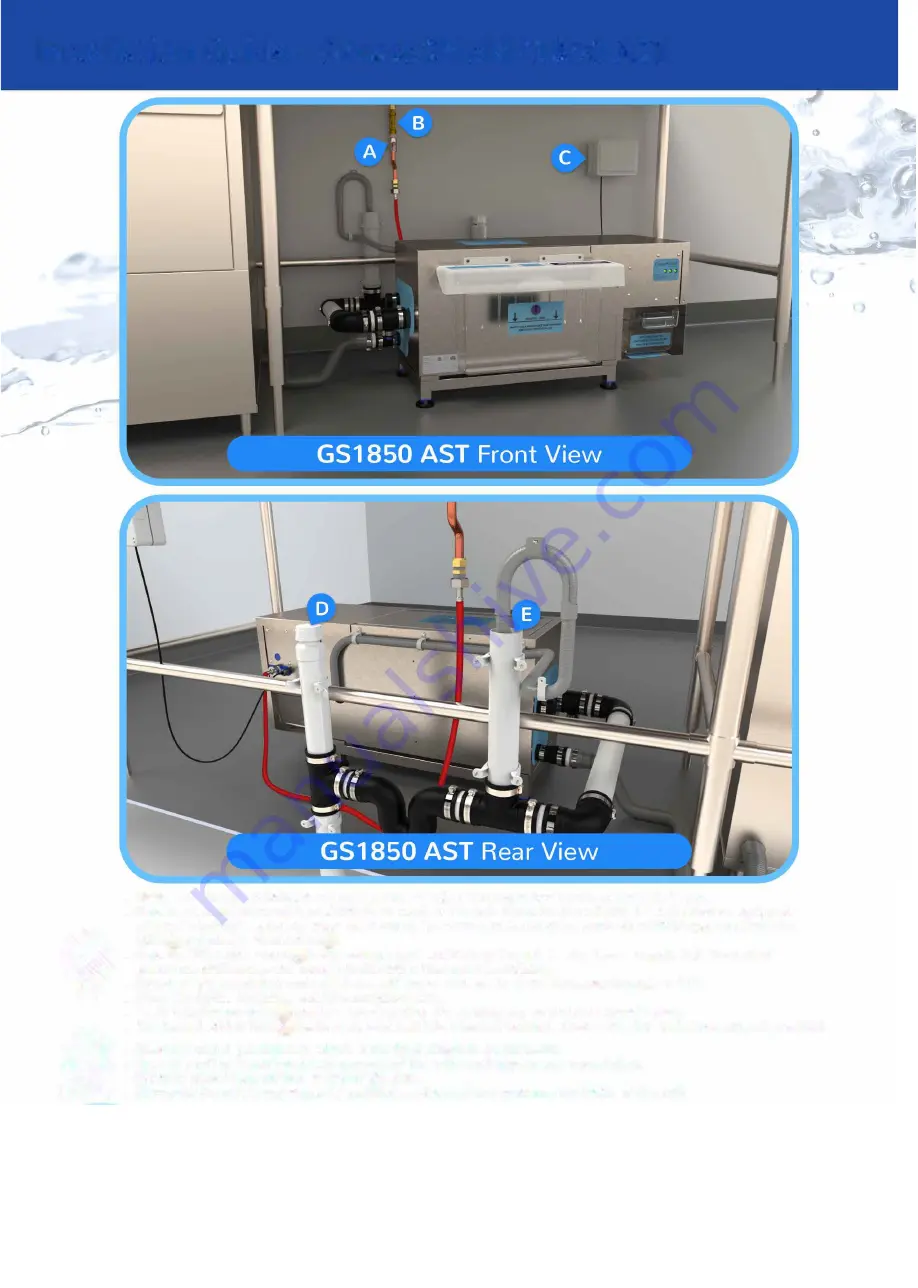
Installation Guide - GreaseShield
®
1850 AST
0
DO
0
DON'T
•
Make sure the u
n
it is
i
ns
t
alled on level ground or adjust the stand feet to ensure the un
i
t
i
s
level.
•
Have a hot water
c
on
n
ect
i
o
n
ava
il
able to con
n
ect to the
un
it
,
if
one is not ava
il
able the unit must be equ
i
pped
wi
th
a Genie H2O to give hot water on dema
n
d. Water
c
onnec
ti
o
n must be made via a WR
A
S approved
i
s
o
lati
o
n
va
l
ve
0
a
n
d
doub
l
e c
h
e
c
k valve
€)
.
•
Have an IP56 rated
s
o
cket
(j
be
l
o
w
counter leve
l
ava
i
l
able t
o
the unit to plug into.
I
f a genie H2O is required
e
n
sure an add
i
tio
n
a
l p
owe
r
supply (preferably a fuse spur) is ava
i
lable
.
•
En
sure
a
l
l
pipe work into and
o
ut
of
the unit has at least a
1
in 40 fall (downwards angle of
1.
5
°
).
•
C
l
ean the Solids C
o
n
taine
r
and
F
OG
co
n
tainer da
i
ly
.
•
An Air Adm
i
ttan
c
e
Valve
6)
must be
i
nsta
ll
ed after the running trap so a s
i
p
h
o
n does
n
'
t occur.
•
The Decant Ou
tl
et
H
ose
Q
needs
to be plumbed
i
nto a ve
n
ted drainage stac
k
, using the drain hose support prov
i
ded
.
•
P
l
ace the u
ni
t in passageways where it can be a hazard or be damaged.
•
Open the u
n
i
t or
i
nsert hands into any part of the un
i
t
;
mov
i
ng parts can cause i
n
jury
.
•
Stand
or
p
l
ace heavy objects on top of the unit.
•
Dismantle the unit
i
n any w
a
y, on
l
y qualified s
e
r
vice staff are to access the
i
ns
i
de of the u
n
i
t.
vs 04/02
/
2020
Award Winning Technology
Web: www.a
qu
am
un
d
u
s.com
Ph
o
n
e
nu
mbe
r
01386832205 Email:
se
rv
ices@a
qu
am
un
d
u
s.co.
uk


