15
Move
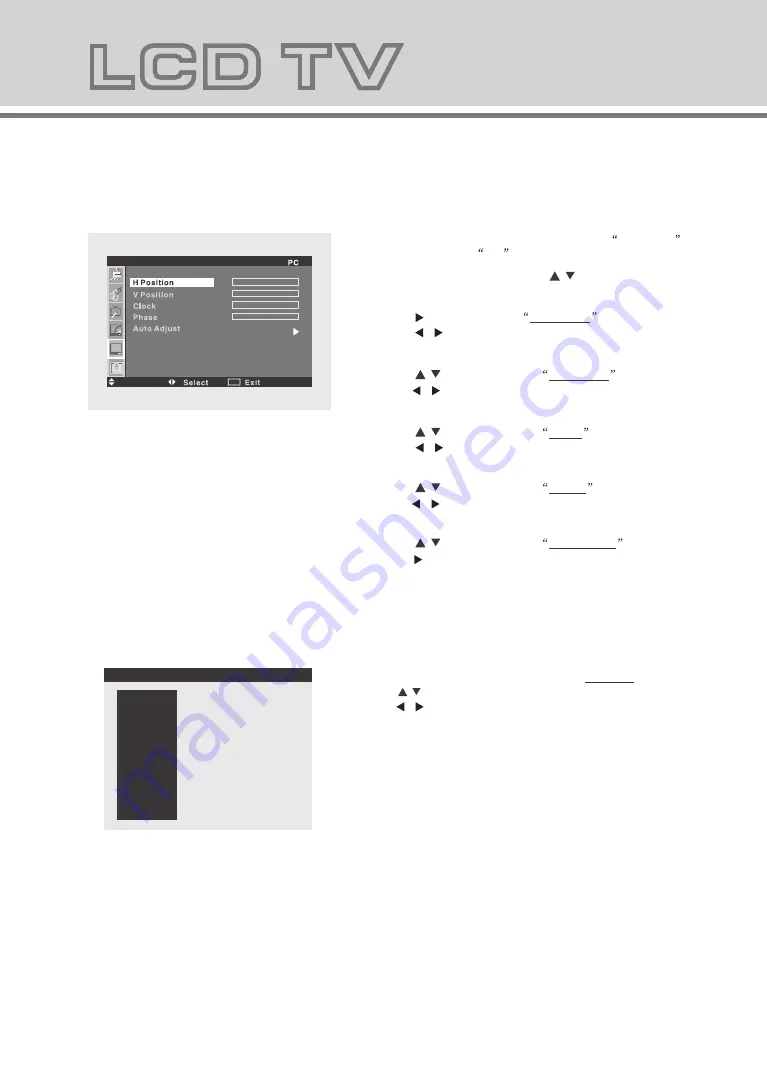
1.Press the
MENU
button then the
/
to enter PC
menu screen.
2.Press the button to select
H Position
.
Press the / button to set the proper screen
position in horizontal.
3.Press the
/
button to select V Position
.
Press the / button to the proper screen
position in vertical.
4.Press the
/
button to select Clock
.
Press the / button to adjust the clock of
the screen.
5.Press the
/
button to select Phase
.
Press the / button to adjust the phase of
the screen.
6.Press the
/
button to select Auto Adjust .
Press the button , the unit will adjust above
options automatically.
Note: This menu is available only when the
SOURCE
menu is set to
PC
.
7.Press the
MENU
button to return to previous menu.
SOURCE
Press the
SOURCE
button to enter the signal SOURCE menu.
Press the
/
button to select signal source.
Press the
/ button to confirm.
Press the
MENU
button to exit signal source menu.
PC
TV
AV1
AV2
AV3
S-VIDEO
YPBPR1
YPBPR2
PC
HDMI1
HDMI2
HDMI3
TV
AV1
AV2
AV3
S-VIDEO
YPBPR1
YPBPR2
PC
HDMI1
HDMI2
HDMI3
MENU
14
Advance
9.Press the
MENU
button to return to previous menu.
1.Press the
MENU
then the
/
button to enter the
Advance menu screen.
2.Press the button to select Scale
.
Press the / button to set the proper display scale
(16:9, 4:3).
3.Press the
/
button to select 3D NR
.
Press the / button to set the 3DNoise reduction
setting of pictures (High, Mid, Low, Off)
6.Press the
/
button to select OSD Transparence .
Press the / button to adjust the OSD menu
screen's transparence.
7.Press the
/
button to select OSD Duration
.
Press the / button to adjust the OSD menu
duration time on the screen .
5.Press the
/
button to select Back Light
.
Press the / button to adjust the LCD background
light.
4.Press the
/
button to select Color Temp.
.
Press the / button to set the desired color
temperature (Normal, Cool, Warm, User).
8.Press the
/
button to select PIP/POP .
Pre ss the bu tton to en ter PIP/ POP sett ing scre en.
(Fig .5-2)
8.1 Pres s the / but ton PIP/POP Mod e is high
-lig hted,and you can set to th e desired picture mode
(O ff, PIP, POP 16:9 , POP 4:3 )
8.2 Press the
/
button to select Sub Source .
Pr ess the / bu tton to se lect the sub sour ce.
8.3 Press the
/
button to select PIP Size .
Pr ess the / bu tton to se lect the corre ct size.
8.4 Press the
/
button to select PIP Position .
Pr ess the / bu tton to se lect the desir ed
su b-picture position .
8.5 Press the
/
button to select Sound Source .
Press the / bu tton to se lect the soun d source.
8.6 Press the
/
button to select Swap .
Press the / bu tton to se lect the swap .
Fig.5-1)
Fig.
5-1)
Fig.5-2)
OSD Duration
OSD Duration
OSD Transparence
OSD Transparence
Move
wap
MENU
MENU
Summary of Contents for AD32LCDG80
Page 1: ...AD32LCDG80...
Page 18: ......


