3.
Expand your
Chassis
tree item. MAX lists all devices installed in the chassis. Your
default device names may vary.
Note
If you do not see your hardware listed, press <F5> to refresh the list of
installed devices. If the device is still not listed, power off the system, ensure
the device is correctly installed, and restart.
Installing the NI FlexRIO Adapter Module
Note
Skip this step if you are not using an adapter module.
1.
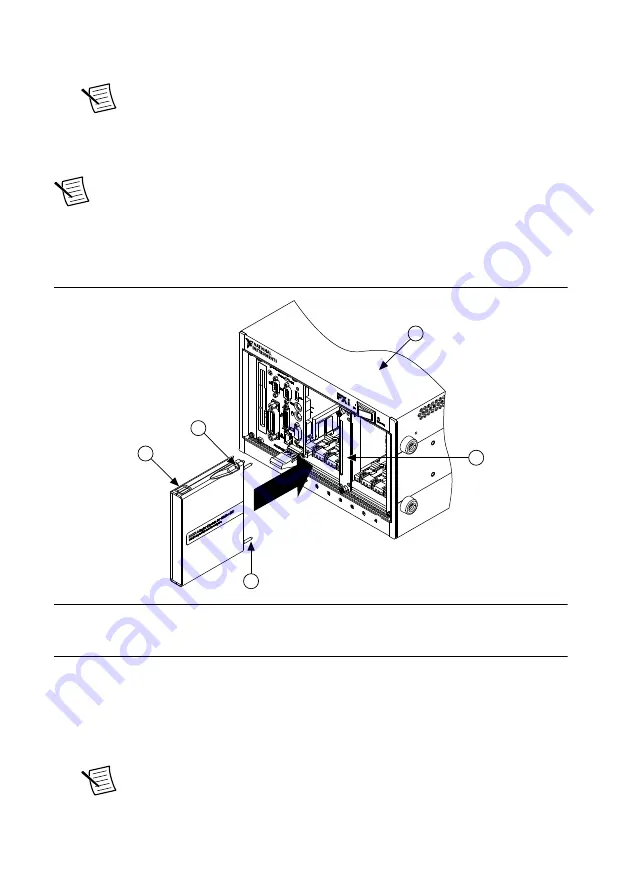
Gently insert the guide pins and the high-density card edge of the NI FlexRIO adapter
module into the corresponding connectors of the NI FlexRIO FPGA module, as shown in
the figure below.
Figure 5.
Installing the NI FlexRIO Adapter Module
PXI-1000B
1
4
3
2
5
1. NI FlexRIO Adapter Module
2. Captive Screw
3. Guide Pin
4. PXI/PXI Express Chassis
5. NI FlexRIO FPGA Module
The connection may be tight, but do not force the adapter module into place.
2.
Tighten the captive screws on the NI FlexRIO adapter module to secure it to the
NI FlexRIO FPGA module. NI recommends using the laser-tipped screwdriver (part
number 748677-01) included in the NI PXIe-7971R packaging.
3.
Launch LabVIEW to begin configuring your NI FlexRIO system.
Note
MAX only recognizes FPGA modules that are in the chassis. Your
adapter module will not appear in MAX.
NI PXIe-7971R FPGA Module Getting Started Guide
|
© National Instruments
|
9


